
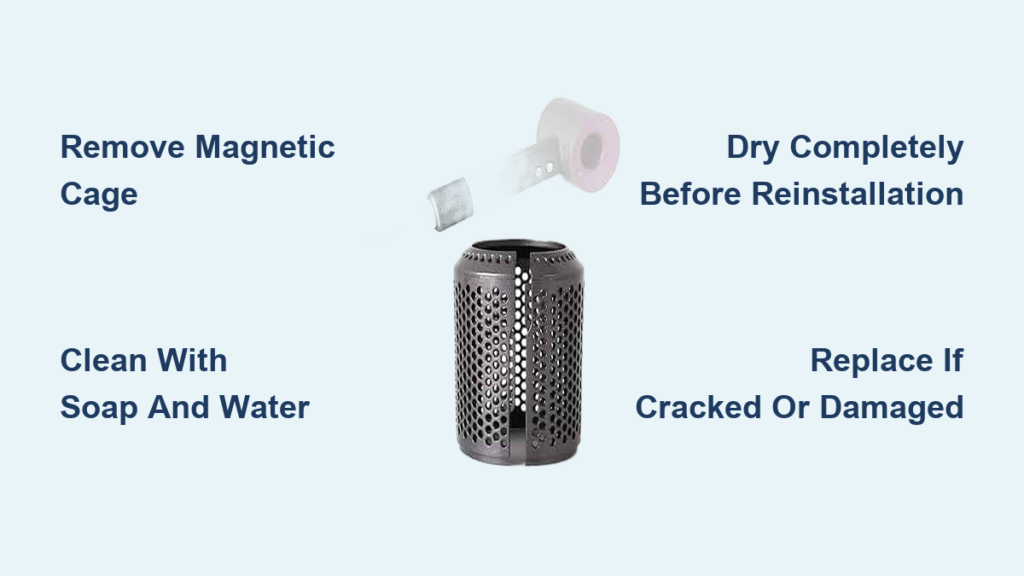
If your Dyson Supersonic hair dryer isn’t performing like it used to, with slower drying times or unusual noise, the filter might be the culprit. The Dyson hair dryer uses a reusable in-line filter cage that protects the motor from dust and debris. Knowing how to change and clean the Dyson hair dryer filter is essential for maintaining peak performance and extending your device’s lifespan.
This guide walks you through safely removing, cleaning, and reinstalling the filter, plus when replacement is necessary. You’ll also learn the tricky process of installing a new filter cage and how to contact Dyson support for free replacements.
Remove the Filter Cage From Your Dyson Hair Dryer
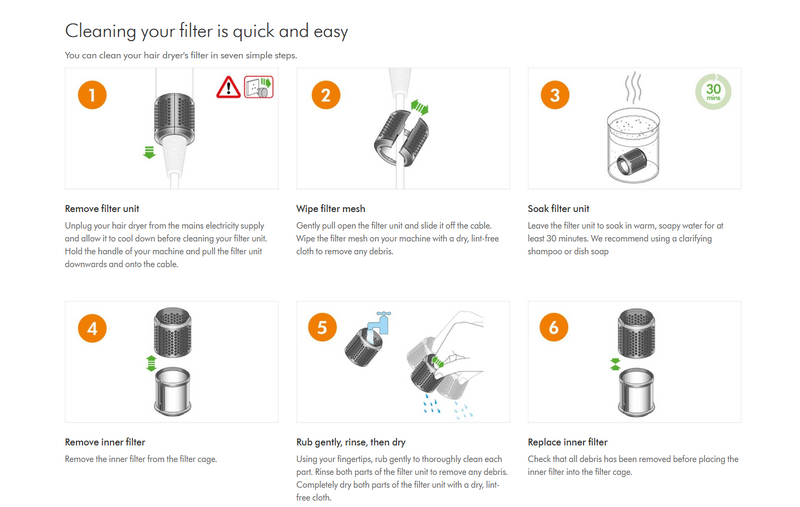
Before cleaning or replacing the filter, you must safely remove the magnetic filter cage from the dryer.
Unplug and Prepare the Dryer
Always prioritize safety when maintaining electrical appliances. Unplug the Dyson Supersonic from the wall outlet before beginning any maintenance. Hold the dryer handle firmly in one hand to stabilize the device during the removal process.
Slide and Open the Magnetic Cage
Grasp the filter cage near the base of the handle and pull it downward along the power cord. Continue sliding it down until it’s fully extended away from the intake area. Once clear, separate the two magnetic halves of the cage to access the mesh filter inside.
Take the Cage Off the Cord
Carefully slide the entire cage off the power cord. Note that the cage cannot pass over the power plug unless you’re replacing it with a new unit. This detail becomes important during filter replacement, as the solid replacement must be threaded from the plug end.
Warning: Never force or pry the cage if it resists. Check for debris or misalignment before proceeding.
Clean the Dyson Filter Properly for Optimal Performance
Regular cleaning restores airflow and prevents overheating. Follow these steps to clean your filter effectively.
Wipe and Soak the Cage
Wipe the exterior of the cage with a dry microfiber cloth to remove surface dust. Submerge the cage in a mixture of warm water and mild dish soap. Let it soak for at least 30 minutes to loosen oils, grime, and hair particles.
Pro tip: Use the spare filter cage included in your original box so you can keep using the dryer while one filter cleans.
Scrub With the Dyson Brush
After soaking, use the Dyson-supplied cleaning brush to scrub both sides of the stainless steel mesh. Focus on areas with visible buildup. Avoid using metal brushes or abrasive pads, as they can damage the delicate mesh.
Rinse and Inspect for Clarity
Rinse the cage under running water until no suds or debris remain. Shake gently to remove excess water. Hold the cage up to a light source. If any part looks cloudy or blocked, repeat the soak and scrub process until the mesh appears clear.
Air Dry Completely
Place the cage on a clean towel and let it dry naturally for several hours. Never use a hair dryer, heater, or cloth to speed drying. Moisture trapped in the filter can harm internal components. Never reinstall a damp filter.
Reinstall the Filter Correctly
A poorly seated filter can reduce performance or create safety risks. Follow these steps for proper installation.
Slide the Cage Back On
Once completely dry, slide the clean cage back onto the power cord. Align the two magnetic halves around the cord. Push it upward until it reaches the intake at the base of the handle.
Secure the Magnetic Clasp
Close the magnetic halves firmly. You should hear a soft snap indicating a secure fit. Check that both sides are flush and fully connected before using the dryer.
Critical: The magnetic closure must be completely engaged. A loose filter can dislodge during use and allow debris into the motor.
Replace a Damaged Filter Cage
If the filter cage is cracked, warped, or broken, cleaning won’t fix it. Replacement is required.
When to Replace the Filter
Replace the cage if you notice any of the following:
- Cracks or broken hinges
- Magnetic clasp no longer holds
- Structure is warped or loose
- Visible damage that affects the seal
Dyson does not recommend routine replacement. Only replace when damage affects function or safety.
Challenges With New Filter Installation
Replacement cages come as solid, closed units that don’t open like the original. This means you must slide the entire cage over the power plug before threading it up the cord. Users often struggle because the plug is thicker than the cord.
Important: Do not cut or modify the cord. This voids the warranty and creates electrical hazards.
Install a Replacement Cage
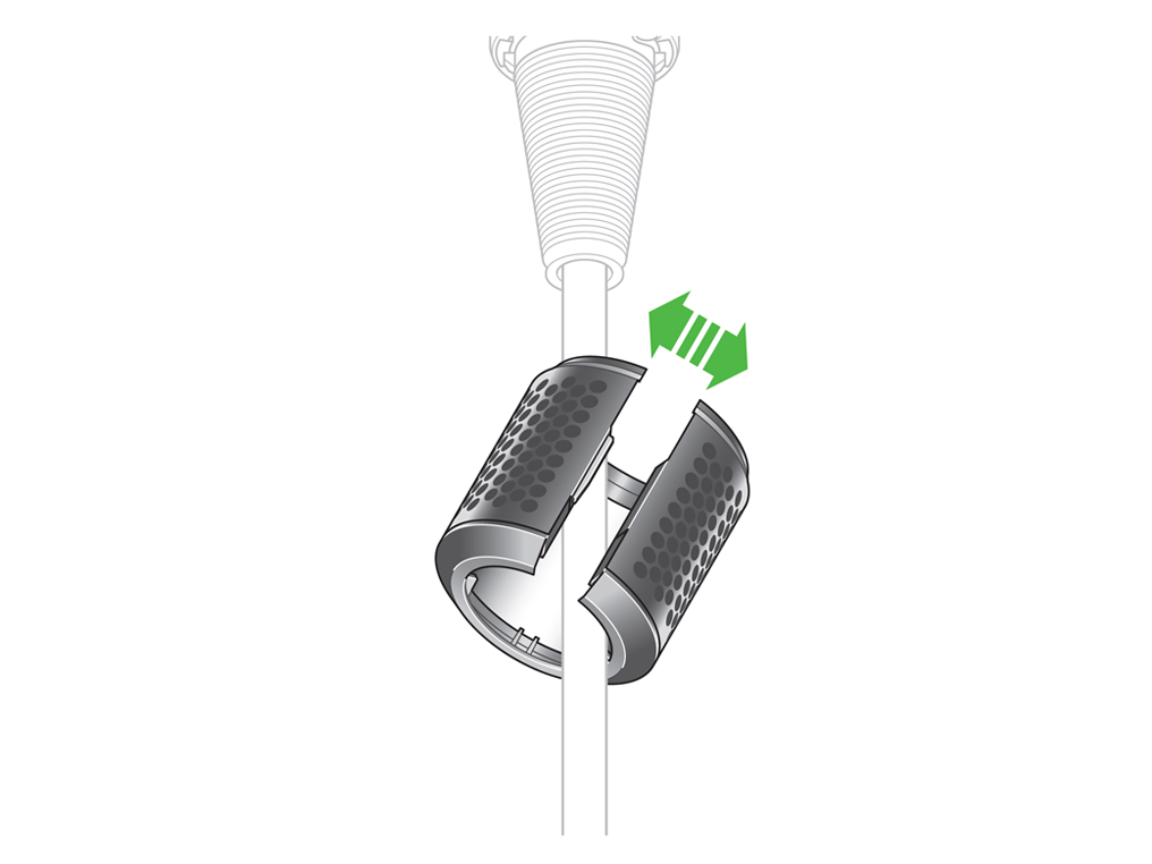
Follow these steps to install a new filter cage:
- Start from the plug end of the power cord
- Gently flex the plastic tabs of the replacement cage to widen the opening
- Carefully slide it over the power plug
- Feed it up the cord to the dryer handle
- Position it at the intake and snap the magnetic halves together
Expert tip: Some users apply a drop of soapy water or silicone lubricant to the cord for easier sliding. Wipe clean and ensure dryness before final installation.
Fix a Cracked Filter Temporarily
If a replacement isn’t immediately available, a damaged cage can be temporarily repaired.
Use Super Glue Carefully
For minor cracks that don’t affect the mesh, apply a small amount of cyanoacrylate (super glue) to the break. Avoid getting glue on the mesh, as this can restrict airflow. Let it cure fully before handling.
Warning: This is not a permanent fix. A compromised filter increases dust intake and risks motor damage. Replace the cage as soon as possible.
Maintain the Filter Weekly
Regular upkeep prevents performance drops and extends your dryer’s life significantly.
Recommended Cleaning Frequency
Clean the filter once per week under normal use. If you use the dryer daily, have long or shedding hair, or live in a humid environment, clean it daily to maintain optimal airflow.
Warning Signs That Need Immediate Attention
Clean immediately if you notice:
- Reduced airflow during use
- Overheating during operation
- Unusual motor noise
- Visible lint buildup on the exterior
These symptoms often point to a clogged filter that needs attention.
Follow Critical Safety Rules
Avoid costly mistakes and protect your investment by following these essential guidelines.
Never Operate Without the Filter
Running the Dyson Supersonic without the filter cage exposes the motor to dust and debris. This can cause permanent damage and void your warranty. The filter is your first line of defense against particles that can destroy the motor.
Use Only Dyson-Approved Parts
Stick to original Dyson filters and accessories. Third-party cages may not fit properly or meet safety standards. Using unauthorized parts can also void your warranty.
Avoid Harsh Cleaners
Do not use the following on your filter:
- Abrasive pads or steel wool
- Solvents or bleach
- High-pressure water jets
These can degrade the plastic or damage the fine mesh.
Get Help From Dyson Support
If your filter is damaged, Dyson often provides free replacements. Here’s how to contact them.
Contact Numbers for Replacement Filters
Dyson does not sell standalone replacement cages online. Contact support directly for assistance:
- US: 1-866-693-9766
- UK: 0800-298-0298
- Canada: 1-877-397-6622
- Australia: 1800 239 766
- New Zealand: 0800 397 667
Most users report receiving free replacement cages, especially if under warranty. Dyson also includes a spare filter in the original box for rotation during cleaning.
Know the Dyson Filter Design and Specifications
Understanding the filter’s design helps with proper maintenance and troubleshooting.
Filter Type and Material
The filter is a reusable in-line cyclonic cage made of heat-resistant plastic with fine stainless steel mesh. It captures particles before they reach the motor, protecting the internal components from damage.
Location and Compatibility
The filter sits at the base of the handle, surrounding the power cord intake. It’s compatible with all Dyson Supersonic models, including:
- HD08
- HD15
- Supersonic Pro
The magnetic closure allows tool-free access for cleaning. No screws or special tools are needed.
Frequently Asked Questions About Dyson Hair Dryer Filters
How often should I clean my Dyson hair dryer filter?
Clean the filter at least once per week under normal use. Daily cleaning is recommended if you use the dryer frequently, have long or thick hair, or live in a humid climate.
Can I replace the Dyson filter with a third-party option?
No. Using third-party filters is not recommended. They may not fit properly, don’t meet Dyson’s safety standards, and can void your warranty.
Why is my Dyson hair dryer getting hot or making noise?
Reduced airflow from a clogged filter causes the motor to work harder, leading to overheating and unusual noises. Clean the filter immediately if you notice these symptoms.
What happens if I run my Dyson without the filter?
Operating without the filter allows dust and debris into the motor housing. This can cause permanent damage to the motor and will void your warranty.
Does Dyson sell replacement filters online?
No. Dyson does not sell standalone replacement filter cages online. You must contact Dyson customer support directly to request a replacement.
How do I know if my filter needs replacing instead of cleaning?
Replace the filter cage if it has visible cracks, broken hinges, a non-functional magnetic clasp, or warped structure. Cleaning cannot repair physical damage.
Key Takeaways for Maintaining Your Dyson Hair Dryer Filter
The Dyson Supersonic filter is built to last, but only with proper care. Clean it weekly using the soak and scrub method, ensuring complete drying before reinstalling. Never operate the dryer without the filter installed, as this risks permanent motor damage.
Replace the filter cage only when physically damaged, and remember that new cages must be slid over the power plug end of the cord. Contact Dyson support for free replacements if your cage is cracked or broken. With consistent maintenance, your Supersonic will deliver powerful, consistent performance for years to come.


