

You just unboxed your Shark FlexStyle and now you are wondering how to actually use this thing. With its sleek design and promise of salon-quality blowouts, curls, and smooth finishes, it is easy to feel overwhelmed by all the attachments and buttons. But do not worry. This guide breaks down exactly how to use your Shark hair dryer step by step, so you can master it fast whether you want bouncy curls, sleek straight styles, or volume-rich blowouts.
The Shark FlexStyle is not just a hair dryer. It is a complete styling system that combines powerful airflow, smart heat control, and interchangeable attachments to replace multiple tools in your routine. In this guide, you will learn how to prep your hair correctly, switch attachments with ease, choose the right settings for your hair type, and create professional-looking styles from the comfort of your home.
Understanding Your Shark FlexStyle Controls
Before styling, take a moment to familiarize yourself with the tool is intuitive controls. Everything is within easy reach, and knowing what each button does will save you time during your styling routine.
Power and Heat Settings
The base unit functions as a high-performance hair dryer with ergonomically placed controls.
• Power switch: Located at the base, toggles the device on and off
• Temperature button: Offers three heat settings including Low, Medium, and High
• Fan speed button: Provides three airflow levels to control drying speed
• Cool-shot button: Positioned at the top, locks in style by cooling curls or setting volume
Key Features That Make Styling Easier
The Shark FlexStyle includes several features designed to enhance your styling experience.
• Hinge lock: Allows rotation of the nozzle for flexible styling angles and better access to hard-to-reach areas
• Style locker: Magnetic or snap-in system that securely holds attachments in place
• Smart heat technology: Measures temperature 1,000 times per second to protect hair from overheating
Pro tip: The device weighs under 2 pounds, making it comfortable to hold during longer styling sessions. Be aware that it is noticeably loud during operation.
Choosing the Right Attachment for Your Style

Each attachment transforms your Shark hair dryer into a different styling tool. Understanding what each one does helps you achieve the exact look you want.
Auto-Wrap Curlers for Effortless Curls
The auto-wrap curlers are designed to create defined curls or waves with minimal effort. They feature directional arrows that indicate whether the curl will fall inward or outward. Use the left curler for the left side of your head and the right curler for the right side to create curls that frame your face naturally.
Oval Brush for Voluminous Blowouts
The oval brush adds soft curls, volume, and bounce. It is perfect for classic blowouts and works especially well for adding lift at the roots while enhancing natural movement throughout the lengths.
Paddle Brush for Fast Straightening
The paddle brush straightens, detangles, and smooths hair quickly. Users report being able to style full hair in as little as five minutes, making it ideal for busy mornings. It also controls flyaways and tames cowlicks effectively.
Styling Concentrator for Precision Drying
The styling concentrator focuses airflow for precise drying and smoothing. This attachment is perfect for targeting specific sections or creating sleek styles at the roots.
Curl-Defining Diffuser for Natural Texture
The curl-defining diffuser enhances natural texture and reduces frizz in wavy or curly hair. It preserves curl pattern while adding definition without disrupting the natural shape.
Wide-Tooth Comb for Thick Hair
The wide-tooth comb detangles and styles thick, curly, or long hair gently. It helps distribute heat evenly while minimizing breakage.
How to Switch Attachments Quickly
Swapping between attachments is designed to be fast and tool-free. Follow these simple steps to change your attachment safely.
- Press the release button on the rear of the handle
- Lift the top section to expose the attachment port
- Remove the current attachment carefully, as it may still be hot
- Align the grooves or tabs on the new attachment with the tool is connector
- Insert and turn until it clicks into place securely
- Ensure the attachment is fully locked before turning on the device
Warning: Always allow attachments to cool before handling to prevent burns.
Preparing Your Hair for Best Results
Proper preparation is critical to protect your hair and maximize your styling results. Taking a few extra minutes before turning on the heat makes a significant difference in the final look.
Towel-Dry and Partial Air-Dry
After washing, gently towel-dry to remove excess moisture. For best results, let hair air-dry until it is approximately 80 percent dry before using heat tools. Starting with damp rather than soaking wet hair prevents prolonged heat exposure and improves curl formation.
Apply Heat Protectant
Use a heat protectant spray or serum on all sections of your hair. This shields strands from thermal damage and maintains shine and integrity. Popular options include Olex and AMAs heat protectants.
Add Texture or Volume Products
Texture spray enhances grip and hold, especially for fine or slippery hair. Apply at roots or mid-lengths depending on your desired volume or texture. For naturally straight, fine hair, skip smoothing products if you plan to curl directly.
Fine hair tip: Texture spray helps curls last longer on strands that tend to slip out of styles.
Rough Drying to Build Volume
Starting with a proper rough dry creates foundation volume and prepares your hair for the next styling steps. This technique significantly reduces overall styling time.
High Heat and Airflow Technique
• Attachment: Wide or concentrator nozzle
• Settings: High heat, High airflow
• Technique: Flip your head upside down and dry hair quickly, focusing on roots and mid-lengths. Stop when hair is damp to the touch rather than fully dry.
The purpose of rough drying is to create natural volume and prepare hair for smoothing or curling. Do not over-dry at this stage, as slightly damp hair holds curls better.
Creating Curls with Auto-Wrap Curlers
This is where the Shark FlexStyle truly shines. The auto-wrap system creates salon-quality curls with minimal effort.
Step-by-Step Curling Process
- Section your hair cleanly before starting
- Place the strand underneath the curler without forcing it in
- Let the tool automatically wrap the hair around the barrel
- Hold in place for approximately 10 seconds
- Press the cool-shot button for 10 seconds to set the curl
- Release slowly for a tighter, more defined curl
Cool shot is essential: Always use the cool shot after curling to lock in the shape and extend how long your curls last.
Fixing Common Wrapping Issues
If hair does not wrap smoothly, manually wrap it loosely first, then release and slowly pull upward and around the barrel. For long, layered hair, grab sections of similar length to maintain neatness and reduce flyaways.
Preserving Root Volume
Stop wrapping approximately two-thirds up the hair shaft rather than all the way to the root. This preserves volume at the roots and keeps your curls looking bouncy rather than flat.
Using the Oval Brush for Blowout Styles
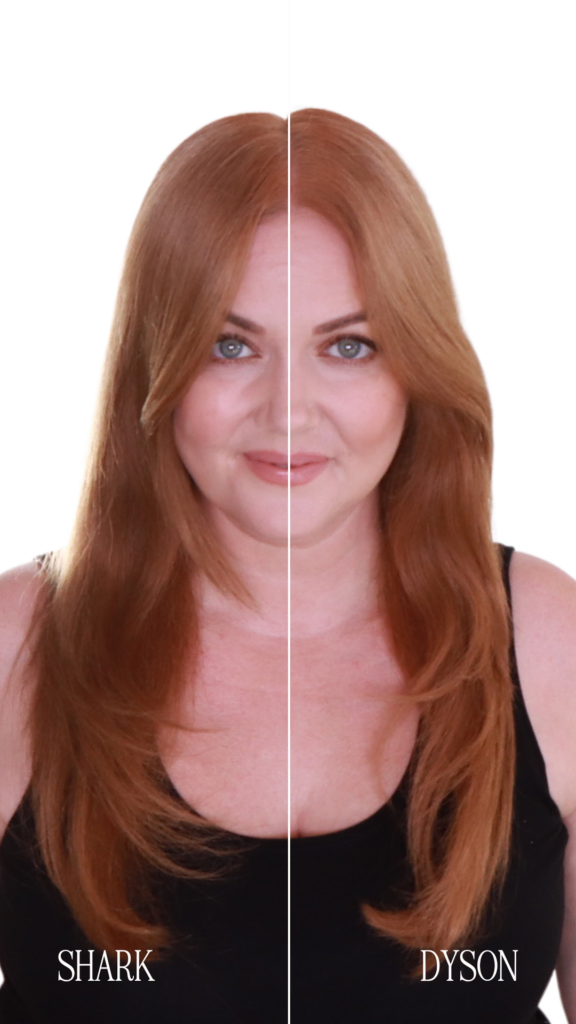
The oval brush delivers soft, voluminous blowouts that look professional but feel effortless.
Volume Technique
• Attachment: Oval brush
• Settings: Medium heat, Medium airflow
• Technique: Get the brush close to the scalp and direct airflow downward as you pull through. Alternate direction slightly to encourage subtle waves. For bangs, start from underneath for volume, then sweep outward from the top.
Finish by running fingers through your hair and adding a drop of hair oil for extra shine.
Fast Styling with the Paddle Brush
When you are short on time, the paddle brush combination dries and styles simultaneously.
Five-Minute Morning Routine
• Attachment: Paddle brush
• Settings: Medium to High heat, High airflow
• Technique: Brush through sections from root to tip. Style the top first, then underneath for added volume. Use the brush to tame cowlicks and flyaways as you go, especially around the hairline and bangs.
This method is a favorite among busy users who need to look polished in minutes.
Refreshing Your Style on Day Two
Your styled look does not have to end after the first day. With minimal effort, you can extend the life of your curls or blowout.
Reviving Flat Curls
• Attachment: Oval brush or auto-wrap curler
• Settings: Medium heat, followed by cool shot
• Technique: Lightly re-curl or re-blow sections that have fallen flat. Add texture spray for grip and bounce.
Many users report that curls develop a softer, more natural look by day three, which is often preferred over freshly styled hair.
Finishing Touches That Lock In Your Style
The final steps make your look last longer and feel more polished.
Apply Texture Spray
Mist texture spray at roots, between curls, and at the back of your head. Work through with fingers for separation and movement.
Light Hairspray Mist
Use just enough hairspray to hold the style without stiffness or crunch. Avoid overuse to maintain natural movement.
Optional Hold Techniques
Pin curls with bobby pins for one to two hours after styling to reinforce the shape. Alternatively, gently pull down on curls with your fingers for a softer, more natural finish.
Pro Tips for Better Results
Maximize your Shark FlexStyle results with these expert-backed recommendations.
• Always use the cool shot after curling or styling to set the shape and extend longevity
• Section hair properly using clips to keep organized during styling
• Use lower heat settings for fine, damaged, or color-treated hair
• Do not force hair into curlers, as this can cause snagging or breakage
• Alternate curl directions on different sections for a less uniform, more organic look
• Style on 80 percent dry hair to maximize curl definition and reduce styling time
Frequently Asked Questions About Using Shark Hair Dryers
How do I prevent my Shark FlexStyle from getting tangled?
Work with clean, detangled hair and smaller sections. For the auto-wrap curlers, ensure you are placing hair underneath the tool rather than forcing it in. If tangling occurs, release the curl slowly and work with slightly smaller sections.
Can I use the Shark FlexStyle on wet hair?
It is best to start with hair that is 80 percent dry. Using the tool on soaking wet hair can damage the motor and produces poor styling results. Rough dry first until damp, then proceed with your chosen attachment.
Is the Shark FlexStyle safe for color-treated hair?
Yes. The smart heat technology measures temperature 1,000 times per second to prevent overheating, making it safe for color-treated and delicate hair. Always use a heat protectant spray for added protection.
How long do curls last with the Shark FlexStyle?
Curls and blowouts typically last two to four days with minimal touch-ups. Many users skip washing their hair for several days while maintaining their style.
Which attachment is best for fine hair?
The oval brush adds volume, while texture spray helps curls grip better on fine strands. Use medium heat rather than high to prevent damage, and apply texture spray at the roots for added lift.
Can I replace my regular hair dryer with the Shark FlexStyle?
Yes. The base unit functions as a powerful hair dryer on its own, and the interchangeable attachments allow you to dry and style simultaneously, replacing multiple tools in your routine.
Key Takeaways for Mastering Your Shark Hair Dryer
The Shark FlexStyle is a complete styling system that simplifies your routine while delivering professional results at home. With smart heat protection, lightweight design, and six versatile attachments, it adapts to your hair type and styling goals whether you are creating long-lasting curls, smooth straight styles, or volume-rich blowouts.
Start with proper preparation by towel-drying to 80 percent dry and applying heat protectant. Choose the right attachment for your desired style, and always finish with the cool-shot button to lock in your look. The auto-wrap curlers take the guesswork out of curling, while the paddle brush delivers fast smoothing for busy mornings.
With practice, you will discover which techniques and attachments work best for your specific hair type. Most users find that their Shark FlexStyle becomes a weekly staple, streamlining their routine and reducing clutter from multiple styling tools. Available at Sephora and major retailers, it offers exceptional value for its performance and versatility. Start practicing today, and you will be creating salon-quality styles in minutes.



