If your curls fall flat or your waves lose shape every time you dry your hair, you’re not alone—and the solution might be simpler than you think. Learning how to use a diffuser hair dryer correctly can transform frizzy, undefined strands into bouncy, polished texture with minimal damage. A diffuser attachment scatters your dryer’s airflow, reducing direct heat exposure while preserving natural curl patterns. Whether you have tight coils, loose waves, or straight hair craving volume, diffusing is a game-changer. But it is not just about attaching a dome and turning on the heat—technique matters. From hover drying to scrunching out the crunch, mastering the right steps ensures defined curls, lifted roots, and long-term hair health. In this guide, you will learn the exact process, from prep to finish, so you can dry smarter, not harder.
Attach the Right Diffuser to Your Hair Dryer
Check Compatibility Before Purchasing
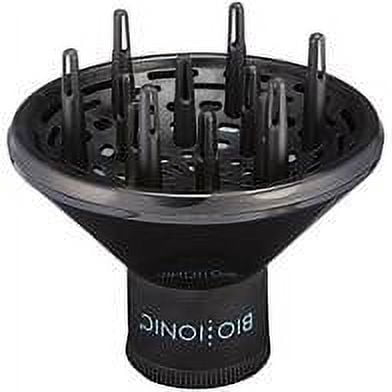
Before you start, confirm your diffuser fits your hair dryer. Most dryers accept universal attachments, but nozzle diameter varies. A loose fit causes air leakage, reduces drying efficiency, and may overheat the motor. For best results, use brand-specific diffusers like the IQ Curl Defining Diffuser for Shark HyperAIR or the magnetic Airshot Pro. If using a universal model, look for adjustable rings or adapters to secure the fit. Never force a diffuser onto an incompatible dryer, as this can damage both tools.
Secure the Attachment Properly
Click or magnetically snap the diffuser onto the dryer nozzle until it locks in place. Magnetic models offer faster switching between concentrator and diffuser nozzles. Once attached, gently tug to ensure it does not wobble. A stable connection ensures even airflow and safer operation. If your diffuser has retractable prongs, start with them folded in for easier sectioning.
Prep Your Damp Hair Properly

Remove Excess Water Gently
After washing, do not rub your hair with a regular towel. This causes frizz and breakage. Instead, squeeze out excess water with your hands, then blot or scrunch using a microfiber towel or an old cotton T-shirt. These materials absorb moisture without disturbing the cuticle. Research shows microfiber towels can reduce drying time by up to 30 percent, minimizing heat exposure.
Apply Heat Protectant and Styling Products
Always use a heat protectant spray before turning on the dryer. Options like Cloud Nine Magical Quick Dry Potion or Olaplex No. 9 create a shield against thermal damage. Next, layer in curl-enhancing products. For curly or wavy hair, use curl cream, mousse, or gel. For straight or flat hair, apply volumizing mousse or root-lifting spray. Scrunch upward from ends to roots to encourage curl formation. Avoid brushing after this step—detangle only when hair is wet and saturated with product.
Set the Correct Heat and Airflow Settings
Choose Low Heat First
Start with low heat and low airflow. High heat disrupts curl formation, increases frizz, and risks long-term damage. Some dryers, like the Shark HyperAIR, automatically switch to low settings when the diffuser is attached. If yours does not, manually adjust. Use medium heat only if necessary, and never high. Keep airflow at low to medium to maintain control and prevent tangling.
Use the Cool Shot Button Strategically
Alternate with cool air bursts during the final minutes of drying. The cool shot seals the hair cuticle, locks in style, and boosts shine. It also enhances volume. Studies show cool air increases hold by up to 40 percent in humid conditions. Use it especially when lifting roots or finishing waves. This simple step makes a noticeable difference in your final result.
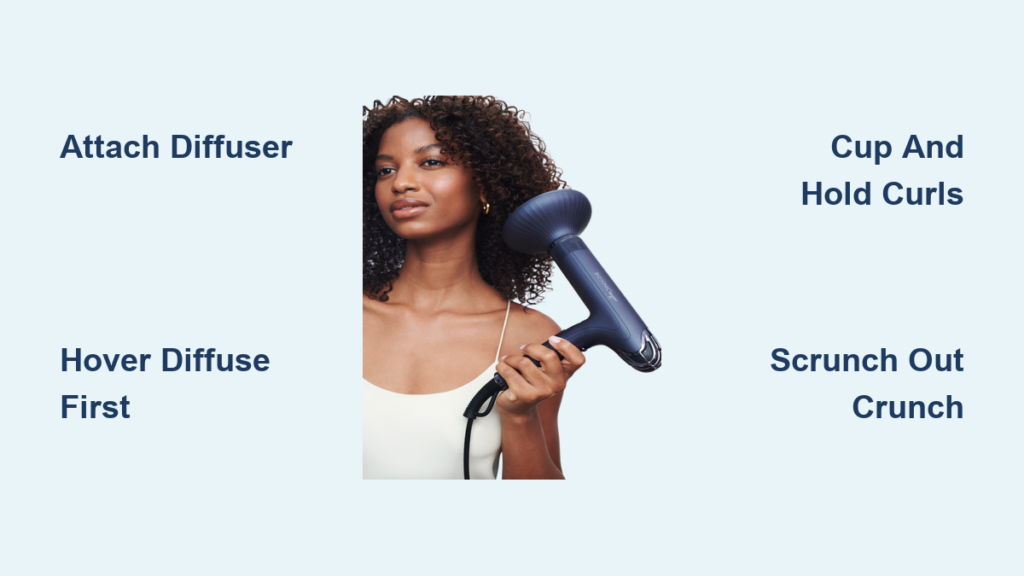
Hover Diffuse to Set the Gel Cast
Hold the Diffuser 12 Inches Away
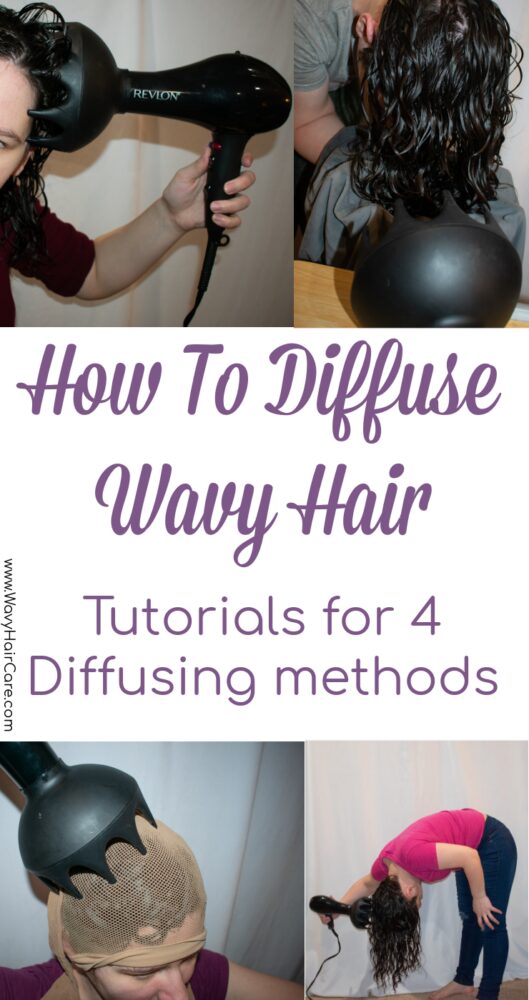
Begin with hover diffusing. Hold the diffuser about 30 cm (12 inches) above your head without touching your hair. Run it over the surface for one to two minutes using low heat. This sets a gel cast, a stiff layer formed by styling products that locks curls in place and prevents frizz during deeper drying. This step is critical. Skipping it leads to undefined curls and puffiness. Keep your hands off the hair during this phase, as touching disrupts the forming pattern.
Dry Curls Using the Cupping Method
Gather Hair Into the Diffuser Bowl
Once the gel cast is set, switch to the cupping method. Take a section of hair, about the size of your diffuser bowl, and gently gather curls from underneath into the dome. Avoid pushing hair down. Instead, lift it up into the diffuser.
Lift and Hold for Maximum Definition
With the hair inside the bowl, lift the diffuser toward your scalp and hold it in place for 30 seconds to several minutes, depending on thickness. Let the warm air dry the roots and mid-lengths without direct contact. Repeat across all sections. Do not move the diffuser constantly. Keeping it still helps curls clump naturally. Avoid using your hands to manipulate curls while drying, as this causes frizz and disrupts definition.
Boost Volume with Root Focusing Techniques

Flip Your Head Upside Down
For maximum lift, tilt your head upside down or to the side. This exposes the roots and allows airflow to penetrate the scalp directly. Position the diffuser close to the roots, without pressing into the scalp, and use warm air to build volume.
Use Extended Prongs for Scalp Massage
If your diffuser has adjustable prongs, extend them and gently massage your scalp through the diffuser. This stimulates blood flow and lifts roots without flattening curls. Combine this with upside-down drying for bouncy, long-lasting volume. This technique works especially well for fine or flat hair types that struggle with root lift.
Finish Drying at 80-90% Dry
Let the Final Portion Air Dry
Stop diffusing when your hair is 80-90 percent dry. Let the last bit air dry to reduce cumulative heat exposure. Over-drying with heat leads to brittleness, frizz, and shrinkage. This step is especially important for curly and coily hair types. Allowing natural drying preserves softness and enhances curl definition.
Complete Your Style with Final Touches
Scrunch Out the Crunch
Once hair is fully dry, scrunch gently with clean hands to break the gel cast. If you used a strong-hold gel, your hair may feel stiff. Scrunching removes the crunch while maintaining shape. Use a small amount of water or a refresher spray if needed.
Apply Anti-Frizz Serum
Add shine and smoothness with a drop of anti-frizz serum or lightweight oil like argan or OUAI Hair Oil. Focus on mid-lengths and ends. Avoid the roots to prevent flatness. Recommended options include John Frieda Frizz Ease Serum or Bumble and Bumble Does It All.
Never Brush Dry Curls
Brushing or combing dry curls destroys the pattern and causes frizz. If you need to detangle, do it only when hair is wet and coated with conditioner or leave-in. Use fingers or a wide-tooth comb instead. This one habit makes a massive difference in maintaining your style.
Avoid Common Diffuser Mistakes
Do Not Start on Partially Dry Hair
Beginning diffusing on hair that is already air-dried means missing the crucial gel cast phase. Always start on damp, product-coated hair for best results. If you wait too long, curls lose their shape and become harder to define.
Do Not Use High Heat
High heat opens the cuticle, strips moisture, and increases frizz. It can also melt product residue, creating a crunchy, uneven texture. Stick to low or medium heat, especially for curly, coily, or damaged hair.
Do Not Touch Hair During Drying
Hands transfer oils and disrupt curl clumps. Let the diffuser do the work. Every time you touch your hair, you risk frizz and misshapen curls. Patience is key to achieving defined results.
Do Not Overuse Products
Too much gel or cream weighs down curls and creates buildup. Use minimal amounts. Start with a quarter-sized dollop and adjust as needed. Lightweight mousses often deliver better softness than heavy gels.
Optimize Technique for Your Hair Type
Diffusing Tips for Curly Hair (Type 3-4)
The goal is defined spirals, reduced puffiness, and long-lasting hold. Use hover first, then cup sections. Apply curl cream and gel. For tighter sections, finger-coil before diffusing for uniform curls. This extra step creates more consistent pattern throughout your hair.
Diffusing Tips for Wavy Hair (Type 2)
The goal is enhanced S-shaped waves, volume, and texture. Diffuse upside down, scrunch out the cast, and use lightweight mousse. Twist sections around fingers before drying to boost wave definition. This technique amplifies your natural texture significantly.
Diffusing Tips for Straight Hair (Type 1)
The goal is root lift, subtle body, and bouncy finish. Clip top layers and focus diffuser at roots with scrunching motion. Finish with root-lifting powder or volumizing spray. Avoid heavy products that weigh hair down. Straight hair benefits most from the scrunching technique at the roots.
Maintain Your Diffuser for Best Results
Clean Regularly
Lint, hair, and product buildup clog vents and reduce airflow. Wipe the exterior with a damp microfiber cloth monthly. Use a soft brush to remove debris from prongs and internal fins. Ensure all vent holes are clear for optimal performance.
Store Properly
Leave the diffuser attached or store it in a protective case. Avoid leaving it in hot, humid areas like steamy bathrooms. This can warp plastic over time. Wrap the cord loosely to prevent wire damage.
Check for Wear
Plastic diffusers last one to two years with regular use. Magnetic attachments tend to last longer. Replace if you notice cracks, loose fittings, or reduced drying efficiency. Regular maintenance ensures your tool performs at its best.
Final Pro Tips for Better Diffuser Results
Use Silicone-Free Products
Silicone buildup dulls hair and blocks moisture. Opt for sulfate-free shampoos and silicone-free stylers like DevaCurl SuperCream or SheaMoisture Curl Enhancing Smoothie. This keeps your hair healthy and products working effectively.
Practice Makes Perfect
Many users report poor results at first. Success comes with practice. Watch tutorial videos to see techniques in action. Visual learners benefit from demonstrations that break down each step. Do not get discouraged if your first attempts are not perfect. Consistent practice yields salon-quality results at home.
Frequently Asked Questions About Diffuser Hair Dryers
What does a diffuser do for hair?
A diffuser scatters airflow from your hair dryer into a gentle, widespread pattern. This reduces direct heat exposure, minimizes frizz, and preserves natural curl patterns. It helps define curls, add volume, and dry hair faster while causing less damage than traditional blow-drying methods.
Can I use a diffuser on straight hair?
Yes, straight hair benefits from a diffuser by gaining root lift and subtle volume. Use a scrunching motion at the scalp and flip your head upside down. Finish with volumizing products to maintain bounce without weighing hair down.
How long should I diffuse my hair?
Total diffusing time ranges from 5 to 30 minutes, depending on hair length, density, and initial wetness. Hover diffuse for one to two minutes initially, then hold each section for at least 30 seconds. Stop at 80-90 percent dry and allow the remainder to air dry.
What heat setting should I use on a diffuser?
Always start with low heat and low airflow. High heat disrupts curl formation and increases frizz. Some advanced dryers automatically set low temperature when the diffuser is attached. Use medium heat only if necessary, and always finish with cool air.
Why are my curls still frizzy after diffusing?
Frizz usually results from using high heat, touching hair during drying, or skipping the hover diffusing step. Ensure you start on damp hair, set the gel cast first, and avoid manipulating curls until fully dry. Using a heat protectant also helps control frizz.
How often should I use a diffuser?
Limit diffusing to two to three times per week to reduce cumulative heat exposure. Between sessions, allow your hair to air dry or use refresh techniques. This maintains hair health while still enjoying the styling benefits of diffusing.
Key Takeaways for Perfect Diffuser Results
Using a diffuser hair dryer is a styling technique that enhances natural texture, adds volume, and protects hair health. With the right prep, settings, and method, you can achieve salon-quality results at home. Start with a compatible diffuser attached securely to your dryer. Prep damp hair with microfiber towels and apply heat protectant before styling. Use low heat, hover diffuse to set the gel cast, then cup curls and lift roots for volume. Finish at 80-90 percent dry, scrunch out the crunch, and never brush dry curls. Whether you are defining curls, boosting waves, or lifting flat roots, consistency and patience deliver the best outcomes. Master the hover, perfect the cup, and let your hair thrive, diffused, not destroyed.