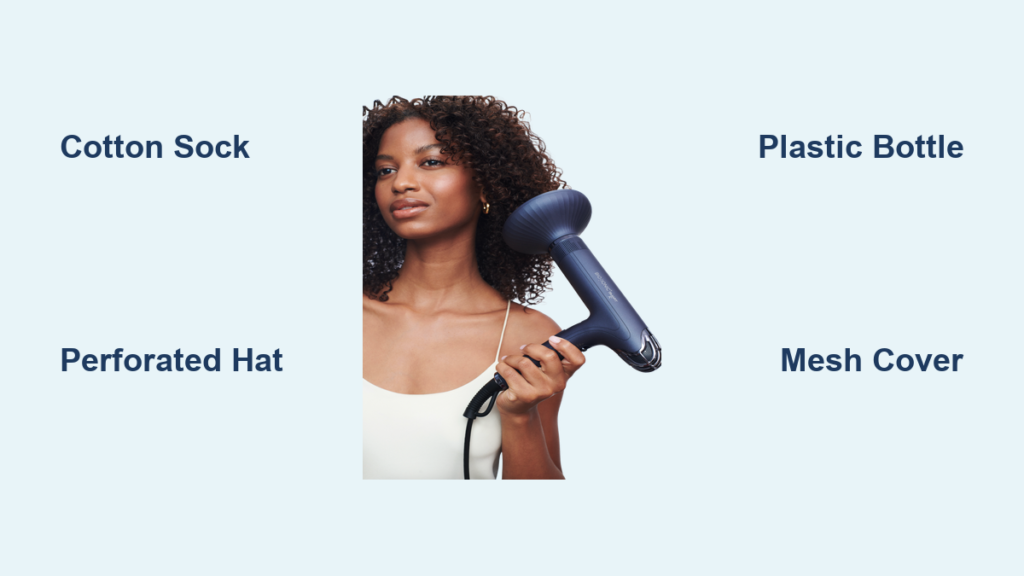
If you have curly, wavy, or textured hair and no diffuser attachment, don’t panic. You don’t need to buy one to protect your curls from heat damage. How to make a diffuser for a hair dryer is a common question, and the answer is simpler than you think. Using everyday household items, you can create an effective DIY diffuser that disperses airflow, reduces frizz, and enhances curl definition. Whether you’re traveling, on a budget, or just need a quick fix, these tested methods deliver real results.
This guide walks you through six proven techniques, compares their performance, and shows you how to use them safely and effectively. You’ll learn which materials work best, how to avoid common mistakes, and when it makes sense to invest in a commercial option instead.
Choose the Right DIY Diffuser Method
Not all DIY diffusers work the same. Your choice depends on your hair type, the tools available, and your drying goals. Below are the most effective, user-validated methods ranked by performance, safety, and ease of use.
Sock Over Dryer Nozzle
The fastest and most accessible way to diffuse hair is with a clean cotton sock.
Why It Works
Slipping a sock over your dryer nozzle instantly breaks up concentrated airflow. The porous cotton fabric mimics a diffuser by scattering heat and reducing wind speed, which helps preserve curl clumps and minimize frizz.
Step-by-Step Setup
Grab a clean, 100% cotton ankle sock with no synthetics. Slide it over the dryer nozzle until fully covered. Secure with a rubber band or hair tie if it feels loose. Set your dryer to low heat and medium speed. Hold the sock-covered nozzle close to your roots, lift sections, and dry using circular motions.
Best For
This method works best for fine to medium curly hair types 2A through 3B. It’s ideal for travel emergencies and quick touch-ups when you need results fast.
Pro Tips
Never use polyester or nylon socks because they can melt under heat. Limit each drying session to 5 to 10 minutes to prevent overheating. Wash or replace the sock after 2 to 3 uses for optimal hygiene and performance.
Perforated Hat Diffusing Technique
For superior curl definition, use a mesh or hole-punched hat as a passive diffuser.
How It Works
Instead of attaching to the dryer, the hat goes on your head. You direct airflow upward into the brim, letting air disperse gently through the perforations. This indirect method protects curls and boosts volume simultaneously.
Setup and Use
Apply heat protectant to damp hair first. Place a breathable hat like a baseball cap or sun hat on your head. Secure it with a rubber band around the base for a snug fit. Set your dryer to cool or low heat. Aim the dryer under the hat’s brim, moving in circles. Dry for 10 to 20 minutes depending on hair thickness.
Best For
This technique excels with thick, coily, or curly hair types 3C through 4C. It’s perfect for defined wave enhancement and frizz control.
Optimization Tips
Choose hats with evenly spaced, large holes for best airflow. Combine with scrunching after drying for extra definition. Avoid tight hats because circulation matters for even drying.
Kitchen Strainer as Manual Diffuser
Turn a colander into a styling tool for root lift and volume.
Why It Works
The strainer’s perforated surface scatters airflow while allowing you to gather hair into the bowl. This mimics the plopping method and lifts roots for salon-level volume without special equipment.
Instructions
Apply heat protectant to damp hair. Plop damp hair into the center of the strainer. Hold it against your scalp with one hand. Point the dryer into the bowl with your other hand. Move in slow circles for even drying.
Best For
This method targets volume seekers with medium-length curly hair. It works well for precision root drying when you need extra lift.
Safety Notes
Use plastic or silicone-coated strainers because metal conducts heat and can cause burns. Don’t press hard against your scalp. This method requires two hands, so it’s not ideal for solo styling.
Plastic Cup with Mesh Diffuser
Build a reusable, cup-style diffuser in minutes using basic supplies.
Materials Needed
You will need a microwavable plastic cup, mesh fabric like an onion bag or tulle, scissors, and a rubber band.
Build Steps
Cut out the bottom of the cup to create an open cylinder. Slide the open end over the dryer nozzle. Cover the top with crumpled tinfoil or mesh. Secure with a rubber band. Optionally tape edges for extra hold.
How It Diffuses
The cup creates a small chamber where air hits the mesh or foil and breaks into scattered streams, just like a commercial diffuser. This design mimics professional airflow dispersion.
Best For
This method suits controlled home drying and reusable DIY solutions. It’s great for those avoiding synthetics who want something sturdier than a sock.
Material Safety
Avoid PETE bottles because they warp at low heat. Remove foil linings from containers to prevent electrical risk. Use only short sessions to prevent melting.
Plastic Bottle Diffuser with Side Holes
Upgrade the cup method with 360-degree airflow using a soda bottle.
Build Guide
Cut off the bottom of a plastic bottle. Keep the cap end to fit over the nozzle. Poke 10 to 20 small holes near the cut edge, spacing them evenly. Insert the dryer nozzle into the bottle’s neck. Secure with tape or a rubber band if it feels loose.
Why It Works
The side holes allow air to escape in all directions, creating multidirectional drying that mimics high-end diffusers. This wider diffusion area covers more hair per session.
Best For
This method targets those with wider diffusion needs and medium to thick hair. It’s ideal for frequent DIY users who want something more durable than cardboard.
Pro Tips
Space holes evenly for balanced airflow. Use larger bottles for long hair. Test the fit before drying to avoid wobbling.
Cardboard Tube with Mesh Cover
A minimalist, low-risk option works for emergency use when nothing else is available.
How to Make It
Cut a paper towel tube to three-quarter inch length. Cover one end with mesh or tinfoil. Secure with tape or a rubber band. Slide onto the dryer nozzle.
How It Works
The short tube extends the nozzle slightly while the mesh disrupts airflow. Cardboard dissipates heat quickly, reducing fire risk compared to plastic alternatives.
Best For
This method suits short drying sessions and low-wattage dryers. It’s perfect for one-time fixes when traveling.
Limitations
This option isn’t durable and should be replaced after 1 to 2 uses. The diffusion area is limited. Avoid using with damp hands or near water.
Material Safety and Selection Guide
Your DIY diffuser is only as safe as the materials you choose. Here’s what works and what to avoid.
| Material | Safe | Notes |
|---|---|---|
| 100% Cotton Sock | Yes | Best fabric choice; absorbs heat well |
| Polyester/Nylon Sock | No | Melts or ignites easily under heat |
| Tinfoil | Yes (short-term) | Crumple for texture; remove linings |
| Mesh Fabric | Yes | Onion bags and tulle provide excellent airflow |
| Microwavable Plastic | Yes | Look for number 5 or microwave-safe labels |
| PETE Plastic | No | Warps at low heat like soda bottles |
| Cardboard | Yes (short use) | Safe but degrades quickly with moisture and heat |
Never use synthetic fabrics or non-heat-resistant plastics near heating elements. Watch for burning smells, discoloration, or melting, and stop immediately if detected.
How to Use Any DIY Diffuser Like a Pro
Even the best homemade diffuser fails without proper technique. Follow these steps for salon-quality results.
Prep Your Hair
Towel-dry or plop hair to 80 to 85 percent dry. Apply a quality heat protectant. Add curl cream or mousse, using about a golf-ball-sized amount, then scrunch thoroughly.
Dryer Settings
Use low to medium heat and low to medium speed. Avoid high speed because it disrupts curl formation and causes frizz.
Drying Process
Section hair into 4 to 6 parts. Hold the diffuser close to your roots, lifting gently. Use circular motions for even drying. Dry each section for 10 to 15 seconds. Flip your head upside down for extra volume. Scrunch upward to enhance curl definition.
Finish Strong
Stop at 80 to 85 percent dry, then let the remaining moisture air-dry. Apply a lightweight serum to ends. Set your style with hairspray held 6 to 8 inches away.
DIY vs. Commercial Diffusers

| Feature | DIY Methods | Commercial Diffuser |
|---|---|---|
| Airflow Dispersion | Moderate to High | Very High |
| Frizz Control | Good to Excellent | Excellent |
| Curl Definition | Moderate to High | High |
| Ease of Use | Varies by method | Easy with universal fit |
| Safety | Moderate | Very High |
| Durability | Low to Moderate | Very High |
| Cost | Free to $1 | Around $22 |
While DIY methods work well in a pinch, a foldable silicone or polycarbonate diffuser is worth the investment for regular styling. Commercial diffusers offer superior heat resistance, consistent performance, and long-term value.
Final Tips for Long-Term Success
Replace DIY tools regularly, especially socks and cardboard. Clean diffusers after each use by wiping plastic and washing socks. Store in a dry place because moisture weakens materials. Never leave your DIY diffuser unattended because fire risk is real. Always test on low heat first, especially with new materials.
Frequently Asked Questions About Making a Hair Dryer Diffuser
Can I use a regular sock as a hair dryer diffuser?
Yes, a clean 100% cotton ankle sock works as an emergency diffuser. Slide it over the dryer nozzle and secure with a rubber band. Use only cotton because synthetic socks can melt. This method disperses airflow effectively for fine to medium curly hair.
What household items can I use instead of a diffuser?
Common alternatives include a kitchen strainer, plastic cup, soda bottle, cardboard tube, or a perforated hat. Each method breaks up concentrated airflow differently. The sock method remains the quickest and most accessible option for most people.
Is the hat diffusing method safe for all hair types?
The perforated hat method works best for medium to thick curly and wavy hair types 2C through 4C. It’s less effective on short or fine hair. The indirect airflow protects curls well and provides excellent frizz control when done correctly.
How long does a DIY diffuser last?
DIY diffusers are temporary solutions. Socks last 2 to 3 uses before needing replacement. Cardboard tubes work for 1 to 2 sessions. Plastic cups and bottles may last several weeks with careful use. Commercial diffusers last years with proper care.
Can I make a diffuser with a plastic bottle?
Yes, cut off the bottle bottom, keep the cap end, and poke 10 to 20 small holes around the cut edge. Insert the dryer nozzle into the bottle neck and secure. This creates multidirectional airflow similar to commercial diffusers.
Key Takeaways for Making Your Own Hair Dryer Diffuser
You don’t need a store-bought diffuser to protect your curls. With a clean cotton sock, mesh hat, plastic bottle, or kitchen strainer, you can achieve professional results at home using items you already own. The core principle behind effective diffusion is airflow dispersion, not the specific tool or brand. Cotton socks offer the quickest solution, perforated hats provide the best curl definition, and plastic bottles deliver multidirectional airflow similar to commercial designs.
For safety, always use heat-resistant materials, avoid synthetics near heat, and monitor for any signs of melting or burning. Replace DIY tools regularly and store them in dry locations. However, for daily styling, consider investing in a heat-resistant silicone diffuser for better durability, consistent performance, and long-term value. Whether you’re fixing curls on the go or experimenting at home, the key is gentle, dispersed airflow that preserves your natural curl pattern while minimizing frizz.