If you’re struggling with thinning hair, breakage, or a dry, flaky scalp, hibiscus oil may be the natural solution you’ve been searching for. Packed with amino acids, antioxidants, and anti-inflammatory compounds, hibiscus oil for hair growth supports stronger strands, healthier follicles, and reduced shedding. The best part? You can easily make it at home using simple ingredients and two proven methods. In just a few weeks of consistent use, many people notice thicker, shinier hair and a calmer scalp.
This guide walks you through every step: choosing the right hibiscus and carrier oils, preparing your infusion, applying it effectively, and avoiding common mistakes. Whether you’re new to DIY hair care or refining your routine, this is your complete roadmap to making powerful, all-natural hibiscus oil at home.
Choose the Right Hibiscus Form
Dried Flowers vs. Leaves vs. Powder
You can make hibiscus oil using dried flowers, leaves, or powder, each offering slightly different benefits.
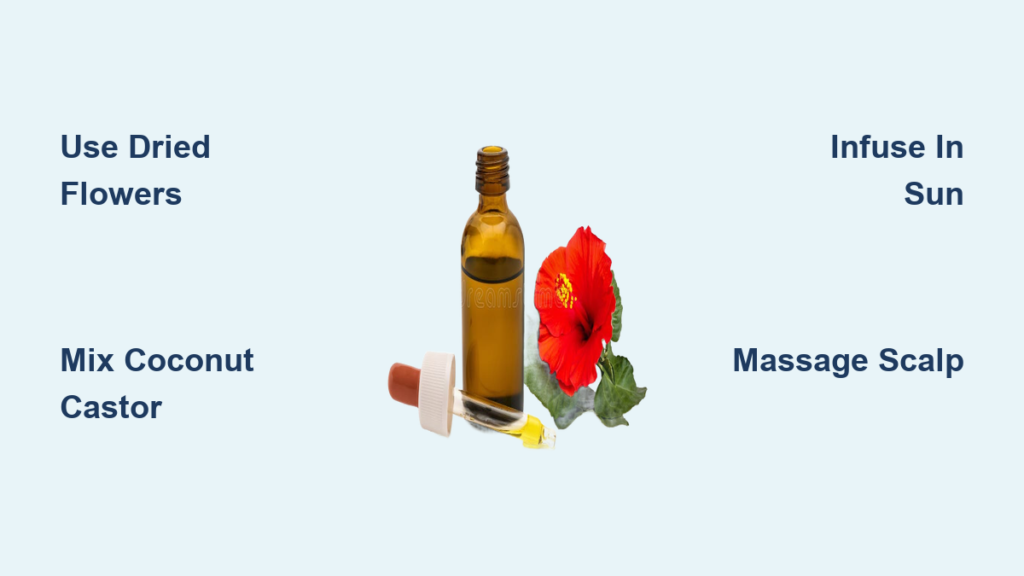
• Dried hibiscus flowers are the most popular choice. They’re rich in pigments and mucilage, which help condition hair and stimulate growth.
• Dried leaves contain similar compounds but may infuse faster due to their thinner structure.
• Hibiscus powder delivers the strongest infusion because of its high surface area, allowing deeper extraction of active ingredients.
Pro Tip: If using whole flowers or leaves, grind them lightly before infusion to speed up the process and boost potency.
Use Pure Hibiscus Only
Ensure your hibiscus is 100% pure with no added flavors, preservatives, or other herbs. Check labels on store-bought dried hibiscus or tea bags. Avoid blends marketed for weight loss or detox, as they may contain ingredients unsuitable for topical use.
Warning: Hibiscus naturally darkens light-colored hair. Always do a strand test on a small section of blonde or gray hair before full application.
Pick Your Carrier Oil Blend
Best Oils for Hair Growth
The base oil determines texture, absorption, and overall effectiveness. Choose one or blend multiple oils to target your specific hair needs.
| Carrier Oil | Best For | Texture |
|---|---|---|
| Coconut Oil | Moisture retention, reducing protein loss | Medium-thick |
| Castor Oil (Jamaican Black) | Thickening, stimulating growth | Very thick |
| Sweet Almond Oil | Lightweight conditioning, shine | Light |
| Olive Oil | Deep nourishment, scalp health | Medium |
| Fractionated Coconut Oil | Non-greasy, long shelf life | Light, liquid |
| Pumpkin Seed Oil | DHT-blocking, promoting regrowth | Medium, nutty scent |
Optimal Oil Combination
For maximum results, use a 50:50 blend of coconut and castor oil. This mix balances castor oil’s powerful growth-stimulating ricinoleic acid with coconut oil’s ability to penetrate hair shafts and prevent breakage.
Add 5 drops of rosemary essential oil per ½ cup blend. It’s clinically shown to support hair density and circulation.
Prepare with the Quick Heat Method

Grind Hibiscus First
Break down dried hibiscus using a spice grinder, blender, or mortar and pestle. Finely ground material releases more nutrients during heating.
Ratio: Use ¼ cup ground hibiscus to ¾ cup carrier oil (1:3 ratio by volume).
Warm Gently in a Double Boiler
Do not apply direct heat. Instead, follow these steps.
- Place oil and hibiscus in a heat-safe bowl over a pot of simmering water.
- Stir gently for 10 to 15 minutes on low heat.
- Watch for color change. Petals should turn dark brown or black, indicating full infusion.
Never let the oil smoke or boil. This degrades beneficial compounds and can create harmful byproducts.
Cool, Strain, and Store
- Remove from heat and let cool completely (about 1 hour).
- Strain through cheesecloth or coffee filter, squeezing out every drop.
- Transfer to a dark glass bottle (amber or cobalt) to block UV light.
- Label and date.
Shelf Life: Up to 6 months when stored in a cool, dark place.
Use Slow Sun Infusion for Maximum Potency
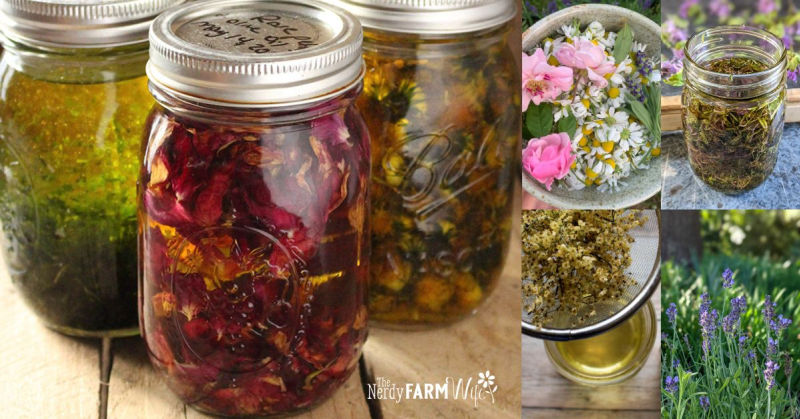
Fill Jar and Submerge Fully
- Place ½ cup dried hibiscus in a clean glass jar.
- Pour 1 cup carrier oil over it until fully covered.
- Seal tightly and shake to remove air bubbles.
Critical: Ensure all plant material stays submerged to prevent mold.
Infuse in Sunlight or Darkness
For heat-stable oils (coconut, olive), place the jar in a sunny windowsill for 2 to 3 weeks. For heat-sensitive oils (pumpkin seed, grapeseed), store in a cool, dark cabinet for 3 to 4 weeks.
Shake the jar once daily to enhance extraction.
Strain After Waiting
After the infusion period, follow these steps.
- Strain through double layers of cheesecloth.
- Squeeze residue well.
- Add 1% vitamin E oil (5 to 6 drops per ounce) to extend shelf life.
- Bottle in dark glass.
Result: A deeply colored, nutrient-rich oil with preserved heat-sensitive actives.
Apply Correctly for Hair Growth
Try a Weekly Hot Oil Treatment
This is the most effective method for stimulating follicles and conditioning hair.
- Warm a small amount of oil (test on wrist. It should be warm, not hot).
- Massage into scalp for 3 to 5 minutes using fingertips or a scalp massager.
- Coat lengths and ends to prevent dryness.
- Cover with a warm towel or shower cap.
- Leave for 30 minutes.
- Wash out with clarifying shampoo.
Why it works: Heat opens pores, improves blood flow, and enhances nutrient delivery.
Use as a Daily Scalp Serum
For continuous stimulation, apply 2 to 4 drops directly to thinning areas. Massage in with fingertips and leave on. No rinsing needed.
Best time: Morning or before bed, depending on your routine.
Caution: Do not overuse, especially with castor oil blends, as it can weigh down fine hair or clog pores.
Prevent Buildup with Clarifying Washes
Hibiscus and castor oil can leave residue that dulls hair over time.
• Use a clarifying shampoo once a week to remove buildup.
• No conditioner is needed. Hair should feel soft after oil treatment.
Alternative: Rinse with diluted apple cider vinegar (1 tablespoon ACV in 1 cup water) to balance pH and boost shine.
Boost Results with Complementary Treatments
Mix in Rosemary Essential Oil
Add 5 drops of rosemary essential oil per ½ cup of hibiscus oil. Studies show it performs comparably to minoxidil in promoting hair growth by increasing microcirculation and reducing inflammation.
Safety: Always dilute essential oils. Never apply undiluted.
Combine with Hibiscus Hair Masks
Enhance your routine with weekly DIY masks that work synergistically with the oil.
Hibiscus-Yogurt Protein Mask
• 4 tablespoons hibiscus tea (cooled) plus 8 tablespoons plain yogurt
• Apply for 30 minutes, then rinse
• Strengthens weak strands and reduces breakage
Anti-Dandruff Paste
• 3 tablespoons hibiscus powder plus 1 tablespoon fenugreek plus ¼ cup buttermilk
• Leave on scalp for 1 hour
• Fights flakiness and soothes irritation
Aloe-Hibiscus Smoothing Treatment
• Equal parts aloe vera gel and hibiscus tea
• Use after shampooing to reduce frizz and improve shine
• Refrigerate leftovers for up to 2 weeks
Freeze in ice cube trays for convenient single-use portions.
Avoid Common Mistakes
Do Not Use Too Much Oil
Over-application leads to greasy roots, clogged follicles, and flat hair. Start with 1 to 2 teaspoons for medium-length hair and adjust as needed.
Fine or oily hair? Use lighter oils like fractionated coconut or grapeseed instead of heavy castor blends.
Skip the Patch Test at Your Own Risk
Even natural ingredients can cause reactions.
- Apply a dime-sized amount behind your ear or on inner forearm.
- Wait 48 hours.
- Check for redness, itching, or swelling.
Stop immediately if irritation occurs.
Do Not Store in Clear Bottles or Warm Spots
UV light and heat degrade oils quickly.
• Always use dark glass bottles.
• Keep in a cool, dark place, not the bathroom. Humidity and temperature swings spoil oil faster.
Add vitamin E (0.5 to 1%) to act as a natural preservative.
Expect Results in 4 to 8 Weeks
Track These Improvements
With consistent use (2 to 3 times per week), look for these changes.
• Less shedding during washing and brushing
• Stronger strands that resist snapping
• Improved shine and softness
• Reduced dandruff and itchiness
• Visible thickening, especially near the crown or part line
Key Insight: Hair growth is cumulative. Stick with it for at least 6 weeks before judging effectiveness.
Final Tips for Best Outcomes
Massage Daily for Better Circulation
Even without oil, 5 minutes of daily scalp massage boosts blood flow and supports follicle health. Do it while watching TV or before bed.
Tool Option: Use a wooden comb or boar bristle brush to stimulate gently.
Be Patient with Light Hair
Blondes and grays should note that hibiscus may add warm tones or darken strands. Perform a strand test first. Apply oil to a small section and wait 24 hours to assess color change.
Minimize staining: Use lower concentrations or opt for leaf-only infusions (less pigment than flowers).
Know When to See a Professional
While hibiscus oil supports general hair health, it’s not a cure for medical conditions like androgenetic alopecia (genetic hair loss), thyroid-related thinning, or scalp infections or psoriasis.
Consult a dermatologist or trichologist if you’re losing hair rapidly, have patchy bald spots, or your scalp is inflamed, painful, or bleeding.
Note: Hibiscus oil complements medical treatments but doesn’t replace them.
Frequently Asked Questions About Making Hibiscus Oil for Hair Growth
What type of hibiscus is best for making hair oil?
Dried hibiscus flowers (Hibiscus sabdariffa or Hibiscus rosa-sinensis) are the most commonly used form for making hair oil. Both varieties work well, with flowers providing rich pigments and mucilage that condition hair and stimulate follicles. Hibiscus powder offers the strongest infusion due to its high surface area, making it ideal if you want maximum potency.
How long does homemade hibiscus oil last?
Properly stored hibiscus oil lasts up to 6 months in a cool, dark place. Use dark glass bottles (amber or cobalt) to protect from UV light degradation. Adding vitamin E oil (0.5 to 1%) as a preservative can extend shelf life. If you added water-based ingredients like aloe gel, refrigerate and use within 1 to 2 weeks.
Can hibiscus oil darken blonde or colored hair?
Yes, hibiscus contains natural pigments that can darken light-colored hair, including blonde, gray, or chemically treated hair. The effect may be temporary or permanent depending on your hair type and how often you use the oil. Always perform a strand test on a small section before full application to assess color change.
How often should I apply hibiscus oil for best results?
Apply hibiscus oil 2 to 3 times per week for treatments. For daily scalp stimulation, use a few drops as a leave-in serum (if your hair tolerates it without becoming greasy). Consistency is key. Most users see visible improvements in hair thickness and scalp health within 4 to 8 weeks of regular use.
What carrier oil is best for hibiscus hair oil?
A 50:50 blend of coconut oil and castor oil provides the best balance for hair growth. Coconut oil penetrates hair shafts to prevent protein loss and breakage, while castor oil (especially Jamaican black castor) stimulates follicles with its ricinoleic acid content. Add 5 drops of rosemary essential oil per ½ cup blend for enhanced circulation and growth support.
Key Takeaways for Making Hibiscus Oil for Hair Growth

Making hibiscus oil for hair growth at home is simple, affordable, and highly effective when done right. Start by choosing pure dried hibiscus flowers or powder, then select your carrier oil blend. A 50:50 mix of coconut and castor oil delivers the best results, with optional rosemary essential oil for added growth stimulation.
You have two preparation methods. The quick heat method takes 15 minutes and works well for heat-stable oils. The slow sun infusion method preserves more nutrients and takes 2 to 4 weeks. Both produce effective results, so choose based on your time and preferences.
Apply your finished oil through weekly hot oil treatments (30 minutes under a warm towel) plus daily scalp massages with a few drops. Prevent buildup by clarifying once weekly. Track your progress over 4 to 8 weeks. Most users notice reduced shedding, stronger strands, improved shine, and healthier scalps with consistent use.
Remember the safety basics. Always patch test before full application, strand test if you have light-colored hair, and store your oil properly in dark glass bottles. With the right ingredients, proper technique, and regular use, you can nourish your scalp, strengthen your hair, and support natural regrowth, all without harsh chemicals. Start small, be consistent, and enjoy healthier, fuller hair that shines from root to tip.