
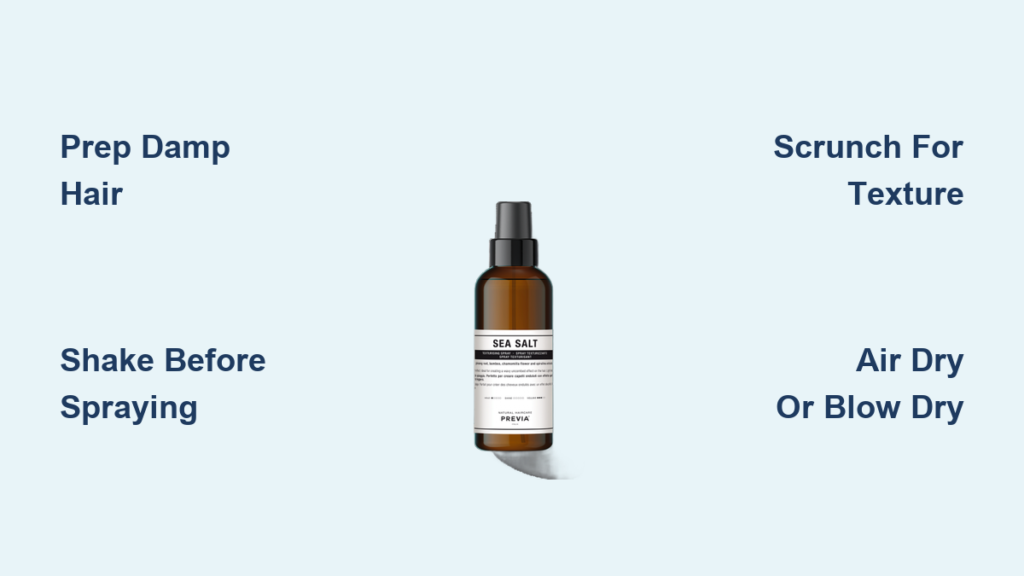
If you have straight hair and dream of effortless beachy waves, more volume, or just a little texture to break the monotony of flat, smooth strands, sea salt spray might be your new best friend. Designed to mimic the natural effects of ocean water, this lightweight styling product adds grit, lift, and movement without the stiffness or shine of heavier products. But to get the most out of it, especially on straight hair, you need the right technique.
Applying sea salt spray correctly transforms lifeless locks into dynamic, touchable styles with soft waves and enhanced body. Whether you’re aiming for tousled morning-after texture or a polished look with subtle definition, the key lies in preparation, application precision, and drying strategy. In this guide, you’ll learn exactly how to apply sea salt spray to straight hair for maximum volume, natural waves, and long-lasting texture without dryness, crunch, or flatness.
Prep Damp, Clean Hair Properly
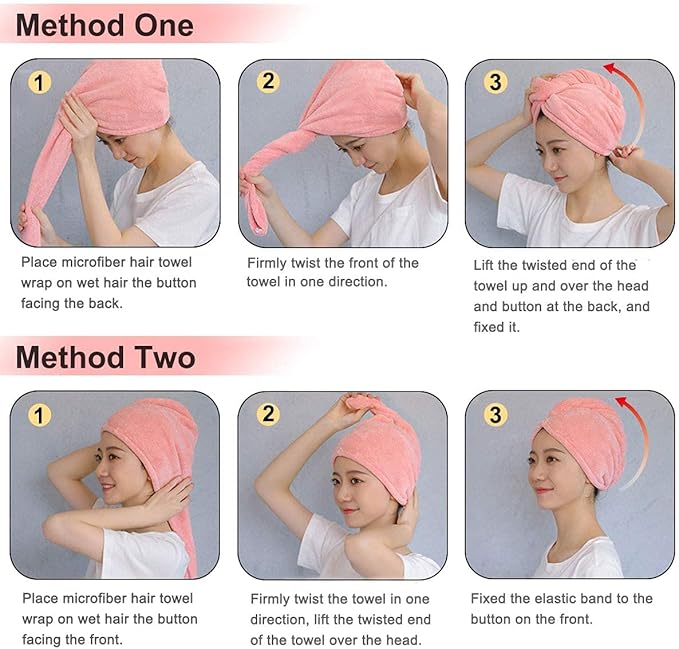
Before applying sea salt spray, your hair’s condition sets the foundation for success. The ideal canvas is slightly damp, freshly washed, or second-day hair, not soaking wet, not bone dry.
Start by washing with a lightweight shampoo that won’t weigh hair down. Avoid heavy conditioners, especially near the roots, as they reduce volume and prevent the salt from gripping the strands effectively. After rinsing, gently towel-dry using a microfiber towel, which is gentler than cotton and minimizes frizz and breakage.
Your goal: hair that feels damp to the touch but doesn’t drip when squeezed. This moisture level allows the sea salt spray to activate properly, encouraging wave formation without diluting the product.
Pro tip: Second- or third-day hair often works better than freshly washed hair. Natural oils protect against over-drying while still allowing texture to build.
Smooth Strands for Even Distribution
Tangled hair leads to uneven product spread and clumpy texture. Use your fingers or a wide-tooth comb to gently detangle from ends to roots before spraying.
This step ensures every strand receives the right amount of product and prevents knots from forming during drying. For straight hair with layers or bangs, pay extra attention to the underside and fringe areas, common spots where tangles hide and volume gets lost.
Shake and Spray Correctly

Always shake the bottle vigorously before use. Salt particles settle at the bottom, so shaking recombines them with the liquid base for consistent performance.
Hold the bottle 15 to 20 centimeters (6 to 8 inches) from your head and spray. For short to medium hair, use 3 to 5 sprays. For long or thick straight hair, use 6 to 10 sprays. Focus on the mid-lengths and roots, which builds volume and texture where straight hair needs it most. Avoid oversaturating the ends, which are already prone to dryness.
For layered cuts or styles with bangs, lift sections and spray underneath to add fullness throughout.
Warning: Start light. You can always add more, but too much sea salt spray causes stiffness, flakiness, and hard-to-manage hair.
Use the Right Amount at the Right Distance
The distance and amount matter more than most people realize. Holding the bottle too close creates concentrated spots that lead to crunchiness. Holding it too far means product sprays onto the air rather than your hair.
Start with the recommended range for your hair length and thickness. You can always add more product, but removing excess is nearly impossible once applied. This conservative approach prevents the white residue and stiffness that give away over-application.
Work Product Through Hair
Once sprayed, distribute the product evenly using your hands or a wide-tooth comb. This step is where the texture really begins to form.
For a messy, beachy look, scrunch upward with cupped hands while hair is still damp. This motion encourages natural wave formation and lifts roots for instant volume. For a neater, structured style, use a wide-tooth comb to smooth and spread the product uniformly. This method works well for textured quiffs, side parts, or soft pompadours.
Pay special attention to bangs or fringe. Working the product through this area prevents flatness and adds movement. You may see immediate texture or slight curling in front sections due to salt-induced strand clumping, which is a sign it’s working.
Choose Your Finish: Tousled or Controlled
The way you work the product through your hair determines your final look. Two approaches deliver distinctly different results.
The tousled method involves cupping your hands beneath sections of hair and gently pressing upward while slightly twisting. Repeat this motion throughout your hair, focusing on roots and mid-lengths. The result is that effortless, windswept beach look that appears natural and unstyled.
The controlled method uses a wide-tooth comb to distribute product evenly from roots to ends. This creates a more polished texture with subtle definition rather than pronounced waves. It’s ideal for professional settings or when you want texture without appearing overly styled.
Dry Strategically for Maximum Effect

How you dry your hair determines the final result. Two methods deliver distinct finishes, and choosing the right one depends on your desired outcome.
Air drying produces soft, natural waves with subtle texture. Let hair dry naturally without touching. This method creates that lived-in, effortless look perfect for low-maintenance days. Avoid frequent touching during drying to prevent frizz. Best for everyday wear and soft movement.
Blow drying offers defined volume and shape that lasts longer. Use a blow dryer with or without a diffuser attachment. Without a diffuser, lift roots with fingers while directing airflow upward. With a diffuser, scrunch sections as you dry to boost volume and refine waves. Angle the dryer upward, especially at the front hairline, for maximum lift.
Pro tip: Flip your head upside down during drying for salon-level root volume. This technique is a favorite among professional stylists for creating instant fullness.
Expert insight: Blow drying locks in the shape created during application, offering more control and longer-lasting style compared to air drying.
Air Dry vs. Blow Dry: Pick Your Style
Air drying works best when you want minimal intervention and natural movement. This method lets your hair form waves organically as it dries, resulting in softer texture that looks completely effortless. The tradeoff is less volume and less defined wave patterns.
Blow drying requires more effort but delivers superior results in terms of volume, wave definition, and style longevity. The heat helps set the texture while the airflow shapes the waves. This method is particularly effective for fine straight hair that tends to fall flat.
Final Touches for Polished Texture

After drying, refine your look with minimal intervention. Overworking your hair at this stage flattens the texture you just created.
Perform a three-part hand motion: side to up to down, gently scrunching sections to reactivate texture. Avoid brushing, as it flattens waves and kills volume. For added separation, lightly rake fingers through hair or use a texturizing spray.
If hair feels crunchy, apply 1 to 2 drops of argan, coconut, or jojoba oil. Rub between palms first, then glide over ends and mid-lengths. This softens the finish without weighing down the texture.
Bold tip: Use the smallest effective amount of sea salt spray. Less is more for a natural, touchable result.
Dosage by Hair Type
Matching your application to your specific hair type ensures optimal results without overdoing it.
For fine or short straight hair, use 2 to 4 sprays focused on roots and mid-lengths. For medium-length hair with average thickness, use 4 to 6 sprays with even distribution, including the underside. For long or thick straight hair, use 6 to 10 sprays with layered application and section lifting. For second-day refresh, use 1 to 3 sprays on roots only, focusing on re-scrunching flat areas.
User hack: Spritz a small amount into palms, rub together, then run through dry hair to refresh texture without over-saturating.
Avoid Common Mistakes
Even the best product fails with poor technique. Steer clear of these errors to get the most from your sea salt spray.
Applying to soaking wet hair dilutes salt and reduces effectiveness. Over-spraying causes stiffness, white residue, and difficulty styling. Using on greasy hair prevents absorption and kills volume. High-heat blow drying exacerbates dryness and salt crystallization. Brushing after drying flattens waves and removes texture. Ignoring the underside misses volume-building opportunities in layered cuts. Daily use without hydration increases risk of brittleness, especially in fine or color-treated hair.
Rule of thumb: Limit use to 2 to 3 times per week and pair with deep conditioning to maintain hair health.
Boost Performance Like a Pro
Take your sea salt spray game further with professional techniques that deliver salon-quality results at home.
Pairing with a diffuser increases volume by up to 30 percent compared to air drying alone. The wide, soft prongs distribute heat evenly while preserving curl formation. Layering with other products after sea salt spray dries adds a light mist of texturizing powder or dry shampoo to extend hold and boost grit, ideal for updos or braids.
Using directional airflow means aiming the dryer upward, especially at the front and sides, to create a lifted, dynamic silhouette. This technique is key for modern men’s styles and fringe-heavy cuts.
Maintaining hydration is essential because salt is naturally drying. Choose formulas with aloe vera, glycerin, or argan oil, or use a leave-in conditioner weekly to counteract dehydration. Clarifying regularly prevents mineral buildup, especially if you use sea salt spray frequently.
Barber insight (Danny Morgan, Goodfellas Barbershop): Spritz at various angles for multidimensional texture. It looks natural, even though it’s styled.
Stylist tip (Ash Mahoney, UK): I use sea salt spray as a finishing step to prep hair. It sets the style without relying on heavy products.
Know What’s in Your Spray
Not all sea salt sprays are created equal. Understanding ingredients helps you choose formulas that protect your hair while delivering texture.
Sea salt (sodium chloride) adds texture and grip as the primary texturizing agent. Magnesium sulfate enhances wave formation. Glycerin draws in moisture and balances dryness. Aloe vera and panthenol soothe the scalp and hydrate. Argan, coconut, or jojoba oil soften texture and prevent crunch. Hydrolyzed proteins strengthen hair. Algae extracts add nutrients and shine. Plant-based polymers provide light hold without stiffness.
Avoid sprays with high alcohol content, as they increase dryness. The ideal pH range is 5.0 to 6.5, which matches the natural scalp balance. Look for matte to natural finish with light to medium hold.
Customize for Your Hair Subtype
Fine, thick, color-treated, or oily hair each requires specific adjustments to get the best results.
For fine or thin straight hair, use 1 to 2 sprays and focus on mid-lengths. Avoid daily use to prevent breakage. For thick or coarse straight hair, you can tolerate more product. Apply to ends and scrunch or diffuse for best results. For color-treated straight hair, use 2 to 3 times per week and follow with moisturizing conditioner. Consider sulfate-free options. For oily straight hair, spray only on mid-lengths and ends. This helps absorb oil and adds volume without greasiness at the roots.
Real-world use: Oily types get volume without greasiness at the roots, perfect for second-day freshness.
Maintain Hair Health
Sea salt spray is powerful, but overuse risks dryness, brittleness, and breakage, especially in fine or damaged hair.
Protect your hair by hydrating weekly with a deep conditioner or hair mask. Rotate products by alternating with oil-based or cream texturizers. Trim regularly to prevent split ends worsened by dryness. Clarify every 7 to 10 days to remove salt and mineral buildup.
For storage, unopened bottles last 12 to 24 months. After opening, use within 6 to 12 months. Store in a cool, dry place away from sunlight. Clean the nozzle occasionally to prevent clogging.
Key Takeaways for Applying Sea Salt Spray to Straight Hair
Applying sea salt spray to straight hair is a method that transforms flat strands into dynamic, textured styles when done correctly. Start with clean, slightly damp or second-day hair for optimal results. Use 3 to 5 sprays for average length, adjusting based on your specific hair type and thickness.
Focus application on roots and mid-lengths rather than the ends, which are more prone to dryness. Scrunch or comb through depending on your desired finish, then dry strategically. Air drying creates soft, natural waves, while blow drying with a diffuser maximizes volume and definition. Finish with gentle scrunching and avoid brushing, which flattens waves and removes texture.
Less is more with sea salt spray. Prioritize technique over quantity for a natural, polished look. Hydrate regularly to prevent dryness, and limit use to 2 to 3 times per week. With the right approach, sea salt spray becomes a go-to tool for effortless volume, touchable texture, and beachy waves, even on the straightest hair.
Frequently Asked Questions About Applying Sea Salt Spray to Straight Hair
Can I use sea salt spray on naturally straight hair?
Yes, sea salt spray works particularly well on straight hair. It adds the texture, volume, and subtle wave formation that straight hair naturally lacks. The key is applying it to damp hair and using the right technique for your desired finish.
How often should I apply sea salt spray to straight hair?
Limit use to 2 to 3 times per week. Daily application can lead to dryness, brittleness, and breakage, especially in fine or color-treated hair. Always follow with moisturizing conditioner or a weekly deep conditioning treatment.
Will sea salt spray make my hair crunchy?
Crunchiness occurs when you apply too much product or do not scrunch it through properly. Start with a small amount, and always work the product through your hair using your hands or a wide-tooth comb. If crunchiness appears, apply a few drops of argan or coconut oil to soften the texture.
Can I apply sea salt spray to dry hair?
Yes, you can apply sea salt spray to dry hair for a quick texture refresh. Use 1 to 2 sprays, then scrunch or tousle with your fingers. This works well for reviving second-day hair or adding grit for updos and braids.
Does sea salt spray work on fine thin hair?
Sea salt spray can benefit fine, thin hair when used sparingly. Use only 1 to 2 sprays focused on the mid-lengths, and avoid daily use. The spray adds volume and makes hair appear fuller by lifting roots and creating texture that adds body.
How long does sea salt spray texture last?
Volume and texture typically last until your next wash. Defined waves last 1 to 2 days depending on your hair type and environment. You can refresh the texture with light reapplication on dry hair.



