
You’ve seen the results in salon windows and on your favorite influencers: smooth, voluminous hair with a natural shine that seems impossible to achieve at home. The secret is not an expensive salon visit or magic product. It’s learning how to use a round brush hair dryer correctly. This versatile tool combines drying and styling into one seamless process, lifting roots, smoothing frizz, and creating soft bends or flips at the ends.
This guide covers everything you need to know about using a round brush hair dryer, whether you own an all-in-one hot air brush or prefer the two-tool method with a separate blow dryer. You’ll learn proper sectioning, the correct tension to maintain, which products to apply, and how to customize your technique for your specific hair type.
Selecting the Right Round Brush Size for Your Hair
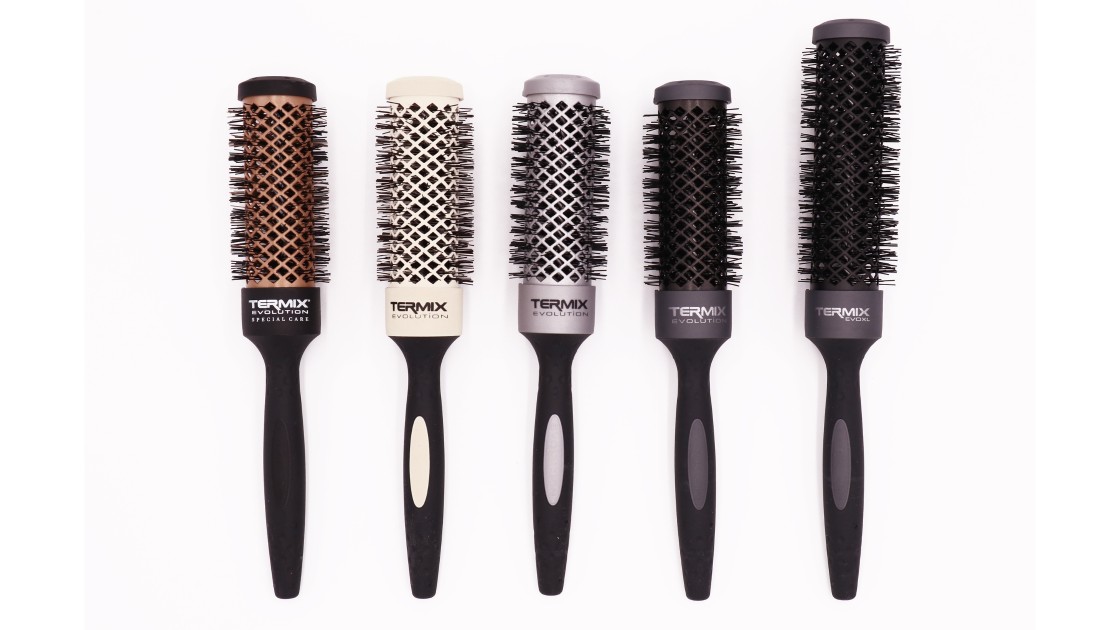
The brush diameter you choose directly impacts your final style. Picking the wrong size leads to flat results or curls that don’t match your vision.
Matching Brush Diameter to Hair Length
Your brush size determines the final style outcome. Consider these options:
• 1 to 1.5 inch brushes: Best for short to chin-length hair. Creates tight curls and strong root lift.
• 2 inch brushes: Ideal for shoulder-length or longer hair. Delivers natural volume and soft waves.
• 3 inch or larger brushes: Perfect for long, straight styles with subtle bends and maximum smoothness.
Larger barrels create looser waves and more volume. Smaller barrels produce tighter curls and stronger root lift. Choose based on your hair length and the style you want to achieve.
Preparing Your Hair with Heat Protection
Starting with properly prepped hair is the difference between a professional finish and a frizzy disaster. Never apply heat to soaking wet strands, as this causes steam damage and unwanted puffiness.
Essential Products to Apply First
Begin with damp, towel-dried hair that is 75 to 80 percent dry. Apply products in this specific order:
- Heat protectant spray is non-negotiable. Use It’s a 10 Miracle Leave-In, Redken Acidic Bonding, or L’Oréal SLEEK IT Heatspray. Spray evenly from roots to ends to shield hair from temperatures over 300 degrees Fahrenheit.
- Volumizing mousse adds lift at the roots. Apply Kenra Platinum Thickening Mousse or L’Oréal BOOST IT Spray at roots and mid-lengths.
- Root-lifting spray targets stubborn flatness. Try TIGI Catwalk Root Boost for additional texture at the crown.
Product is your friend. Mousse or root spray helps keep the volume you’re adding with a round brush.
Sectioning Hair for Even Styling Results
Unsectioned hair leads to uneven drying, poor tension, and visible style lines. This step is where many beginners go wrong, and fixing it transforms your results immediately.
The Clip Method for Manageable Sections
Divide your hair into 3 to 4 manageable sections using clips. Follow this method:
• Clip the top half (ear-to-ear) out of the way.
• Split the bottom layer into left and right sections.
• Work in 1 to 2 inch subsections for precision styling.
Sectioning ensures consistent heat exposure, full root lift, and professional results. Always work from bottom to top to avoid flattening previously styled layers.
Mastering the Two-Tool Method
Using a separate blow dryer and thermal round brush gives you more control than all-in-one devices, though it requires better coordination. This method produces superior results for fine or frizz-prone hair.
Proper Tool Positioning and Grip
Hold your tools in opposite hands for maximum control. Your dominant hand operates the blow dryer with the concentrator nozzle attached. Your other hand holds the round brush, such as the Olivia Garden 2 inch Ceramic+Ion Brush. Keep the dryer 1 to 2 inches from the brush to direct airflow along the hair shaft without causing heat damage.
The Roly Poly Technique for Smooth Results
This fundamental move creates that coveted salon blowout finish:
- Place a 1 to 2 inch section around the brush, starting at the ends.
- Slowly roll the brush downward from scalp to tip, maintaining consistent tension.
- Rotate the brush gently in your fingers with a back and forth motion for extra smoothness.
- Direct hot air along the same path the brush is traveling.
- Finish with a 5-second cool shot to lock in shine.
Hair should glide smoothly off the brush with no snagging or puffiness. If you notice resistance, check your tension and ensure the section isn’t too large.
Creating Maximum Volume at the Roots
Flat roots ruin otherwise perfect styles. To fix this:
• At the crown and hairline, tilt the brush upward and away from the scalp.
• Hold the position for 10 to 20 seconds with warm air directed at the roots.
• Seal with cool air for 5 to 10 seconds to set the volume.
Tension is key. Never release the section until it is fully dry, or your volume will collapse immediately.
Using an All-in-One Hot Air Brush
Devices like the Revlon One-Step, Shark FlexStyle, or Dyson Airwrap integrate dryer and brush into one tool. This approach is perfect for beginners or those with wrist limitations. However, these tools require different techniques than traditional blow drying.
Starting with Properly Damp Hair
Towel-dry or rough-dry your hair upside down for 2 to 3 minutes until it reaches 75 percent dry. Never start with soaking wet hair, as this creates excessive frizz and extends your styling time dramatically.
Wrapping and Drying Technique
Select medium heat for medium hair, low for fine hair, and high for thick hair. Place the brush at the ends of a 1 to 2 inch section, then roll upward toward the scalp, wrapping hair around the barrel. Maintain firm tension throughout. Once you reach the root, hold for 10 to 20 seconds with heat, then activate the cool shot and hold for 5 to 10 seconds to set the style.
Releasing Hair Without Losing Volume
Choose one of these release methods:
Cool shot unwind provides the best hold. Keep cool air running while you slowly unravel the brush downward without tugging.
Twisting release creates a softer curl. Twist the brush downward while applying warm air, then cool set and unravel by twisting rather than pulling.
Fixing Common Beginner Mistakes
Even with the right tools and technique, certain errors sabotage your results. Recognizing and correcting these mistakes accelerates your learning curve significantly.
Quick Fixes for Frequent Problems
| Problem | Solution |
|---|---|
| Skipping heat protectant | Always apply before styling to prevent split ends and breakage |
| Using high heat on fine hair | Switch to low-medium settings to avoid frizz |
| Releasing tension too soon | Hold until fully dry for lasting volume |
| Not sectioning properly | Clip hair and work bottom-up to avoid flattening |
| Holding dryer too close | Keep 1 to 2 inches away to prevent damage |
Practice consistently. Mastery typically takes 3 to 5 attempts. Most users report that their first few tries produce disappointing results, but persistence pays off.
Customizing Your Technique by Hair Type

Your hair’s unique texture and thickness require adjustments to the standard technique. What works for fine hair may damage thick hair, and vice versa.
Adjusting for Fine or Flyaway-Prone Hair
Fine hair needs gentler treatment. Use low heat settings and tools with ionic technology to reduce static. Avoid heavy serums before styling, as they weigh down delicate strands. Finish with flexible-hold hairspray like Elnett Satin for touchable volume that doesn’t crunch.
Handling Thick or Coarse Hair
Thick hair can handle higher heat and requires larger brushes, typically 2 to 3 inches in diameter. Apply mousse generously for control, and dry in smaller sections to ensure even results throughout.
Taming Curly or Frizz-Prone Hair
Curly hair benefits from ceramic plus ionic brush technology, which distributes heat evenly while reducing static. Apply anti-humidity treatment like Color Wow Dream Coat twice weekly. Finish each section with a cool shot to smooth the cuticle and lock in shine.
Sealing Your Style for All-Day Hold
The finishing products you apply determine how long your blowout lasts. Skip this step, and your hard work fades by midday.
Products That Lock In Your Blowout
Apply a drop of smoothing serum to your ends, such as L’Oréal EverSleek Oil-In-Serum. For root refreshment between washes, use volumizing powder like Beyond the Zone Volumizing Powder. Set everything with a high-shine hairspray like L’Oréal Elnett Precious Oil, Aveda Air Control, or unscented Elnett Extra Strong.
Mist a high-shine formula over your strands to lock in sleekness and extend your style’s lifespan to 2 days or more.
Cleaning and Maintaining Your Round Brush Hair Dryer
Regular maintenance extends your tool’s lifespan and ensures consistent performance. Neglected tools lose airflow and heat distribution efficiency.
Routine Care Schedule
After each use, unplug the tool and let it cool completely. Wipe the bristles with a damp cloth to remove product residue. Weekly, remove tangled hair from bristles using a comb or tweezers, and clean the air intake filter to maintain proper airflow. Monthly, disinfect with rubbing alcohol applied to a cloth, but never submerge the tool in water.
Store your tool in a cool, dry place. Avoid wrapping the cord tightly around the device, as this damages the wires over time.
Troubleshooting Style Problems in Real Time
When your blowout isn’t turning out right, identify the cause quickly and adjust your technique immediately.
Common Issues and Solutions
No volume at roots? You are likely releasing tension too early or skipping the root hold step. Fix this by holding the brush at the scalp for 15 seconds with heat, then cooling for 10 seconds to set.
Frizz or puffiness? Too much heat, skipped cool shots, or lack of ionic technology causes this. Lower your heat setting, use cool air finish on every section, and apply anti-humidity products.
Hair sticking or snagging? Product buildup on bristles or tangled hair creates this problem. Clean your brush weekly and always detangle before styling.
Uneven results? Rushing through sections or skipping areas causes inconsistent styling. Work systematically in small subsections from bottom to top.
Speeding Up Your Learning Curve
Everyone struggles at first. These resources help you master the technique faster.
Resources for Faster Mastery
Watch video tutorials from Moriah Seabrook on YouTube for step-by-step blowout guidance. The Blowout Professor teaches both hot brush and two-tool methods effectively. Schedule a session at a cosmetology school, where students provide blowouts for $25 to 30 and can demonstrate techniques while you observe.
Ask your stylist to teach you during regular appointments. Many are happy to walk you through the process if you bring your own tools.
Expect a learning curve of 1 to 2 weeks before you achieve consistent results. Practice regularly, and don’t get discouraged by early attempts.
Frequently Asked Questions About Round Brush Hair Dryers
Can I use a round brush hair dryer on all hair types?
Yes, you can use this tool on all hair types by adjusting heat settings and barrel size accordingly. Fine or thin hair works best with low to medium heat and a 1 to 1.5 inch barrel. Thick or coarse hair handles high heat with a 2 to 3 inch barrel. Curly hair benefits from medium heat and a ceramic barrel for smoothing. Damaged or color-treated hair should use low heat with cool shot finishing.
Is a round brush hair dryer better than a flat iron or traditional blow dryer?
A round brush hair dryer is less damaging than a flat iron while adding volume that flat irons cannot create. Compared to a traditional dryer plus separate brush, round brush dryers are faster and more convenient for beginners but offer less precise control. Many users achieve better results with the two-tool method, especially for fine or frizz-prone hair.
How often should I clean my round brush hair dryer?
Clean your tool daily by removing loose hair from bristles. Perform a deep clean weekly by washing bristles and cleaning the filter. Wipe down the tool after heavy product use to prevent buildup that affects performance.
Do I need additional tools with a round brush hair dryer?
While not required, additional tools enhance your results. Velcro rollers add extra volume when set before blow drying. Root crimpers create long-lasting lift at the crown. Mousses, sprays, and serums improve texture and extend hold. These extras are optional but helpful for achieving your ideal style.
Key Takeaways for Using a Round Brush Hair Dryer
Successfully using a round brush hair dryer transforms your hair by adding volume and shine while reducing frizz and flatness. Whether you use an all-in-one hot air brush or the two-tool method with a separate blow dryer, your success depends on four critical factors.
First, proper sectioning ensures consistent heat exposure and full root lift. Second, maintaining consistent tension throughout each section prevents flat results. Third, always apply heat protection products before styling to prevent damage. Fourth, use the cool shot to set every section, locking in shine and extending your style’s lifespan.
With practice, you’ll achieve salon-quality blowouts at home in under 15 minutes. Start tonight by sectioning your hair, applying your heat protectant, and working through each section methodically. Your new voluminous, shiny hair is worth the effort.


