

You don’t need a curling iron to achieve bouncy, salon-quality waves. Your blow dryer can create soft, natural-looking curls while adding volume and reducing direct heat damage. This technique works for every hair type, from fine and straight to thick and curly, and transforms damp hair into defined waves in just minutes. This guide walks you through every step from product application to finishing touches so you get flawless results every time.
Learning how to curl hair with a blow dryer opens up a world of styling possibilities. It saves money on salon visits, protects your hair from excessive heat exposure, and gives you complete control over curl size and wave pattern. Whether you want tight curls, loose beachy waves, or voluminous blowout waves, your blow dryer and the right technique can deliver all three.
Prep Hair for Heat Styling
Proper preparation determines your final result. Skipping these steps leads to frizz, flat curls, and long-term hair damage.
Towel-Dry to the Right Moisture Level
Start with freshly washed, conditioned hair. Use a microfiber towel to gently blot excess water, never rub. Your hair should feel damp but not dripping wet before you begin styling.
The ideal moisture level is 70 to 85 percent dry. Hair below 70 percent dry takes too long to style and produces weak curls that fall out quickly. Hair above 85 percent dry is already too dry to shape properly and will resist curl formation. This moisture sweet spot gives you optimal control during the blow-drying process.
Apply Heat Protectant Every Time
Heat protectant is non-negotiable. It forms a protective barrier around the hair shaft, preventing split ends, breakage, and moisture loss from direct heat exposure.
Apply heat protectant from mid-lengths to ends, or throughout the entire length if you have thick or coarse hair. Hold the bottle eight to ten inches away for even coverage without weighing hair down. Wait one to two minutes before styling to allow the product to fully absorb.
Layer Styling Products for Hold and Shine
The right product combination enhances curl memory, adds volume, and creates shine without crunch or greasiness.
Start with Volumizing Mousse
Mousse builds body and helps curls hold longer throughout the day. Apply a golf ball-sized amount to medium or thick hair, or half that amount for fine hair. Distribute evenly using your fingers or a wide-tooth comb. Flip your head upside down and apply at the roots for maximum lift.
Add Lightweight Styling Cream
Apply styling cream to mid-lengths and ends for elasticity and smoothness. Avoid heavy creams that flatten roots or weigh down curls. A lightweight formula fights frizz while maintaining bounce.
Finish with Serum on Ends Only
Apply a pea-sized amount of serum or oil to your ends only. Rub it between your palms and smooth over the tips to add shine and prevent dryness. Never apply oil or serum to your roots, as this weighs down curls and creates greasiness at the scalp.
Choose the Right Tools
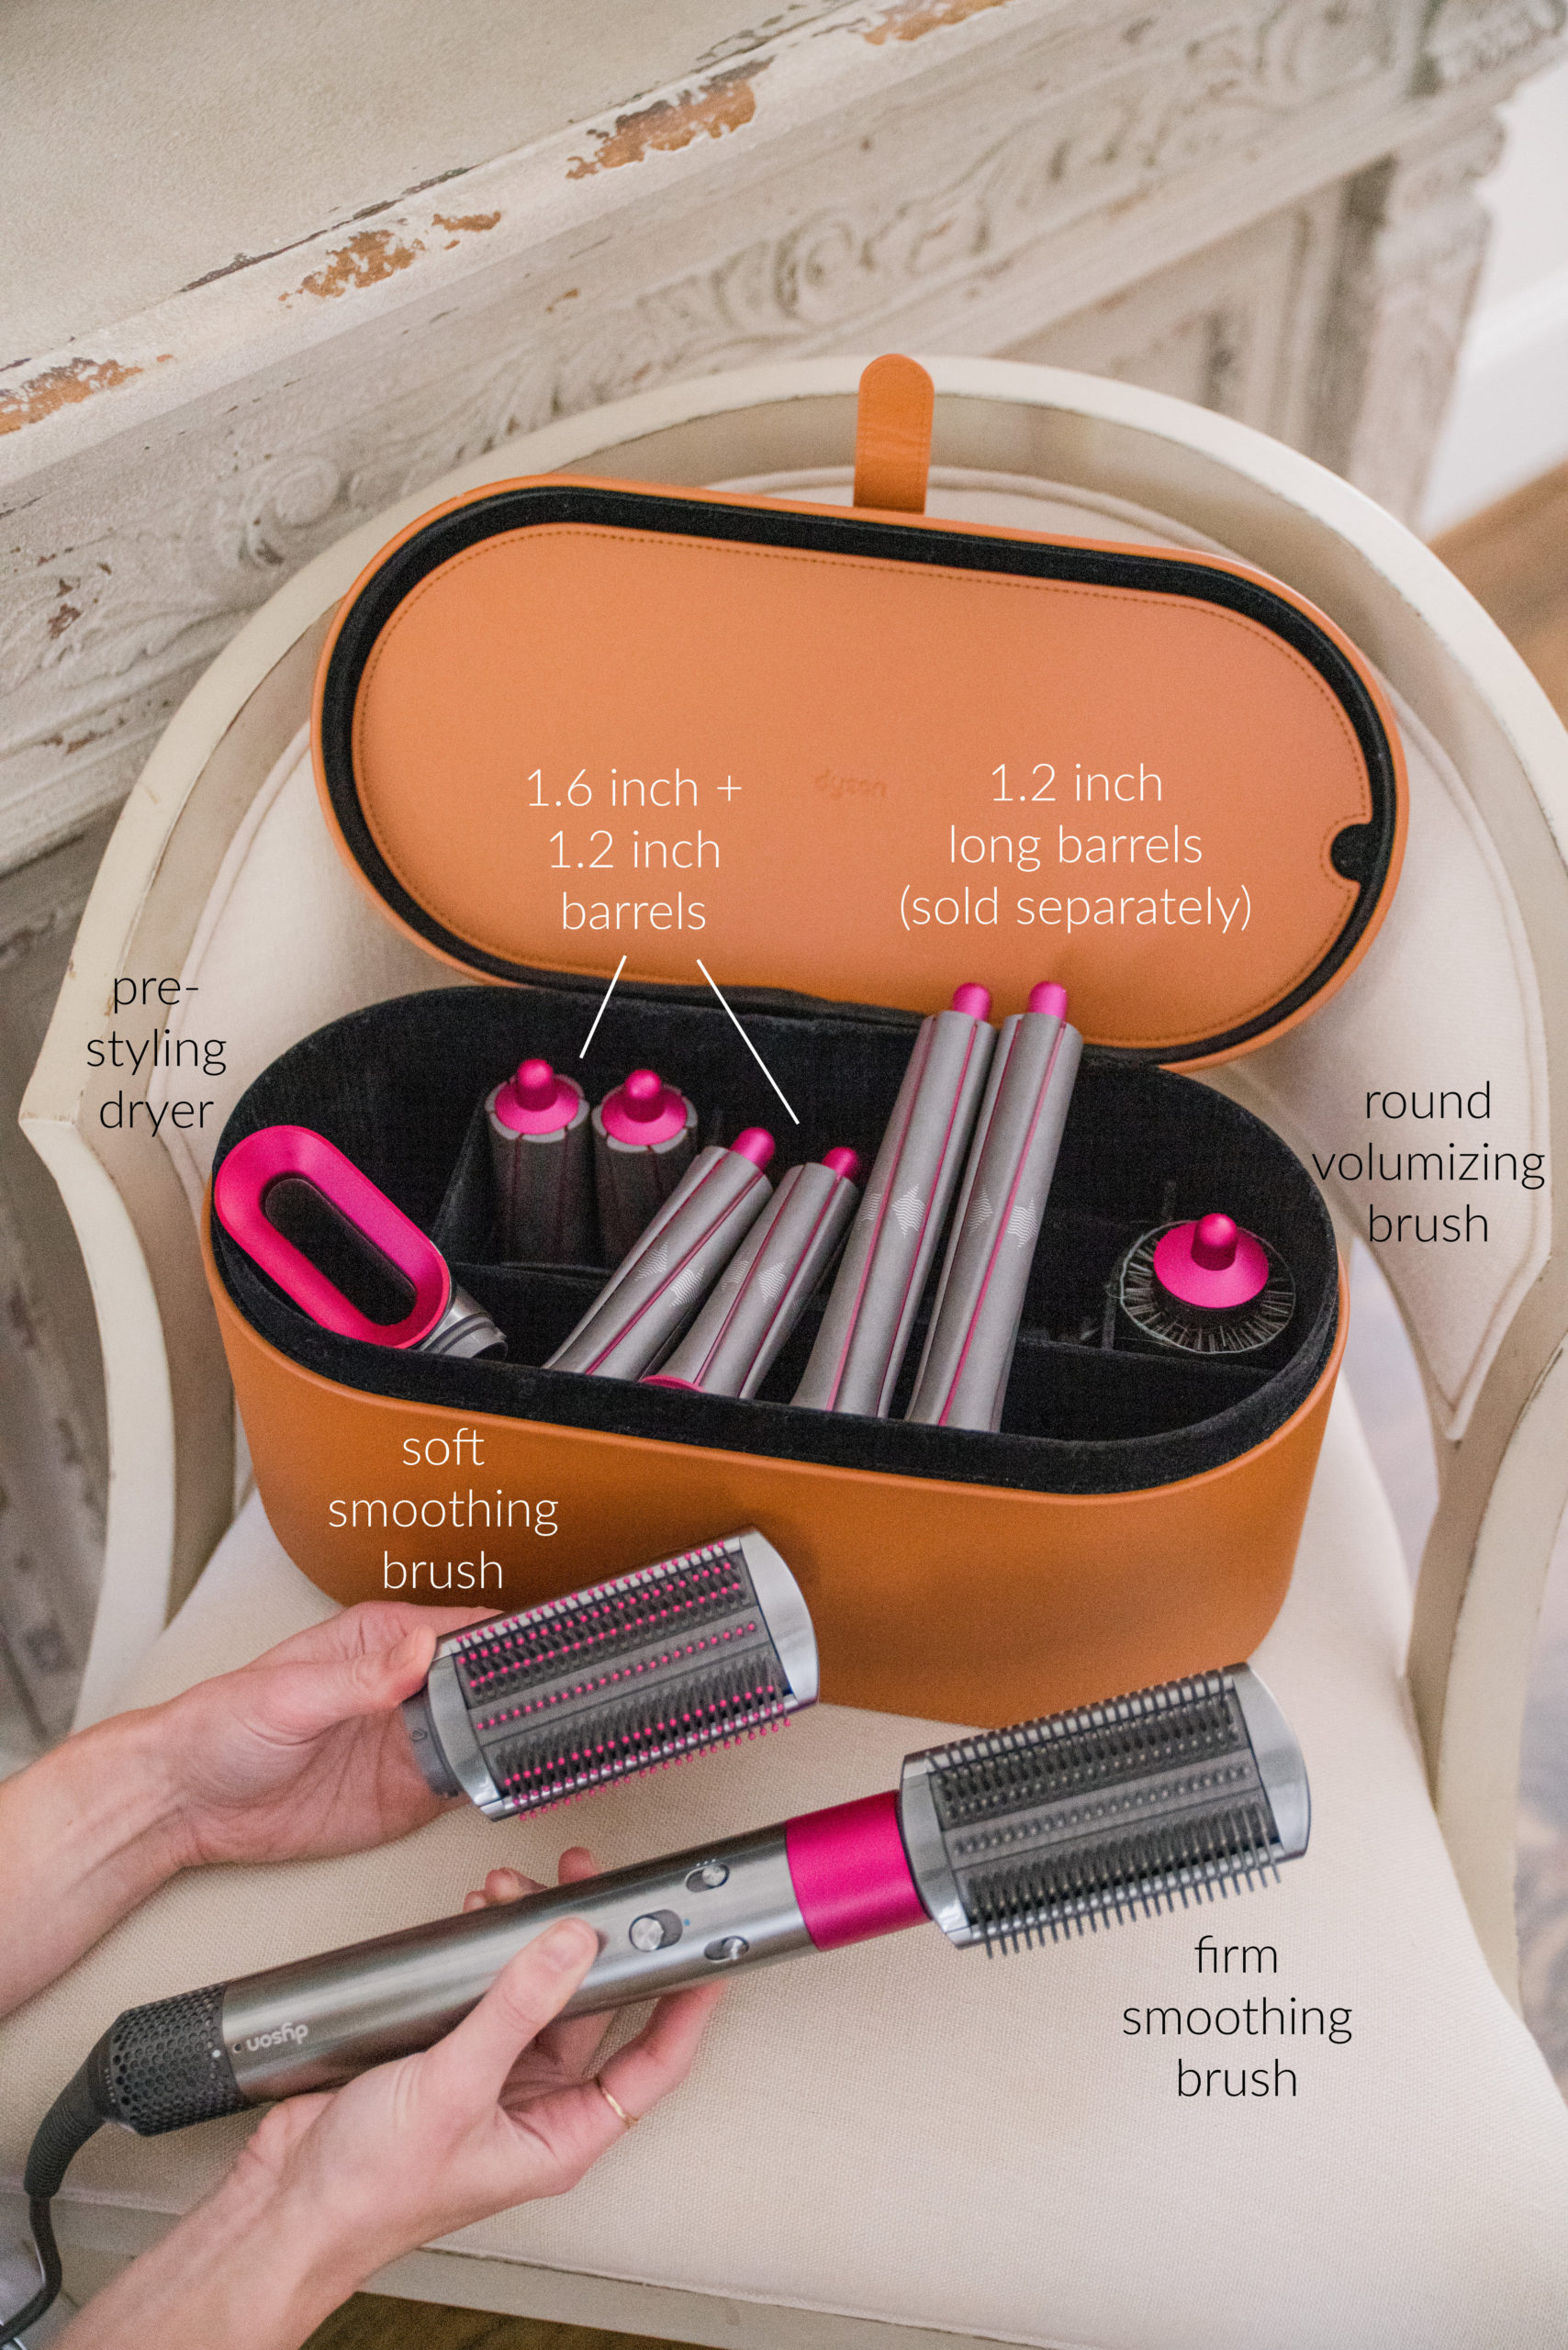
Your tools make or break the curling process. Quality equipment gives you better control, faster drying, and healthier hair overall.
Select a Powerful Blow Dryer
Look for a blow dryer with at least 1800 watts. Use 2000 watts or more if you have thick or coarse hair. Essential features include adjustable heat and speed settings, a cool shot button for setting curls, ionic technology to reduce frizz, and a concentrator nozzle for precise airflow.
Top recommendations include the Dyson Airwrap, Cloud9 Airshop Pro, or a professional dryer from Sally’s Beauty Supply. A diffuser is not needed for brush curling, so save that attachment for air-drying natural curls.
Pick the Correct Round Brush
Brush size determines curl tightness and volume. A 25 millimeter brush creates tight curls best suited for short to mid-lengths and fine hair. A 35 millimeter brush produces loose waves ideal for long, thick hair. A 50 millimeter or larger brush creates beachy waves perfect for straight, long hair.
Choose brushes with ceramic or ionic barrels for even heat distribution and shine. Boar bristle combined with nylon bristles provides the best tension and smoothing. Look for air vents in the barrel to speed up internal drying, which is critical for setting curls properly.
Section Hair for Even Curls
Proper sectioning prevents missed spots and ensures every strand gets proper heat and tension.
Divide Into Horizontal Layers
Split your hair into three to four horizontal sections. Start with the bottom layer at the nape, then move to the middle layer, and finish with the top layer at the crown. Clip each section up with alligator clips. Always work from bottom to top so your styled curls are not disturbed by later styling.
Isolate Face-Framing Sections
Take a small front section from temple to ear on each side. Wrap these sections tightly around a smaller brush for soft definition that frames your face. These sections deserve extra attention because they are most visible.
Keep Sections Narrow
Each section should be smaller than your brush’s bristle area. Fine hair can use slightly wider sections, but thick or coarse hair needs thinner sections for full drying and control. The smaller the section, the tighter and more defined the curl.
Curl with a Round Brush
This technique creates polished, bouncy waves with a professional blowout look.
Wrap Hair Around the Brush
Take a section and place the round brush vertically behind the strand. Wrap the hair around the brush from the ends up to the roots. Hold the brush stationary at the scalp while drying. Movement during drying causes uneven results and frizz.
Dry Roots First for Volume
Direct hot air at the roots for ten to fifteen seconds. Keep the dryer six to eight inches away and move it slightly to avoid hot spots. This root-focused drying sets lift and prevents flat, lifeless volume.
Glide Down After Drying
Once the roots are 80 percent dry, slowly glide the brush down while continuing to blow-dry. Maintain tension on the hair to keep it smooth. Dry until completely dry before releasing the curl.
Cool Before Releasing
Leave the curl wrapped on the brush and press the cool shot button for ten seconds. Alternatively, let it cool for five minutes to lock in the shape. Releasing too soon causes curls to fall out fast.
Create Beachy Waves with Fingers
For a relaxed, textured look, skip the brush entirely and use your fingers.
Twist Damp Hair
Blow-dry hair to 85 percent dry, focusing on the roots first. Take medium-sized sections and twist them away from your face. Hold the twist and apply hot air for one to two minutes.
Redry Multiple Times
Twists trap moisture inside the hair shaft. Retwist and re-dry each section two to three times to ensure full drying and better curl hold.
Cool and Separate Gently
Let twists cool completely before releasing. Use the cool shot button to speed up the cooling process. Unravel the twists with your fingers only, never with a brush. Finish with sea salt spray or spray wax on the ends for added definition.
Set Curls with the Pin Curl Method
For maximum hold and volume, especially for events or humid days, use the pin curl technique.
Roll and Pin After Drying
After blow-drying a section to 80 percent dry, wrap it fully on the brush. Apply hot air briefly, then use the cool shot. Unwrap the curl and re-roll it on your fingers, then pin it close to the scalp like a traditional pin curl.
Let Cool Completely
Leave pinned for five to ten minutes or longer. This cool-down phase sets the curl memory and doubles wear time in humid conditions. This technique is known among stylists as the pink girl finish for its durability.
Release and Shake
Remove pins gently and shake out curls with your fingers for a bouncy, voluminous result. Set with a flexible-hold hairspray to maintain movement without stiffness.
Control Heat and Airflow
Mastering temperature and airflow creates healthy, long-lasting curls.
Use Medium to High Heat
Start with medium or high heat to dry efficiently. Keep the dryer moving constantly, never holding it in one spot. Direct heat from root to tip in smooth motions.
Never Skip the Cool Shot
After drying each section, press the cool shot button for five to ten seconds. This contracts the hair shaft around the curl form and locks in the shape. Users who use the cool shot report 30 to 50 percent longer curl retention.
Style Top Sections for Volume
The crown area defines your overall silhouette. Do not skip volume-building techniques on these sections.
Pull Upward Not Back
When styling top front sections, wrap the hair around the brush and pull upward and outward. Direct heat at the root while lifting to create natural crown lift and fullness.
Cool Before Re-Brushing
Let the section cool completely while still wrapped on the brush. Then gently re-brush or finger-fluff to expand volume without losing the curl shape.
Finish with Final Touches
The last steps refine your look and ensure all-day wear.
Let All Curls Rest
After styling all sections, pin curls in place and allow a five-minute rest period for full cooling and stabilization.
Unpin and Brush Lightly
Use your round brush to unpin and lightly brush through curls. Brush in the direction of the original wrap to maintain the wave pattern. Avoid aggressive brushing which causes frizz.
Finger-Style for Softness
Use your fingers to twist and reshape curls, blending sections seamlessly. Finger-styling removes stiffness and adds natural movement.
Define Your Part
Choose an off-center part for a modern look. Sweep hair away from the face with your brush for soft framing.
Avoid Common Mistakes
Small errors ruin your curling results. Here is how to prevent them.
Do Not Start Too Wet
Wet hair stretches and loses shape. Always towel-dry to 70 to 85 percent before styling.
Never Skip Heat Protectant
Direct heat without protection leads to breakage and split ends. Apply heat protectant every time without exception.
Keep Brush Stationary While Drying
Moving the brush mid-dry causes kinks and frizz. Hold the brush still and only glide after the section is fully dry.
Wait Before Releasing Curls
Releasing too soon equals flat hair that falls out within hours. Cool for five minutes or use the cool shot before unwrapping.
Use Less Product
Too much mousse or serum weighs hair down and creates greasiness. Layer products lightly and add more only if needed.
Adapt for Your Hair Type

Customize the method based on your specific texture.
Fine or Thin Hair
Use lightweight mousse and a small 25 millimeter brush. Focus on root drying for lift and avoid oils at the roots.
Thick or Coarse Hair
Use strong-hold mousse and section hair finely. Try the pin curl method for durability and use a wider 35 to 50 millimeter brush for manageability.
Wavy or Curly Hair
Enhance your natural texture with curl cream. Use your fingers or a diffuser to predry, then refine with the blow dryer.
Straight Hair
Straight hair needs more product for hold. Use a full round brush wrap with the concentrator nozzle for best results.
Compare Blow Dryer vs Curling Iron
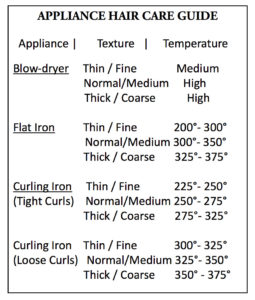
| Feature | Blow Dryer | Curling Iron |
|---|---|---|
| Heat Exposure | Lower, indirect | High, direct |
| Curl Type | Soft, natural waves | Tight, uniform |
| Volume | Adds fullness | Flat at roots |
| Styling Time | 20 to 45 minutes | 15 to 30 minutes |
| Longevity | 1 to 2 days | 1 day |
| Damage Risk | Lower | Higher with daily use |
The blow dryer method is best for daily wear, volume, and long-term hair health. Curling irons excel at precision and creating tight, uniform curls for special occasions.
Maintain Tools and Hair Health
Keep your routine sustainable with proper care.
Clean Your Brush Weekly
Remove hair and product buildup from your brush regularly. Wash with mild shampoo, rinse thoroughly, and air-dry completely.
Replace Worn Tools
Replace brushes every six to twelve months when bristles loosen. Professional blow dryers last two to three years with proper care.
Deep Condition Weekly
Counteract heat exposure with a hydrating mask once a week. Use products like Biolage Deep Recovery Mask or Olaplex No. 3 to maintain moisture balance.
Frequently Asked Questions About Curling Hair with a Blow Dryer
Can you curl hair with just a blow dryer?
Yes, you can curl hair using only a blow dryer and a round brush. This technique creates soft, natural-looking waves with more volume than a curling iron. It also causes less heat damage because the heat is indirect rather than direct.
What brush is best for curling hair with a blow dryer?
A round brush with ceramic or ionic barrels works best. Use a 25 millimeter brush for tight curls, a 35 millimeter brush for loose waves, and a 50 millimeter or larger brush for beachy waves. Choose brushes with air vents for faster drying.
Does curling hair with a blow dryer damage it less than a curling iron?
Yes, blow dryer curling causes less damage. The indirect heat application is gentler on the hair shaft compared to the direct high heat from a curling iron. Using a heat protectant further reduces damage risk.
How long do blow dryer curls last?
Blow dryer curls typically last one to two days with proper technique and product use. Using the cool shot, pinning curls while cooling, and applying flexible-hold hairspray extends the lifespan significantly.
Why do my curls fall out immediately?
Curls fall out when released before cooling completely. Make sure to use the cool shot for ten seconds or let curls cool for five minutes before unwrapping. Also ensure your hair is 70 to 85 percent dry before styling.
Can I curl short hair with a blow dryer?
Yes, short hair curls well with a blow dryer. Focus on root volume and use a small 25 millimeter brush for tight definition. Create flicked ends by wrapping the brush horizontally at the tips.
Final Thoughts on Mastering Blow Dryer Curls
Curling hair with a blow dryer is a healthier, more versatile alternative to curling irons. The key lies in proper preparation, using the right tools, and taking time to cool each section before releasing. Start with 70 to 85 percent dry hair, always apply heat protectant, and never skip the cool shot. Practice the round brush technique first before moving to finger twisting or pin curls. With repetition, your speed and results will improve dramatically. You will get soft, voluminous waves that last all day while protecting your hair from excessive heat damage.



