
If you have curly hair, you know the struggle: air-drying takes forever, but using a blow dryer risks frizz, puffiness, and losing your curl pattern. The good news is you can dry curly hair with a blow dryer and keep it bouncy, defined, and frizz-free if you do it the right way. The key lies in technique, tools, and timing. By using a diffuser, applying heat protectant, drying in sections, and stopping before 100% dryness, you can cut drying time in half without sacrificing curl integrity. This guide reveals the professional-approved method for blow drying curly hair, packed with science-backed product recommendations, step-by-step diffusing techniques, and real-user tips that deliver results.
Prep Hair for Heat Styling
Before any heat touches your curls, proper preparation is non-negotiable. Skipping prep leads to frizz, breakage, and dullness. The foundation of healthy blow-dried curls starts in the shower and continues through post-wash treatment.
Choose Curl-Friendly Cleansers
Use sulfate-free shampoos and rich conditioners tailored to your curl type. Stripping formulas disrupt moisture balance, making curls more vulnerable to heat damage.
Fine or Medium Curls
* Opt for lightweight options like NutriCurls Micellar Shampoo and Detangling Conditioner. These cleanse without weighing down waves.
Thick, Coarse, or Damaged Curls
* Reach for bond-rebuilding formulas like ULTIMATE REPAIR Shampoo and Conditioner. They reinforce weakened hair fibers and retain moisture under heat.
For extra hydration, co-wash with a cleansing conditioner like NutriCurls Cleansing Conditioner, especially between shampoos.
Detangle with Care
Always detangle while hair is wet and coated in conditioner.
- Start from the ends, working upward in small sections.
- Use fingertips or a wide-tooth comb. Never use a brush.
- Keep hair slick with product to prevent snagging and breakage.
Detangling before styling ensures even product distribution and smooth airflow during drying.
Blot, Do Not Rub
After washing, gently remove excess water.
- Use a microfiber towel or soft cotton t-shirt.
- Never rub. This roughs up the cuticle and causes frizz.
- Instead, press and blot to absorb moisture while preserving curl clumps.
Studies show microfiber towels reduce frizz by up to 70% compared to regular cotton towels.
Apply Protective and Styling Products
Heat styling demands defense. Without protection, blow drying can strip moisture and weaken curls. Layering the right products ensures your hair stays strong, shiny, and defined.
Use a Heat Protectant
This step is non-negotiable.
- Apply EIMI Thermal Image or a similar spray evenly from root to tip before any other product.
- It creates a shield against thermal damage, reducing moisture loss and preserving cuticle health.
- Works best when applied to damp, not soaking wet, hair.
Heat exposure without protection leads to cumulative damage, even at low temperatures.
Add Leave-In Treatment
For damaged or porous curls, boost repair with a pre-styling treatment.
- ULTIMATE REPAIR Miracle Hair Rescue absorbs in 90 seconds and delivers 12 times smoother hair.
- Apply from mid-lengths to ends before styling products.
- Ideal for frequent heat users or chemically treated hair.
Pick the Right Styling Product
Match your product to your curl type and desired finish.
Fine or Medium Curls
* Use lightweight mousse or foam.
* EIMI NutriCurls Soft Twirl enhances natural waves.
* EIMI NutriCurls Boost Bounce adds volume and definition.
* Application: Shake well, dispense into palms, and scrunch upward into damp hair.
Thick or Coarse Curls
* Use richer curl balms or creams.
* NutriCurls Curlixir Balm contains jojoba oil and panthenol for moisture and shine.
* Apply in sections, focusing on drier areas.
* For tighter coils, finger coil strands before diffusing for spiral definition.
Gel offers maximum hold and frizz control, ideal for humidity, while mousse gives softness and volume.
Air-Dry Before Blow Drying
One of the most effective ways to protect curls is to minimize heat exposure time, and the best way to do that is to let hair air-dry first.
Dry to 50-85% Before Using the Dryer
- Let curls air-dry for 30-60 minutes before turning on the blow dryer.
- At this stage, hair should feel damp but not dripping.
- Reduces blow-drying time by up to 50%, cutting thermal stress.
Users consistently report less frizz and better definition when skipping straight-to-diffusing.
Why It Works
- Less wet hair means less time under heat.
- Allows curl clumps to form naturally before airflow disrupts them.
- Prevents over-drying, which leads to puffiness and stiffness.
This step is especially crucial for Type 3 and 4 curls, which are more prone to shrinkage and frizz.
Section Hair for Even Drying
Trying to dry all your curls at once leads to uneven results and missed spots. Sectioning gives you control and ensures every curl gets attention.
Divide Into 4-8 Sections
- Standard: Part hair into four quadrants. Front left, front right, back left, back right.
- Thick or Dense Hair: Split into six or eight smaller sections for better airflow and manageability.
- Secure each section with clips to prevent tangling.
Sectioning also makes it easier to apply product evenly and monitor drying progress.
Work One Section at a Time
- Release and dry one section before moving to the next.
- Keeps hair organized and prevents re-wetting already-dried curls.
- Ideal for using the root-lift method or twist-and-dry technique.
Use the Right Dryer and Diffuser
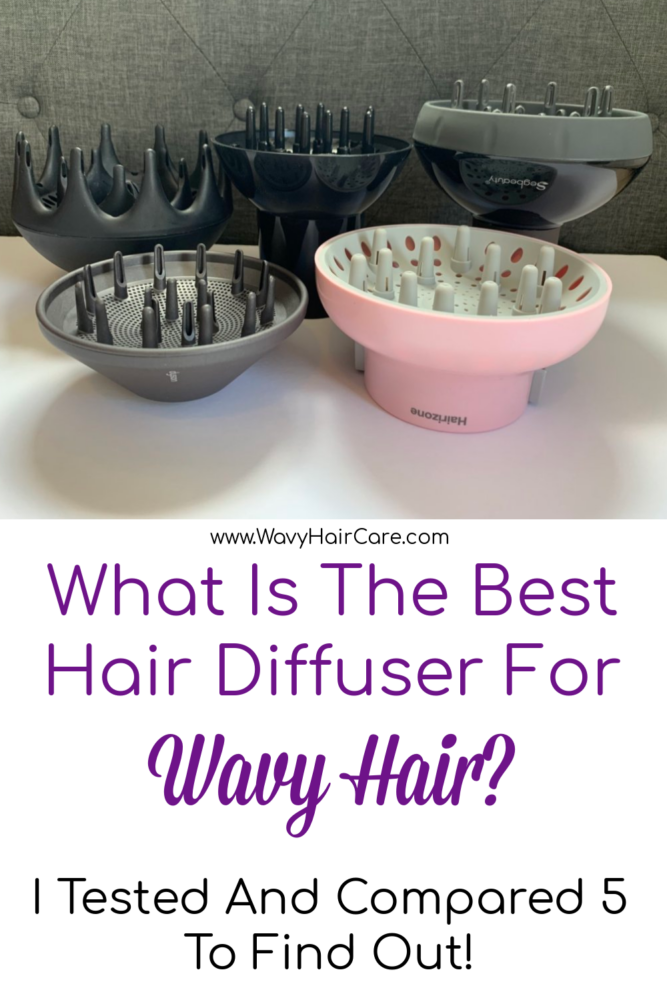
Your tools matter as much as your technique. Using the wrong dryer or skipping the diffuser can ruin your curl pattern.
Choose a Curly-Hair-Friendly Dryer
Look for these features.
- Ionic Technology: Breaks down water molecules for faster drying and 60-70% less frizz.
- Ceramic or Tourmaline Heating: Ensures even heat distribution and prevents hot spots.
- 1800-2000+ Watts: Provides enough power for efficient drying without excessive heat.
- Cool Shot Button: Locks in curl memory and boosts shine.
- Lightweight Design: Easier to handle during sectioned drying.
The Sahira Anti-Static Hair Dryer is favored for reducing frizz and speeding up drying, ideal for sensitive scalps.
Never Skip the Diffuser
The diffuser attachment is essential for curly hair.
- Spreads airflow over a wide area, preventing disruption of curl clumps.
- Allows you to dry hair close to the roots without direct heat exposure.
- Mimics natural drying patterns.
No diffuser? Cover the nozzle with a clean microfiber sock to diffuse airflow temporarily.
Set the Correct Heat and Speed
Even with a diffuser, wrong settings can damage curls. Tailor your dryer heat and airflow to your hair type.
Recommended Settings
Fine or Medium Curls
* Heat: Low
* Speed: Low to Medium
* Why: Prevents over-drying and limpness
Thick or Coarse Curls
* Heat: Medium
* Speed: Medium
* Why: Balances speed and protection
Damaged or Porous Hair
* Heat: Low
* Speed: Low
* Why: Minimizes further stress
Avoid high heat unless absolutely necessary, and even then, use it sparingly.
Keep Temperature Under 200°F
- Blow dryers should stay below 185-200°F for curly hair.
- Higher than that risks cuticle damage and moisture loss.
- Unlike flat irons, which can exceed 400°F, blow dryers should be gentle.
Many Curly Girl method followers avoid heat entirely, but moderate, controlled use with protection is widely accepted as safe.
Use Proper Diffusing Techniques
How you move the diffuser determines your final result. The goal is minimal manipulation, maximum definition.
Scoop and Hold Method
- Place a section of hair into the diffuser bowl.
- Gently scoop upward toward the scalp to lift roots.
- Hold the diffuser near the roots.
- Turn on the dryer and let it run for 45-60 seconds.
- Keep the dryer on while lifting, and turn it off before lowering to avoid disturbing curls.
This method builds volume and preserves curl formation.
Pixie Diffusing (Low-Disturbance Method)
- With the dryer off, place hair into the diffuser.
- Lift the diffuser toward the scalp.
- Turn on at low heat and low speed.
- Hold for 45 seconds, then turn off before releasing.
- Repeat per section.
This reduces frizz by eliminating airflow disruption during placement.
Massaging Motion for Curl Activation
- After scooping, gently move the diffuser in a back-and-forth massaging motion.
- Helps activate natural curl pattern.
- Promotes even drying without pulling or twisting.
- Continue until hair is 80-90% dry.
Twist-and-Dry for Soft Waves
Ideal for creating lived-in, beachy texture.
- After root drying, divide hair into eight sections.
- Twist each section away from the face into a rope.
- Use the dryer with a concentrator nozzle or diffuser to direct airflow along the twist.
- Dry for 1-2 minutes per twist.
- Retwist and repeat if needed.
- Cool completely before separating.
Finish with a cool shot to set the wave pattern.
Dry Roots First for Volume

Flat roots? This professional trick builds instant lift.
Focus on the Crown
- Direct airflow at the roots, especially at the crown.
- Use fingers or diffuser to lift hair at the scalp.
- Dry roots completely before moving to mid-lengths and ends.
Volume starts at the roots. Dry them first.
Why It Works
- Roots are the heaviest and take longest to dry.
- Fully dried roots stay lifted. Damp roots collapse as they cool.
- Creates a structured base for the rest of the style.
This technique is especially effective for fine curls or styles needing extra oomph.
Finish Without Over-Drying
The final stage is just as important as the start. Over-drying leads to stiffness, puffiness, and frizz.
Stop at 80-90% Dry
- Do not dry curls to 100% with the blow dryer.
- Let the last 10-20% air dry naturally.
- Prevents cuticle damage and reduces frizz.
Curls set better when cooled undisturbed.
Use the Cool Shot
- After drying, switch to cool air for 15-30 seconds.
- Or let curls cool without touching.
- Locks in the curl shape and boosts shine.
Define and Finish the Style
Once dry, your curls may feel stiff, especially if you used gel. This is normal. The final steps bring out softness and definition.
Scrunch Out the Crunch
- Once completely dry, scrunch curls upward with clean hands.
- Breaks the gel cast for a soft, touchable feel.
- Use a few drops of Oil Reflections Luminous Smoothing Oil if needed.
Never brush or comb. This causes frizz.
Finger-Separate for Natural Look
- Gently pull apart larger clumps with fingertips only.
- Creates soft, separated curls.
- Avoid tools. Fingers are the gentlest option.
Add Final Touch-Ups
- For Humidity: Mist with EIMI Glam Mist to block moisture and add shine.
- For Flyaways: Apply a tiny amount of spray wax or serum to ends.
- For Refresh: Use EIMI Fresh Up on fine hair for a lightweight boost.
Less is more. Over-producting leads to greasiness, especially at roots.
Final Thoughts on Drying Curly Hair with a Blow Dryer
Drying curly hair with a blow dryer does not have to mean frizz or damage. With the right prep, tools, and technique, you can achieve defined, bouncy curls in half the time. The secret is protect, diffuse, and preserve. Use heat protectant, a diffuser on low heat, and stop before fully dry. Then scrunch, cool, and go. Whether you are mastering the scoop-and-hold method or trying the twist-and-dry for soft waves, these steps work for all curl types, from loose waves to tight coils. Stick to the checklist, listen to your hair, and enjoy faster, healthier, more beautiful results every time.
Frequently Asked Questions About Drying Curly Hair with a Blow Dryer
Can you blow dry curly hair without frizz?
Yes, you can blow dry curly hair without frizz by using a diffuser attachment, applying heat protectant before drying, and using low to medium heat settings. The diffuser spreads airflow evenly to preserve curl clumps while the heat protectant shields your hair from thermal damage.
What setting should I use to dry curly hair?
Use low to medium heat and low to medium speed settings for curly hair. Fine or medium curls should stay on low heat and low to medium speed. Thick or coarse curls can handle medium heat and medium speed. Always keep the temperature below 200°F to prevent cuticle damage.
Should I air dry curly hair before blow drying?
Yes, air drying curly hair to 50-85% dry before blow drying is highly recommended. This reduces your heat exposure time by up to 50%, significantly cutting thermal stress on your curls. Let hair air-dry for 30-60 minutes before using the blow dryer.
How do I keep curls defined after blow drying?
To keep curls defined after blow drying, stop at 80-90% dry and let the remaining 10-20% air dry naturally. Once completely dry, scrunch curls upward to break the gel cast, then gently separate clumps with your fingertips. Apply a smoothing oil or humidity shield for added protection.
What is the best diffuser technique for curly hair?
The best diffuser technique for curly hair is the scoop-and-hold method. Place curls in the diffuser bowl, scoop upward toward the scalp to lift roots, and hold for 45-60 seconds with the dryer on. Keep the dryer on while lifting and turn it off before lowering to avoid disrupting curl formation.
Can I use a blow dryer on Type 4 curly hair?
Yes, you can use a blow dryer on Type 4 curly hair, but use extra caution. Apply a rich curl balm or cream for moisture, use low heat, and consider finger coiling sections before diffusing for better definition. This curl type is more prone to shrinkage and frizz, so pre-drying and minimal manipulation are critical.



