
If you’ve ever struggled with frizzy, unmanageable hair, a hair straightening cream might be exactly what you need. These products can transform rough, curly textures into sleek, smooth locks, but only when applied correctly. Using the wrong product or skipping critical steps can lead to greasy results, scalp irritation, or permanent hair damage. This guide walks you through exactly how to use hair straightening cream for both temporary smoothing and permanent chemical treatments, with detailed steps, tool recommendations, and safety precautions to ensure you get salon-quality results at home.
Choose the Right Type of Hair Straightening Cream

Not all straightening creams work the same way. Selecting the correct product for your hair goals is the first critical step toward success.
Temporary Smoothing Creams
These creams add shine, reduce frizz, and enhance blowouts without altering your hair’s structure. They wash out after one or two shampoos, making them safe for frequent use. Temporary creams work best when applied before heat styling, as the warmth activates the smoothing agents and seals the cuticle.
Permanent Chemical Straighteners
These products contain active chemical agents that permanently alter the disulfide bonds in your hair. Results last until new growth appears, typically six to twelve weeks. Permanent straighteners require precise timing, heat application, and a neutralizer to lock in the new straight shape. This process demands strict adherence to protocols and should never be rushed.
Tip: If you’re new to straightening creams, start with a temporary smoothing cream to see how your hair responds before attempting a permanent treatment.
Gather Essential Tools for Application
Having the right tools ensures even application and prevents damage, especially with chemical treatments.
Must-Have Supplies
- Non-metallic bowl and brush to prevent chemical reactions
- Plastic gloves to protect your skin from harsh ingredients
- Sectioning clips to divide hair into four to six manageable parts
- Wide-tooth comb for detangling without breakage
- Flat iron with ceramic or titanium plates, 350 to 450 degrees Fahrenheit
- Blow dryer for drying hair to eighty percent before flat ironing
- Plastic cap to trap heat during processing
- Clarifying shampoo to remove buildup before chemical application
Warning: Never use metal combs, clips, or bowls with chemical straighteners. Metal reacts with the active ingredients and can cause discoloration or weaken your hair.
Prepare Your Hair Properly Before Application
Skipping preparation leads to uneven results and increased damage risk. Taking time to prep properly sets you up for success.
Wash and Clarify
Use a clarifying shampoo to remove oils, silicones, and product buildup. Rinse thoroughly and towel-blot until hair is damp but not dripping. Do not apply conditioner if using a permanent straightener, as moisture can interfere with the chemical process.
Section Your Hair
Part hair into four equal sections using clips. Work from the back of your head (nape area) forward for better visibility and control. This ensures you don’t miss any sections during application.
Pro Tip: Apply a thin layer of petroleum jelly along your hairline to protect your skin from chemical burns.
Apply Temporary Smoothing Cream Correctly
Temporary creams work well for quick styling, frizz control, and extending blowout life. The key is using the right amount and distributing it evenly.
Use the Right Amount
Start with a dime-sized amount of cream per section. Increase slightly for thick or long hair. Using too much product causes greasiness and weighs hair down, leaving it flat and oily.
Distribute Evenly
Warm the cream between your palms to soften it. Apply from mid-lengths to ends, avoiding the scalp unless the product specifically instructs otherwise. Use your fingers or a wide-tooth comb to spread the product uniformly through each section.
Style with Heat
Blow-dry or flat iron each section at 350 to 400 degrees Fahrenheit. Pass over each section only once or twice. The heat activates the smoothing agents and creates that sleek, polished look.
Apply Permanent Straightening Cream Step by Step

Permanent straightening is a chemical process that permanently changes hair texture. Precision and timing are absolutely critical for good results.
Start at the Nape
Apply the cream to the most resistant area first, which is the back of your head at the nape. Use a tint brush for accuracy and keep the cream half an inch away from your scalp to prevent irritation.
Work Section by Section
Apply from root to ends, ensuring full saturation across every section. After completing one or two sections, gently comb through with a wide-tooth comb to distribute the product evenly and eliminate clumps. Hair should look uniformly coated, not patchy or uneven.
Visual Cue: When properly applied, your hair should have a consistent, slightly glossy appearance across all sections.
Process with Heat for Maximum Effectiveness
Heat helps the cream penetrate and break down the disulfide bonds in your hair’s keratin structure.
Cover Your Hair
Once fully applied, cover hair with a plastic cap or wrap to trap heat. Processing time varies by hair type. Fine or color-treated hair needs ten to twenty-five minutes. Normal hair takes fifteen to thirty minutes. Coarse or resistant hair may need twenty to thirty-five minutes.
Never exceed the maximum recommended time. Over-processing weakens hair and causes brittleness and breakage.
Rinse and Neutralize Thoroughly
Residue left behind can block the neutralizer and cause serious damage.
Rinse Until Clear
Use warm water to rinse out all the cream. Continue until the water runs completely clear. Towel-blot gently rather than rubbing.
Detangle Carefully
Use a wide-tooth comb to remove tangles, starting from the ends and working upward slowly. This prevents breakage at this vulnerable stage.
Apply Neutralizer Immediately
The neutralizer reforms the disulfide bonds and locks in your new straight shape. Apply from scalp to ends, starting at the nape. Leave on for exactly ten minutes, smoothing hair with your fingers during processing to maintain alignment. Rinse thoroughly with warm water afterward.
Critical: Skipping the neutralizer leaves hair weak and unstable, causing it to curl back unpredictably within days.
Flat Iron for Professional-Looking Results
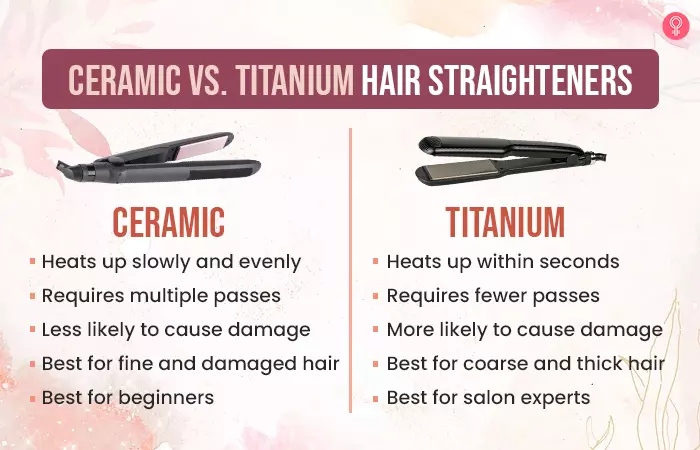
Heat permanently restructures your hair after the chemical softening process. This step locks in the straight configuration.
Set the Correct Temperature
Fine or damaged hair needs 350 degrees Fahrenheit. Medium hair works best at 375 to 400 degrees. Coarse or resistant hair requires 400 to 450 degrees.
Iron Properly
Clamp each section tightly and pull slowly and steadily. Pass over each section two to three times maximum. Keep hair taut and straight. Stop when the hair feels silky and looks visibly shiny.
Important: Hair must be one hundred percent dry before flat ironing. Damp hair combined with high heat causes bubble hair and irreversible breakage.
Follow Post-Treatment Care Rules
The first forty-eight hours after a permanent treatment are crucial for lasting results.
Wait Before Washing
Do not wash your hair for forty-eight hours after treatment. Also avoid tying it up, using clips or bands, or swimming. Water and tension can disrupt the rebonding process and reduce how long your straight style lasts.
Sleep Smart
Wear a silk scarf or sleep on a silk pillowcase. This prevents creasing and friction that can ruin your newly straightened hair while you sleep.
Avoid Common Mistakes That Damage Hair
Even small errors can ruin your results or cause significant damage.
Top Errors and Fixes
Using too much product creates greasy, weighed-down hair. Apply only dime-sized amounts per section. Applying too close to the scalp causes burns and irritation. Keep the cream half an inch away. Skipping the wide-tooth comb after application leads to uneven coverage. Comb through every section. Rushing the rinse means residue interferes with the neutralizer. Rinse until water runs completely clear. Flat ironing damp hair causes steam damage. Dry to one hundred percent first. Washing too soon disrupts the bond reforming process. Wait forty-eight hours minimum.
Pro Tip: Set timers for both processing and neutralizing steps. Guessing the time leads to over-processing or incomplete results.
Perform Safety Tests Before Full Application
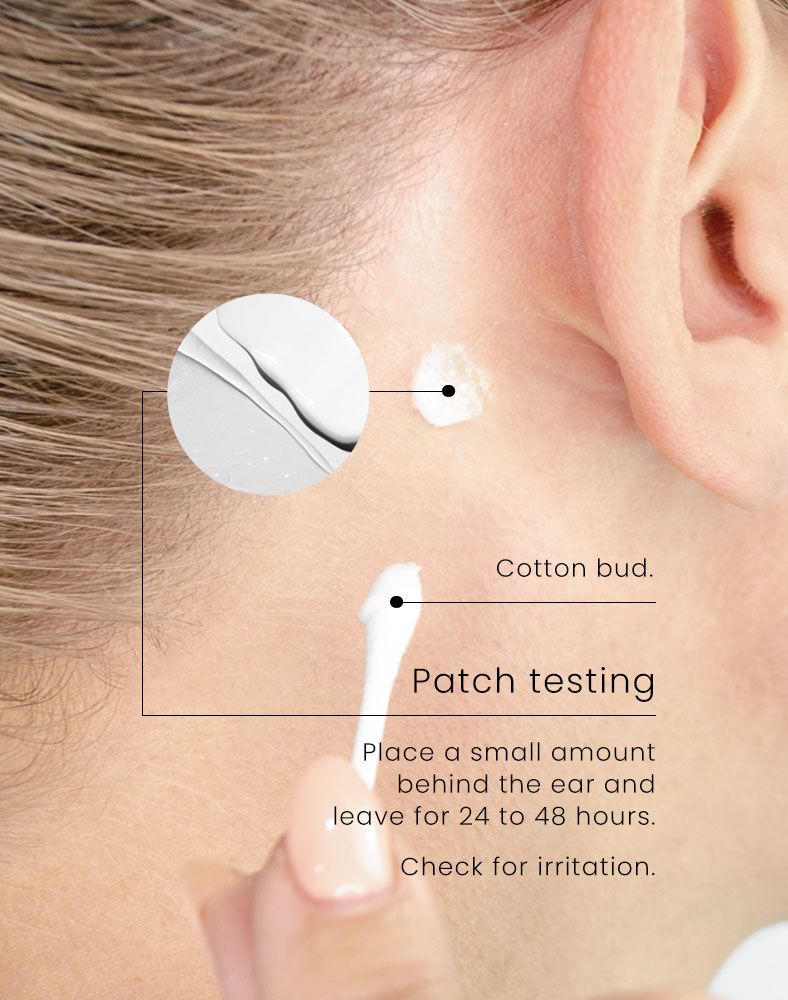
Never skip these critical checks, especially with chemical straighteners.
Strand Test
Apply a small amount of cream to a section behind your ear. Wait the full processing time. Check for breakage, excessive softness, or discoloration. If any of these occur, do not proceed with full application.
Patch Test
Apply a small amount behind your ear or on your inner elbow. Wait twenty-four to forty-eight hours. Look for redness, swelling, or itching. If a reaction occurs, avoid using the product.
Note: These tests are especially important for lye-based or ammonia-containing creams, which cause allergic reactions in some people.
Maintain Results Based on Your Hair Type
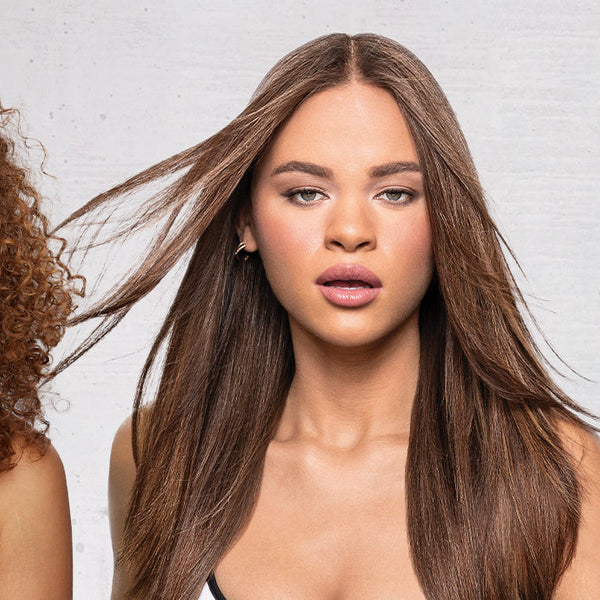
How you care for your hair after treatment determines how long it stays straight.
For Temporary Creams
Use two to four times per week as needed. Store in a cool, dry place. Replace every six to twelve months.
For Permanent Treatments
Wash with sulfate-free, pH-balanced shampoo. Condition weekly with deep treatments to restore moisture. Limit heat styling to prevent cumulative damage. Trim ends every six to eight weeks. Wait fourteen days before coloring your hair, as chemicals can interact and cause breakage.
Results by Hair Type
Fine, straight hair sees moderate improvement with lower risk of over-processing when using reduced heat and shorter processing times. Wavy hair achieves excellent results with permanent creams and typically sees eight to ten weeks of straightness. Curly or coily hair experiences dramatic transformation but requires extra care to avoid dryness. Color-treated hair faces higher damage risk and should always undergo patch and strand tests first.
Frequently Asked Questions About How to Use Hair Straightening Cream
Can I use hair straightening cream on colored hair?
Yes, but with caution. Color-treated hair has higher damage risk. Always perform a strand test and patch test first. Use lower heat settings and shorter processing times to minimize damage.
How long does hair straightening cream last?
Temporary smoothing creams wash out after one to two shampoos. Permanent chemical straighteners last six to twelve weeks, depending on your hair growth rate and after-care routine.
Can I apply hair straightening cream at home myself?
Yes, temporary creams are safe for home use. Permanent chemical treatments can be done at home but require strict adherence to timing, safety protocols, and proper tools. If you’re inexperienced, consider consulting a professional.
What happens if I leave the straightening cream on too long?
Over-processing weakens hair structure, causing brittleness, breakage, and split ends. In severe cases, hair may become mushy or develop bubble-like damage. Always set a timer and never exceed the maximum recommended time.
Do I need to use a neutralizer with hair straightening cream?
Neutralizers are only required for permanent chemical straighteners. They lock in the new straight shape by reforming disulfide bonds. Skipping the neutralizer leaves hair unstable and causes it to revert or break.
Key Takeaways for Using Hair Straightening Cream Successfully
Choosing between temporary smoothing creams and permanent chemical straighteners depends entirely on your goals and how long you want results to last. Temporary creams offer quick frizz control with no lasting commitment, while permanent treatments provide long-lasting transformation but require strict timing and post-treatment care. Regardless of which type you choose, proper preparation, the right tools, and following safety protocols prevent damage and ensure the best results. Always perform strand and patch tests before committing to a full application, and wait the recommended time before washing or styling your hair after treatment. With patience and precision, you can achieve smooth, sleek, professional-looking hair at home.



