

If you own or are considering the Granteva hair dryer bonnet attachment, you’re one step closer to achieving salon-quality, frizz-free curls from home without the bulk or high cost of a traditional hooded dryer. Designed for natural, curly, and coily hair types, this lightweight, portable tool turns any standard blow dryer into a hands-free drying station. Whether you’re doing a wash-and-go, deep conditioning, or maintaining roller sets, knowing how to use the Granteva hair dryer correctly ensures faster drying, enhanced curl definition, and healthier hair. In this guide, you’ll learn the exact setup, safety tips, best practices, and pro techniques used by real users to get the most out of their Granteva bonnet.
Prepare Your Hair Properly
Before attaching the Granteva bonnet, your hair must be prepped for optimal drying and styling results.
Style Before You Dry
Start with washed and conditioned hair. Apply your preferred leave-in conditioner, curl cream, or heat protectant to damp hair. Style using your preferred method such as twist-out, braid-out, roller set, or wash-and-go.
Use lightweight products instead of heavy oils or watery formulas that may drip during drying. Some Granteva kits include a hair tray to catch runoff during deep treatments, which proves especially useful for at-home chemical applications.
Remove Excess Moisture
Gently blot hair with a microfiber towel or cotton T-shirt to remove excess water. Avoid rubbing your hair, as this causes frizz and disrupts your curl pattern. The drier your hair is before using the bonnet, the faster and more efficient the drying process will be.
Keep over-saturation in mind. Wet, dripping hair increases drying time significantly and may lead to condensation inside the bonnet, which defeats the purpose of using the attachment.
Choose a Compatible Hair Dryer

The Granteva bonnet is not a standalone unit. It connects to your existing blow dryer to function.
Check Nozzle Compatibility
The attachment works with most standard home hair dryers featuring round or oval nozzles. Ideal nozzle diameter ranges from 1.5 to 2 inches. Models like the Revlon Limitless Infrared Dryer are frequently recommended by users for optimal performance.
Avoid using industrial dryers with oversized nozzles, as they won’t fit securely into the hose connection. This incompatibility creates air leaks and reduces effectiveness.
Use Low Heat Settings Only
Always use low heat and low speed on your blow dryer when using the Granteva attachment. High heat can damage the bonnet fabric and cause scalp discomfort. The goal is gentle, consistent warmth, not intense drying that defeats the purpose of this gentle tool.
Never leave the dryer unattended while in use. Safety should always be your top priority when using any heat styling tool.
Attach the Hose to Your Dryer
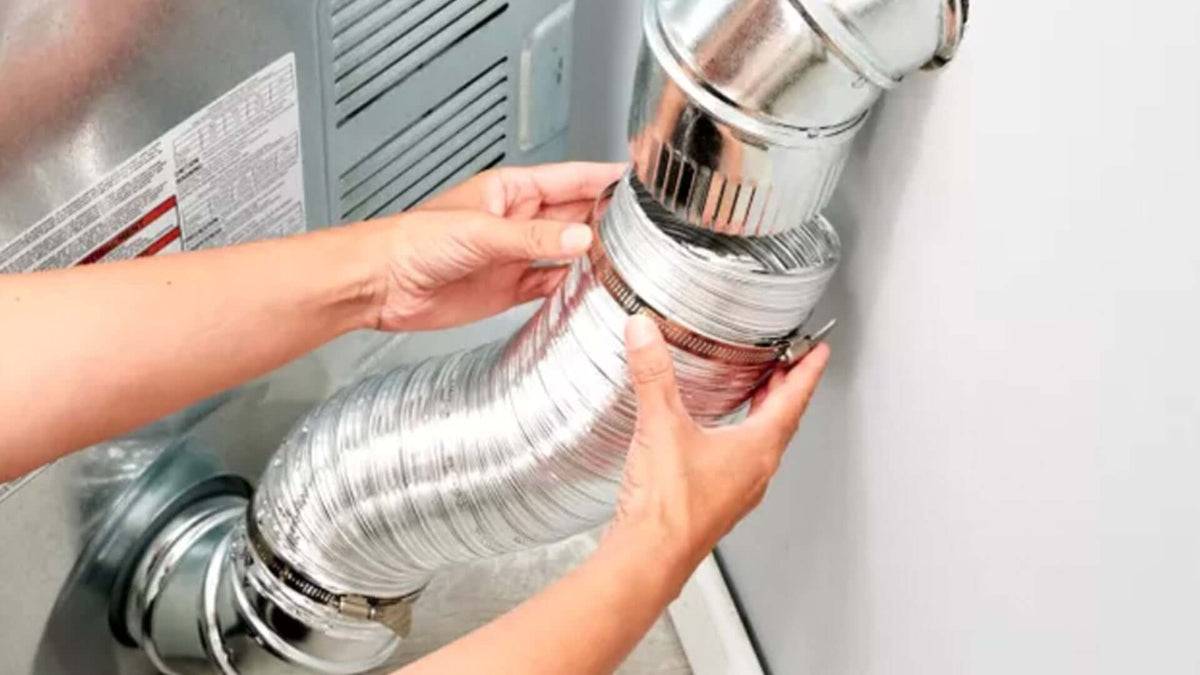
The flexible hose serves as the bridge between your blow dryer and the bonnet attachment.
Secure the Connection
Insert your hair dryer nozzle into the Velcro-secured end of the hose. Pull the Velcro straps tight to create an airtight seal. Confirm that no air leaks exist around the connection point, as leaks reduce airflow efficiency and prolong drying time.
If the nozzle slips during use, wrap a thin layer of electrical tape around it for a snugger fit. This simple fix prevents air loss without damaging your dryer.
Connect the Bonnet to the Hose
Now link the hood to the other end of the hose to complete the setup.
Slide On the Bonnet
Attach the open end of the bonnet hood to the free end of the hose. Push it on firmly so it stays in place during use. Confirm the fit is snug, ensuring air flows into the bonnet rather than escaping.
Test the airflow by turning on the dryer briefly without wearing the bonnet. Check for even airflow through the perforated lining. Look for 100 or more holes, as these ensure uniform heat distribution across all hair sections.
Position the Dryer Unit Safely
Where you place your blow dryer affects comfort and functionality during use.
Set It on a Stable Surface
Place the dryer on the floor, desk, or behind a nightstand. Use an extension cord if needed to allow flexibility in positioning. Keep the hose loose and avoid kinks or tension that could restrict airflow.
Position the unit behind furniture so it’s out of the way while you work, relax, or watch TV. This setup lets you multitask freely during the drying process.
Keep the dryer away from water sources. Never place it near sinks, bathtubs, or wet surfaces to avoid electrical hazards.
Wear the Bonnet Correctly
Proper fit ensures even drying and comfortable use throughout your session.
Place Over Styled Hair
Tuck all styled hair inside the bonnet carefully. Avoid pulling or flattening curls as you insert your head. The goal is to enclose your entire style without disrupting it.
Adjust the Drawstring
Tighten the drawstring at the base to seal around your neck or shoulders. It should be snug but not tight, with no pressure on the forehead. A proper seal traps heat and significantly speeds up drying.
Too loose allows heat to escape, slowing the process. Too tight flattens roots and causes discomfort. Finding the right balance takes practice but makes a significant difference in results.
Fasten the Chin Strap
Secure the chin strap under your chin for added stability if your kit includes one. This proves especially helpful when lying down, moving around, or using the bonnet for long treatment sessions.
The chin strap isn’t always necessary. If your hair is pinned or rolled, the bonnet may stay in place without it.
Start Drying or Treatment
Now it’s time to activate the dryer and begin the actual drying or treatment process.
Turn On Low Heat
Power on your blow dryer using low heat and low speed settings. Allow warm air to circulate gently through the bonnet. During the first few minutes, you’ll feel consistent warmth, which is completely normal.
Monitor Every 10 to 15 Minutes
Check hair progress without removing the bonnet. Gently lift the edge to inspect dryness at the roots and ends. This lets you adjust time accordingly without disturbing your style.
For regular drying, expect 12 to 15 minutes for Type 3C to 4C hair. This reduces drying time by up to 50 percent compared to air drying. You can anticipate defined curls, minimal frizz, and volume at the roots.
For deep conditioning treatments, leave the bonnet on for 20 to 45 minutes. Low heat opens the hair cuticle, boosting moisture absorption from your treatment products. Rinse out the treatment after removing the bonnet.
For stubborn damp spots, you can use brief high heat at the end as a final boost. Never use high heat for more than one to two minutes.
Adjust During Use
Stay engaged with the process to maximize your results.
Maintain Airflow
If drying seems uneven, gently fluff hair underneath the bonnet to redistribute airflow. Avoid touching the hot hose or interior lining, as these can become warm during operation.
Retain Extra Heat
Drape a scarf, towel, or hoodie over the bonnet during deep treatments. This extra layer traps warmth and enhances the conditioning benefits. Many users wrap a silk scarf around the base to protect neck skin and retain additional heat.
Finish and Remove the Bonnet
Once drying or treatment is complete, shut down safely and preserve your style.
Turn Off and Unplug
Switch off the hair dryer and unplug it from the wall. Wait a few seconds for airflow to stop completely before proceeding to remove the bonnet.
Disconnect and Remove
Gently slide the bonnet off the hose. Lift it from your head carefully to preserve your curl pattern and style. Take your time with this step to avoid disrupting the results you worked to achieve.
Style as Desired
Scrunch curls with a bit of gel or oil if desired. Fluff roots with your fingers for added volume. Apply shine serum if needed to enhance the overall look.
Users consistently report well-defined, dry, soft curls with minimal frizz. Many describe the final result as salon-perfect.
Clean and Store Properly
Maintain your Granteva bonnet for long-term performance and hygiene.
Wash Every 3 to 5 Uses
Hand wash with mild shampoo or gentle detergent. Soak in lukewarm water and scrub the interior gently to remove product buildup. Rinse thoroughly and hang to dry completely before storing.
Never machine wash the bonnet unless the manufacturer explicitly specifies this is safe. Machine washing can damage the fabric and compromise the perforated lining.
Clean the Hose
Wipe the inside and outside of the hose with a damp cloth. Remove lint or dust that may block airflow and reduce performance over time.
Store in the Travel Bag
Fold the bonnet and store in the included compact bag. This keeps it clean, dry, and ready for travel. Never store the bonnet while it’s still wet, as this promotes mold, mildew, and odor.
Know the Limitations
The Granteva bonnet is powerful, but it’s not designed for every use case.
Not Suitable for Large Rollers
Only small to medium rollers fit inside the bonnet. Large rollers distort the bonnet and block airflow, making them unsuitable for this attachment. The bonnet works best with flexi rods, perm rods, or no-heat curl methods.
Learning Curve for Fit
Getting the drawstring and chin strap right takes practice. Too loose means heat loss and reduced efficiency. Too tight causes discomfort and potential scalp pressure. Adjust during your first few uses to find your perfect fit.
Who Should Use It
The Granteva hair dryer attachment shines for specific hair types and lifestyles.
Ideal For
This attachment works perfectly for natural hair wearers with Type 3 and 4 textures. It’s excellent for wash-and-go enthusiasts wanting defined curls. Travelers benefit from its compact, portable design. Parents and professionals who multitask appreciate the hands-free functionality. DIY chemists using relaxers or dyes can benefit from the optional hair tray.
Not Ideal For
This attachment isn’t the best choice for those who only straighten their hair. Users without a compatible blow dryer will need to purchase one first. Anyone relying on jumbo rollers for styling won’t find this tool useful.
Real User Tips and Feedback
Verified buyers share what works and what doesn’t when using the Granteva bonnet.
What Users Love
Many users report drying their 4C hair in 15 minutes with zero frizz. Others mention it’s so light they forget they’re wearing it. Travelers praise it for hotel rooms where salon dryers aren’t available. Users report curls stay bouncy and defined after deep conditioning sessions.
Common Warnings
Some users note it takes practice to get the fit right. Others remind buyers to make sure their dryer has a low setting. A few mention the hair tray isn’t included in all versions, so check before purchasing.
Maximize Results
Follow these best practices to get the most from your Granteva hair dryer.
Use low heat only to prevent damage to the fabric and scalp. Seal the drawstring well to lock in heat and speed drying. Hand wash regularly to keep airflow strong and hygienic. Pair with heat protectant to shield hair during extended use. Store dry and folded to extend the lifespan and prevent mold. Use an extension cord to allow comfortable positioning. Check nozzle fit first to ensure no air leaks.
Frequently Asked Questions About Using Granteva Hair Dryers
How long does it take to dry hair with a Granteva bonnet?
For Type 3C to 4C hair, drying typically takes 12 to 15 minutes. This represents up to a 50 percent reduction compared to air drying, which can take several hours for similar hair types.
Can I use the Granteva bonnet with any hair dryer?
The bonnet works with most standard home hair dryers with round or oval nozzles between 1.5 and 2 inches in diameter. Industrial dryers with oversized nozzles may not fit securely, so check your dryer’s dimensions before purchasing.
Is the Granteva suitable for deep conditioning treatments?
Yes, the bonnet is excellent for deep conditioning. Leave it on for 20 to 45 minutes with low heat to help open the hair cuticle and improve product penetration. This results in softer, shinier, more manageable hair after repeated use.
How do I clean my Granteva bonnet attachment?
Hand wash every 3 to 5 uses using mild shampoo or gentle detergent in lukewarm water. Gently scrub the interior to remove buildup, rinse thoroughly, and hang to dry completely before storing. Never machine wash unless the manufacturer specifies it’s safe.
Can I use large rollers with the Granteva bonnet?
No, the bonnet only fits small to medium rollers. Large rollers won’t fit inside and may distort the bonnet or block airflow. This attachment works best with flexi rods, perm rods, or no-heat curl methods.
Does the Granteva work for straightening hair?
The Granteva is primarily designed for drying and setting curly styles. If you only straighten your hair, a traditional drying method likely suffices. However, you can still use it for quick drying between straightening sessions if desired.
Final Thoughts on Using Your Granteva Hair Dryer
The Granteva hair dryer attachment delivers impressive results for the price. Priced between $14 and $25, it offers up to 50 percent faster drying, enhanced curl definition, and hands-free multitasking convenience. It’s a game-changer for natural hair care without requiring bulky equipment.
By following this guide on how to use the Granteva hair dryer, you’ll avoid common mistakes, protect your hair, and enjoy salon-quality results at a fraction of the cost. Whether you’re drying after a wash day or boosting a deep conditioning treatment, this tool brings professional efficiency to your routine.
The key to success lies in proper setup, low heat settings, and finding your perfect fit with the drawstring and chin strap. With practice, you’ll master the technique and wonder how you ever managed without it.



