

Blow drying is a daily ritual for millions, offering sleek finishes, volume, and control. But without the right approach, it can silently erode hair health, leading to dryness, frizz, split ends, and breakage. The good news is you do not have to choose between styled hair and healthy hair. With the right tools, products, and techniques, blow drying can actually be less damaging than air drying.
This guide reveals a science-backed, step-by-step protocol to protect your hair from heat damage. From selecting the best dryer to using heat protectants effectively and mastering technique by hair type, you will learn how to dry your hair faster, safer, and with long-term strength in mind.
Choose a High-Performance Blow Dryer
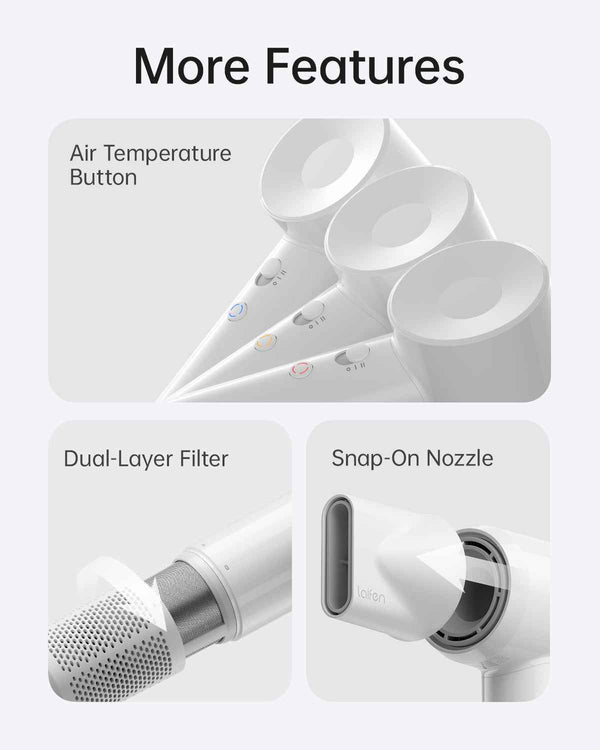
The dryer you use sets the foundation for damage control. Cheap models often overheat, distribute heat unevenly, and lack safety sensors, increasing the risk of scorching and cuticle lifting. Investing in a smart, high-efficiency dryer means faster drying at lower temperatures, which is key to preserving hair integrity.
Look for Smart Heat Control
A dryer with real-time temperature monitoring adjusts heat output instantly, preventing spikes that damage keratin. Models like the Levity SE Light check heat 50 times per second, maintaining safe levels even during extended use. This kind of precision rivals premium dryers without the high price tag.
Avoid dryers without thermal regulation. They may feel hot to the touch or emit inconsistent airflow, signaling poor internal controls that can create hot spots causing bubble lesions, which are tiny steam pockets inside the cortex that weaken hair from within.
Prioritize Airflow Over Heat
High-speed motors dry hair faster using air movement, not just heat. Models delivering high airflow cut drying time significantly, and less time under heat equals less damage. The Levity SE Light delivers 19 m/s airflow from a 100,000 RPM brushless motor.
Modern dryers like the Dyson Supersonic and Levity Swift use this principle: powerful airflow at low-to-medium heat settings for safer, more efficient results.
Use Negative Ion Technology
Negative ions break down water molecules on the hair surface, speeding evaporation and reducing static. The Levity SE Light emits 150 million negative ions per second, smoothing the cuticle and minimizing frizz without extra heat. This leads to shinier, softer hair with less mechanical stress during styling.
Apply Heat Protectant Properly

Skipping heat protectant is the number one mistake in blow drying. Even with a great dryer, direct heat degrades proteins and lifts cuticles. A quality protectant forms a thermal barrier, reducing moisture loss and protein denaturation by up to 50 percent.
Use the Right Ingredients
Effective heat protectants contain specific ingredients that create barriers and nourish hair. Look for these key components.
Silicones like dimethicone and cyclomethicone create a heat-resistant film that seals the cuticle. Hydrolyzed wheat protein slows heat transfer and reinforces weakened areas. Plant oils such as argan, coconut, squalane, and Omega-9 nourish and add slip. Vitamin E fights oxidative stress caused by heat.
For curly or dry hair, layer repair treatments like Wella ULTIMATE REPAIR Miracle Hair Rescue with AHA and Omega-9 before applying oil-based serums. This combo repairs the cortex and adds surface protection.
Apply to Damp, Not Soaking Hair
Wait until hair is towel-blotted and damp before applying protectant. If hair is too wet, the product dilutes and washes off. If too dry, it will not absorb evenly.
Use a fine mist or lightweight serum, focusing on mid-lengths and ends, which are the oldest and most fragile parts. Avoid saturating roots unless using a lightweight mist for volume.
Layer for Maximum Defense
For damaged or chemically treated hair, layer your protection. Apply a leave-in conditioner first, follow with a repair treatment, and finish with a heat protectant spray or serum. This multi-barrier approach defends against both internal and external damage.
Prep Hair Before Drying
How you prep determines how much stress hair endures during drying. Wet hair is up to 50 percent weaker, so gentle handling is non-negotiable.
Use a Microfiber Towel or Cotton T-Shirt
Never rub hair with a regular towel. Cotton fibers are rough and cause friction, leading to frizz and breakage. Instead, use a microfiber towel or an old 100 percent cotton T-shirt to blot or squeeze out excess water.
For curly hair, use the press and twist method: gently press water out with the fabric, then twist sections to absorb moisture without disturbing the curl pattern.
Detangle Gently with a Wide-Tooth Comb
Always detangle on damp hair, starting from the ends and working upward. Use small sections and apply a leave-in detangler to reduce resistance.
Avoid fine-tooth combs or brushes on wet hair. They snag and pull, increasing breakage significantly. Use a paddle brush only after hair is 70 percent dry for smoothing.
Apply Styling Products Early
Use lightweight, heat-safe products before drying. Fine hair benefits from mousse or volumizing spray for lift. Curly or wavy hair needs curl cream to define shape. Frizz-prone hair responds well to smoothing serum applied sparingly.
Avoid heavy creams or butters that build up or require high heat to activate. These increase drying time and thermal stress unnecessarily.
Master the Correct Drying Technique
Even the best tools fail without proper technique. The way you move the dryer, where you aim it, and how long you expose each section all impact damage levels significantly.
Keep the Dryer 6-8 Inches Away
Hold the dryer 15-20 cm from hair. Closer distances concentrate heat, risking localized scorching. Farther away reduces efficiency and prolongs exposure time.
Use a sweeping motion, never holding the dryer still on one spot. Constant movement ensures even heat distribution and prevents overheating in any single area.
Use Low-to-Medium Heat Settings
High heat speeds drying but increases protein denaturation and moisture loss. Modern dryers with high airflow can dry hair effectively at lower temperatures.
Use low heat for fine or damaged hair and medium for thick or coarse hair. Always start low and increase only if needed.
Dry in Sections for Even Results
Clip hair into 3-4 sections, using more for thick or long hair. Work from the bottom up, drying one layer at a time. This prevents re-wetting already-dried sections and ensures complete drying.
For curly hair, use the cup and lift technique with a diffuser. Gather curls into the diffuser, lift toward the scalp, and dry in gentle motion to preserve shape and reduce frizz.
Direct Airflow Down the Shaft
Always point the airflow from roots to ends, following the direction of the cuticle. This smooths the scales, enhances shine, and reduces friction.
Use a concentrator nozzle for straight or fine hair to focus airflow and add precision. For curls, use a diffuser to disperse air gently and prevent puffiness.
Finish with the Cool Shot
Switch to cool air for 10-15 seconds at the end of each section. This seals the cuticle, locks in style, and boosts shine. It is especially effective when using a round brush for smooth finishes.
Never leave hair damp. Moisture trapped at the roots can lead to scalp odor, fungal growth, and breakage. Run fingers through roots to confirm they are fully dry.
Tailor Technique to Your Hair Type
:max_bytes(150000):strip_icc()/How-to-Blow-Dry-Cury-Hair-130d53157b74495e8dc0e8d9459d5ab2.png)
One-size-fits-all drying causes avoidable damage. Customize your approach based on texture, thickness, and condition for the best results.
Fine or Thin Hair
Fine hair heats up quickly and is prone to brittleness. Use the lowest heat setting and focus on root drying for volume while letting ends air dry. Apply lightweight mists, not heavy oils, and avoid over-drying, as fine hair can become parched in seconds.
Thick or Coarse Hair
Denser hair takes longer to dry but can handle more heat. Use medium heat and an ionic dryer, apply richer leave-ins and protectants, and dry in smaller sections for even results. Use a paddle brush to stretch and smooth.
Curly or Wavy Hair
Curls are fragile when wet and prone to frizz. Always use a diffuser and apply curl cream plus heat protectant before drying. Use low-to-medium heat and avoid brushing. Scrunch or finger-coil to enhance definition after drying.
Damaged or Chemically Treated Hair
Bleached, colored, or permed hair is highly porous and fragile. Use the lowest heat setting and double-layer protection with leave-in plus heat protectant. Focus on gentle drying rather than speed, and finish with a cool shot. Deep condition weekly to maintain moisture.
Replenish Moisture After Drying
Blow drying strips natural oils and moisture, even with protection. Post-drying care restores softness and prevents long-term dryness.
Use a Leave-In Conditioner
Apply a lightweight leave-in conditioner after drying to lock in hydration. Look for formulas with ceramides to reinforce the lipid barrier, natural oils to restore shine and softness, and humectants to attract moisture from the air.
For curly hair, try Leaf and Flour CBD Curl Cream, which defines curls, soothes the scalp, and adds lasting moisture without buildup.
Avoid Over-Washing
Washing too often strips natural sebum, making hair more vulnerable to heat. Extend time between washes with dry shampoo or protective styles like braids and buns.
Avoid Common Blow Drying Mistakes
Even small errors can cause cumulative damage over time. Watch for these common pitfalls.
Rubbing hair with a cotton towel causes frizz and breakage. Skipping heat protectant leads to direct cuticle damage. Using high heat on fine hair results in brittleness. Holding the dryer too close risks scalp burns and scorching. Drying partially invites hygral fatigue and breakage. Using the wrong brush on wet hair increases snagging. Daily re-styling builds up thermal stress. Ignoring product buildup blocks protectants from working effectively.
Clean your dryer filter monthly to maintain airflow and efficiency. A clogged filter forces the motor to work harder, increasing heat output unexpectedly.
Protect Hair Long-Term
Damage prevention is not just about one session. It is a consistent routine that yields results over time.
Limit Heat Styling Frequency
Aim to blow dry every other day. On off days, try heatless styles. Overnight braids or buns create natural waves. Foam rollers or flexi rods add curls without heat. The pineapple method, a high loose ponytail, preserves curls while sleeping.
Deep Condition Weekly
Use a protein-rich or ceramide-based mask once a week. Apply to damp hair, cover with a shower cap, and use a heat cap for 20-30 minutes to boost penetration. This repairs micro-damage, strengthens the cortex, and improves elasticity.
Trim Regularly
Split ends travel up the shaft if left untreated. Get a trim every 6-8 weeks to maintain healthy ends and prevent breakage from progressing further up the hair.
Adjust for Age and Hair Changes
As you age, hair produces less sebum and loses protein. It becomes drier, thinner, and more fragile. Lower heat settings, increase conditioning, and prioritize protection to maintain hair health.
Final Protocol: 5 Steps to Safe Blow Drying
Follow this streamlined protocol for consistent, damage-free results every time you style.
Choose the right dryer. Select one with temperature control, high airflow, and negative ions. The Levity SE Light or Swift are excellent options. Avoid cheap, unregulated models.
Apply heat protectant. Use a silicone or protein-based formula on damp hair. Focus on mid-lengths and ends. Layer with leave-in for damaged hair.
Dry at 6-8 inches with motion. Use low-to-medium heat, keep the dryer moving, and never hold it still. Dry in sections for full control.
Use the right attachment. A concentrator nozzle works for smooth styles. A diffuser is essential for curls and waves.
Finish with moisture. Apply a leave-in conditioner or curl cream post-dry to restore hydration and enhance shine.
Frequently Asked Questions About Protecting Hair from Blow Dryer Damage
Does blow drying actually damage hair more than air drying?
Air drying is not inherently safer. Prolonged wetness compromises the cell membrane complex and causes hygral fatigue, especially in thick or curly hair. Strategic blow drying with proper tools and technique can be less damaging than leaving hair wet for extended periods.
What is the most important step in preventing blow dryer damage?
Applying a heat protectant is the most critical step. It forms a thermal barrier that reduces protein loss and cuticle disruption by up to 50 percent. Skipping this step exposes hair to direct thermal damage.
How close should I hold the blow dryer to my hair?
Hold the dryer 6-8 inches (15-20 cm) from your hair. Closer proximity concentrates heat and risks localized scorching. Greater distance reduces efficiency and prolongs exposure time.
Can I use blow dryer on fine hair safely?
Yes, but use the lowest heat setting and focus on root drying for volume. Let the ends air dry partially or completely. Apply lightweight products only and avoid over-drying, as fine hair becomes parched very quickly.
How often should I deep condition hair that is heat-styled regularly?
Deep condition once a week with a protein-rich or ceramide-based mask. Apply to damp hair, cover with a shower cap, and use a heat cap for 20-30 minutes to maximize penetration and repair micro-damage.
Key Takeaways for Protecting Hair from Blow Dryer Damage
Blow drying does not have to damage your hair. With the right tools, technique, and consistency, it can be a safe, efficient, and even protective styling method. The key is respecting hair structure, minimizing exposure time, and supporting it at every step from towel to finish.
Choose a dryer with smart heat control, high airflow, and negative ion technology. Apply heat protectant every single time without exception. Master the correct distance, heat settings, and motion. Tailor your approach to your specific hair type, and always replenish moisture after drying. Follow this guide consistently, and you will enjoy polished, healthy hair for years to come.



