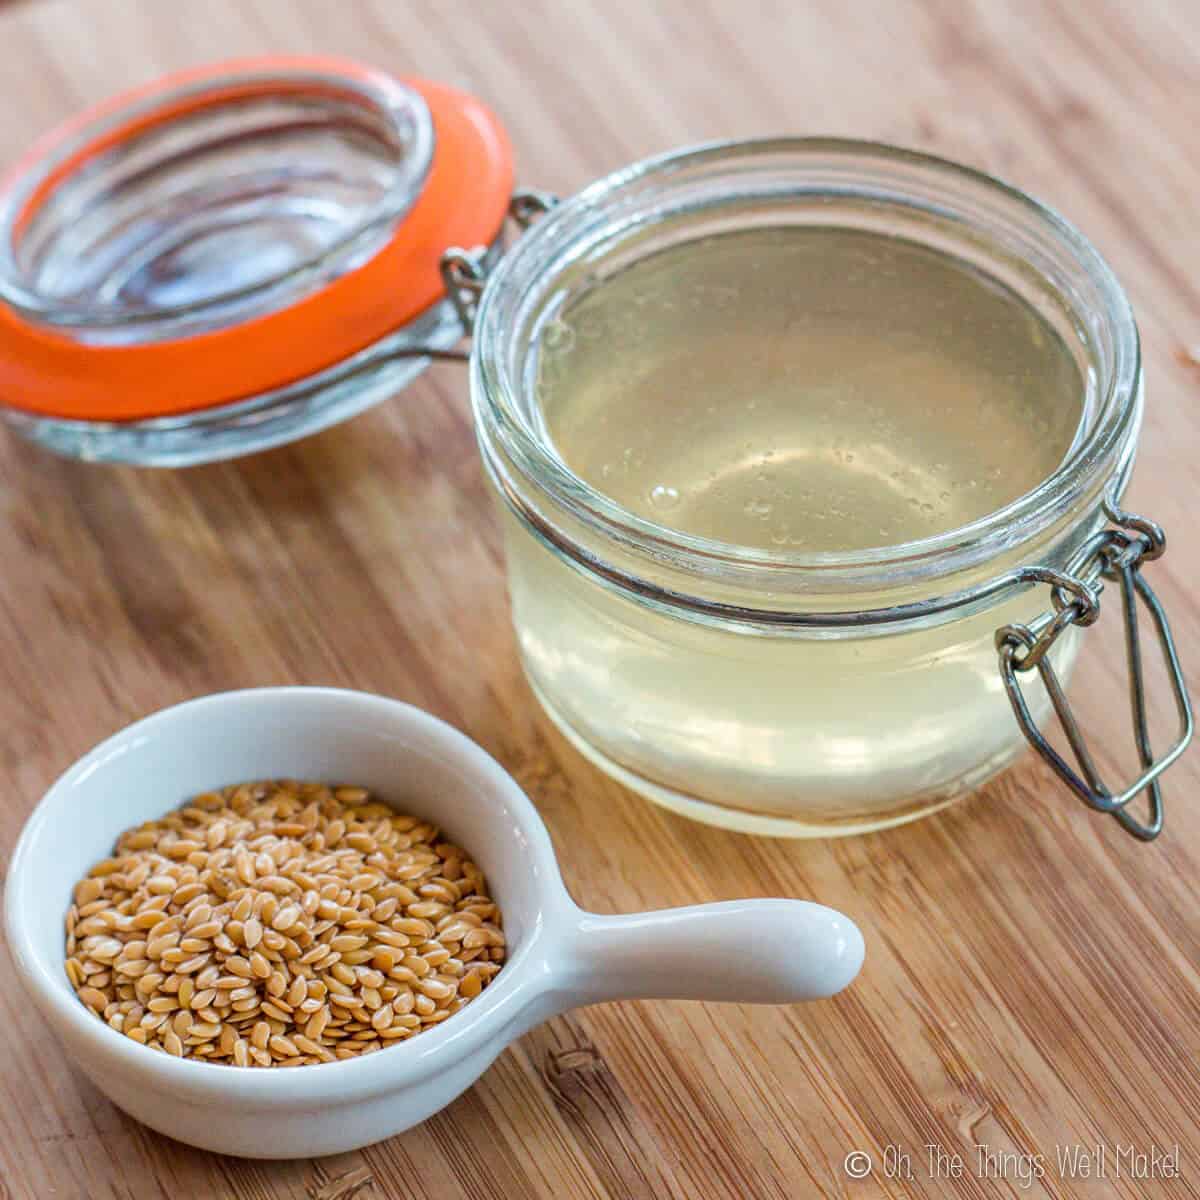
If you’re struggling with frizz, looking for affordable curl definition, or want to ditch harsh commercial products, flaxseed gel for hair offers a natural solution right from your kitchen. This DIY styling staple has become a favorite in the curly hair community for its ability to define waves and curls without silicones, alcohols, or plastic packaging. Made with just two ingredients, it delivers medium-to-firm hold while nourishing your strands with omega-3s and vitamin E.
In this guide, you’ll learn exactly how to make flaxseed gel step by step, troubleshoot common mistakes, customize your batch with natural additives, and integrate it into a sustainable hair care routine that saves money and reduces environmental impact.
Choose the Right Ingredients
The success of your flaxseed gel starts with selecting the correct ingredients. Using the wrong type of seeds or water can result in a gritty, ineffective mixture that’s difficult to strain and performs poorly on your hair.
Use Whole Flaxseeds, Not Ground
Always begin with whole brown or golden flaxseeds. Ground flaxseed releases oils too quickly during heating, creating a sludgy mixture that clogs your strainer and leaves a gritty texture in your gel.
• Whole seeds slowly release mucilage during simmering, producing a smooth, clear gel
• Recommended ratio: ¼ cup flaxseeds to 2 cups water
• A $5 bag of flaxseeds can yield hundreds of batches when reused
Use Filtered or Distilled Water
Tap water contains minerals and impurities that affect clarity, shelf life, and texture. For the cleanest, longest-lasting gel, use filtered or distilled water. Hard water may cause stiffness or residue on your hair after application.
Optional Additives for Enhanced Performance
Enhance your gel with natural boosts, but master the basic recipe first.
• Essential oils (lavender, rosemary): 5-10 drops for pleasant scent and scalp benefits
• Aloe vera juice: Replace ½ cup water for extra hydration and softer feel
• Vegetable glycerin: ½ teaspoon for humidity resistance in dry climates
⚠️ Caution: Essential oils can mask spoilage odors. Only add them once you’re familiar with the fresh, earthy scent of pure flaxseed gel.
Gather Essential Equipment
You don’t need fancy tools for this DIY project. Most items are already in your kitchen.
• Small saucepan: Stainless steel or glass works best
• Fine mesh strainer: Preferred over cheesecloth for safety and ease
• Spoon or spatula: For stirring during cooking
• Heat-safe bowl or jar: To catch strained gel
• Airtight glass jar: For storage in the refrigerator
• Optional: Thermometer to monitor heat if desired
🔥 Safety tip: Avoid using pantyhose or cheesecloth unless you’re experienced. Handling hot gel through fabric increases burn risk significantly.
Cook the Gel to Perfection

The cooking process determines the thickness and hold strength of your gel. Getting this step right is crucial for achieving that perfect honey-like consistency.
Simmer, Don’t Boil
- Combine ¼ cup flaxseeds with 2 cups water in a saucepan
- Heat over low to medium-low until it begins to simmer gently
- Keep heat gentle—never allow a rapid boil
Boiling too hard breaks down the mucilage, resulting in weak or rubbery gel that won’t hold your style.
Monitor Cooking Time Closely
Consistency changes rapidly after the 7-minute mark. Check every minute to avoid overcooking.
| Cooking Time | What to Expect | Result |
|---|---|---|
| 7 minutes | Slight foam, watery drip | Too thin |
| 11 minutes | More foam, coats spoon lightly | Getting there |
| 13 minutes | Thick, glossy, leaves a trail when dripped | Perfect |
Remove from heat at 12-14 minutes for honey-like consistency that coats the spoon and drips slowly in a continuous ribbon.
Fix Overcooked Gel
If your gel becomes too thick or rubbery, stir in 1-2 tablespoons of hot water and heat for 1-2 minutes. Test the drip—it should flow slowly off the spoon in a continuous line.
Strain While Hot
Timing matters enormously when straining flaxseed gel. The gel thickens rapidly as it cools, and waiting too long makes straining difficult and messy.
Strain Immediately After Removing from Heat
Place a fine mesh strainer over a clean bowl and pour the hot mixture through immediately. Use a spoon to gently press the seeds and extract maximum gel, but never force pulp through the mesh.
Avoid Cloudy Gel
Pushing solids through the mesh creates fine particles that make your gel cloudy. While clear gel isn’t necessary for performance, it does indicate purity and smoothness. Cloudiness doesn’t affect hold, but it looks less appealing.
🧼 Pro tip: Reuse the strained seeds 3-5 times with fresh water. Each subsequent batch yields less gel, but this practice extends value and reduces waste.
Store Safely and Prevent Spoilage
Flaxseed gel contains no preservatives, so proper storage is essential for maintaining freshness and preventing mold or bacterial growth.
Refrigerate Immediately
Cool the gel slightly, then transfer it to an airtight glass jar. Label the jar with the date and place it in the refrigerator within 30 minutes of making.
Shelf Life: Up to 2 Weeks
Most batches last 10-14 days when made with filtered water and stored in a clean, sealed container. Discard earlier if you notice cloudiness, mold spots, or a sour smell. Never reboil spoiled gel—it won’t kill all microbes.
❌ Important: Room temperature storage leads to spoilage in just 2-3 days. Refrigeration is non-negotiable for safety.
Apply for Maximum Hold and Softness
How you apply flaxseed gel matters just as much as how you make it. Proper technique ensures even coverage and strong hold without stiffness.
Prep Your Hair First
Flaxseed gel is a styler, not a moisturizer. For best results, wash with sulfate-free shampoo or co-wash, then apply a leave-in conditioner or light oil for dry or porous hair. Towel-dry until hair is damp, not dripping wet. Excess water dilutes the gel and weakens hold.
Section and Coat Thoroughly
Divide hair into 2-4 sections. Start with 1 tablespoon for short hair or up to ¼ cup for long, thick hair. Rub gel between your palms, then apply using the praying hands method for waves or raking and finger-combing for curls. Ensure every strand is coated from root to tip.
Style and Dry Properly
Scrunch upward to enhance curl formation, then allow hair to air-dry for 15-20 minutes to set the shape. For faster drying, use a diffuser on low heat and low speed, hovering without touching your hair to prevent frizz. In humid climates, full air-dry often produces softer results.
Scrunch Out the Crunch
As flaxseed gel dries, it forms a hard cast—this is normal and means the gel is working. However, you need to break this cast for soft, bouncy hair.
Why This Step Is Essential
Once your hair is 90% dry, apply a few drops of oil (jojoba, argan, or sweet almond) to your palms. Gently scrunch upward to break the cast. This transforms stiff hair into soft, touchable curls with beautiful shine.
💡 Pro tip: Too much oil weighs down curls. Start with just 2-3 drops and add more only if needed.
Troubleshoot Common Problems
Even with proper technique, issues can arise. Here’s how to fix the most common problems.
Dry or Brittle Hair
Overcooked gel causes mucilage to degrade, leaving flaky residue. Cook only 12-14 minutes and test the drip—it should flow slowly, not break.
Applied to soaking wet hair dilutes the gel, causing uneven drying. Always towel-dry thoroughly before application.
Hard water minerals react with flax compounds and cause stiffness. Switch to filtered or distilled water.
Skipped moisture step leaves hair dry because gel holds moisture but doesn’t add it. Always use leave-in conditioner before gel.
Forgot to scrunch out the crunch leaves the hard cast intact. Use oil to break the cast every time.
Weak Hold or Fast Frizzing
Undercooked gel hasn’t extracted enough mucilage. Simmer until gel coats the spoon and leaves a trail when dripped.
Too much water or reused seeds creates thin, watery gel. Use fresh seeds every 3-5 batches and stick to the ¼ cup to 2 cups ratio.
High humidity without protection causes flax gel to absorb moisture from the air. Add ½ teaspoon glycerin in dry climates, but reduce or skip it in humid areas.
Poor application technique leads to uneven coverage. Be meticulous about coating every strand.
Customize Your Flaxseed Gel
Once you’ve mastered the basic recipe, experiment with these additions to suit your hair’s specific needs.
Boost Hydration
Replace half a cup of water with aloe vera juice for added moisture and softness. This works especially well for dry or thick hair types.
Add Shine and Scent
Mix in 5-10 drops of essential oil after straining. Lavender provides a calming floral scent, rosemary stimulates the scalp, and vanilla adds a warm, sweet fragrance.
🌿 Always patch test oils first, especially if you have sensitive skin.
Improve Humidity Resistance
Add half a teaspoon of vegetable glycerin to help retain moisture in dry climates. In humid areas, skip glycerin entirely—it attracts water and worsens frizz.
Reuse Flaxseeds 3-5 Times
Maximize your investment and reduce waste by reusing flaxseeds for multiple batches.
How to Reuse Seeds
After straining, return seeds to the pot, add 2 cups fresh water, and simmer again for 10-13 minutes. Strain as usual. Each reuse produces slightly less gel with a thinner consistency.
When to Retire Seeds
Stop reusing when the gel becomes very thin or watery, the seeds look pale and mushy, or you get little to no yield. Spent seeds can be composted or added to smoothies—they still contain fiber even after most mucilage is depleted.
Know the Benefits Over Store-Bought Gels
Flaxseed gel offers significant advantages over commercial styling products.
Natural Hold Without Harsh Chemicals
Unlike alcohol-based gels that dry out hair, flaxseed gel locks in moisture, seals the cuticle, and reduces breakage. It washes out easily without buildup—no sulfates required.
Nourishes Hair and Scalp
Flaxseeds contain omega-3 fatty acids that strengthen hair and reduce inflammation, vitamin E that protects from oxidative stress, and lignans with antioxidant properties. These nutrients support long-term hair health with regular use.
Eco-Friendly and Budget-Smart
| Feature | Flaxseed Gel | Commercial Gel |
|---|---|---|
| Cost per batch | ~$0.03 | $0.50-$1.50 |
| Packaging | Zero waste | Plastic bottle |
| Shelf life | 2 weeks | 6-12 months |
| Environmental impact | Minimal | High |
💬 Real user feedback: “I’ve saved over $500 a year since switching to flaxseed gel.”
Expert Tips for Success
These final recommendations will help you achieve consistent results every time.
Start Simple
Master the basic recipe before adding any extras. Learn what works for your hair first, then customize from there.
Cook Low and Slow
High heat destroys mucilage. A gentle simmer produces stronger, smoother gel with better hold.
Strain Hot, Store Cold
Don’t let gel cool in the pot—straining becomes messy and inefficient. Refrigerate immediately after straining.
Always Refrigerate
Room temperature storage leads to spoilage in 2-3 days. This step is essential for safety.
Use Within 2 Weeks
Even if the gel looks fine, discard after 14 days. When in doubt, throw it out.
Pair with Moisture
Flax gel enhances hydration—it doesn’t replace it. Use a leave-in conditioner every time.
Scrunch Out the Crunch
This step transforms stiff hair into soft, bouncy curls. Never skip it.
Track Your Batches
Note cooking time, water type, additives, and performance. Refine your method over time based on what works best for your hair.
Frequently Asked Questions About Flaxseed Gel for Hair
How long does homemade flaxseed gel last?
Flaxseed gel lasts 10-14 days when refrigerated in an airtight container. Discard earlier if you notice mold, cloudiness, or a sour smell. Never store at room temperature.
Can I use ground flaxseed instead of whole seeds?
No. Ground flaxseed releases oils too quickly when heated, creating a sludgy mixture that’s difficult to strain. Always use whole flaxseeds for the best texture and performance.
Why is my flaxseed gel not holding my curls?
Undercooked gel produces weak hold. Simmer until the gel coats your spoon and leaves a trail when dripped. Also ensure you’re applying to damp, not soaking wet hair.
Can I use flaxseed gel on type 4 coily hair?
Flax gel alone may lack sufficient slip for type 4 hair. Try layering it over a creamy leave-in or butter, or mix it with a natural curl cream for better definition.
Does flaxseed gel expire faster with added essential oils?
Not necessarily. Essential oils can mask spoilage odors, making it harder to detect when gel has gone bad. Only add oils once you’re familiar with the natural scent of fresh gel.
How do I know when flaxseed gel is done cooking?
The gel is ready when it coats a spoon and drips slowly in a continuous ribbon, typically around 12-14 minutes of gentle simmering. Remove from heat immediately at this point.
Key Takeaways for Making Flaxseed Gel
Making flaxseed gel at home is a simple, sustainable way to achieve defined, frizz-free curls without harsh chemicals. The process requires only whole flaxseeds and water, with a gentle 12-14 minute simmer producing the perfect honey-like consistency. Always strain while hot, refrigerate immediately, and use within two weeks for best results. Pair the gel with a moisturizing leave-in conditioner, apply to damp hair in sections, and remember to scrunch out the crunch once your style is dry. With practice, you’ll have a personalized styling product that saves money, reduces plastic waste, and leaves your curls soft, bouncy, and beautifully defined.