
If your hair feels dry, brittle, or looks frizzy and lifeless, you are not alone. Millions struggle with damaged hair caused by heat styling, coloring, chemical treatments, or environmental stress. While no product can magically reverse split ends, a hair mask for damaged hair is one of the most effective tools to restore strength, moisture, and shine.
Using a hair mask correctly can transform weak, dull hair into soft, resilient locks. In this guide, you will learn exactly how to use a hair mask for damaged hair, including step-by-step application techniques, ideal frequency, ingredient choices, and expert-backed tips to avoid common mistakes.
Choose the Right Mask for Your Damage Type

Not all hair masks work the same. To get real results, match your mask to your specific type of damage.
Identify Your Hair Damage
Look for these common signs to determine your damage type:
- Heat-damaged hair feels rough, looks frizzy, and resists styling
- Chemically treated hair appears porous, brittle, and breaks easily from bleaching or relaxing
- Dry or dehydrated hair lacks shine, tangles easily, and feels straw-like
- Over-processed hair stretches when wet and snaps easily
Knowing your damage type helps you pick a mask that targets the root cause, not just the symptoms.
Pick Repairing Ingredients by Concern
Different ingredients address different hair concerns. Choose based on your specific needs.
For dryness and frizz, look for argan oil, shea butter, or coconut oil. These ingredients seal moisture and smooth the cuticle.
For breakage and weakness, select keratin, hydrolyzed protein, or silk amino acids. These rebuild the internal hair structure.
For color fading, choose antioxidants, UV filters, or copper chelators. These protect against oxidative damage.
For temporary split end repair, use jojoba oil, avocado oil, or fatty alcohols. These coat and seal ends temporarily.
Avoid sulfates, parabens, and drying alcohols. These strip natural oils and worsen damage.
Know Your Mask Types
Hair masks fall into several categories, each serving different purposes.
Moisturizing masks are ideal for dry, curly, or coarse hair. They contain humectants like glycerin and natural oils.
Protein masks are best for severely damaged or porous hair. They strengthen but should not be overuse.
Keratin masks smooth frizz, add shine, and repair heat damage.
Multi-benefit masks combine moisture, protein, and color protection. These work well for general repair.
Tip: Rotate between moisturizing and protein masks every two to three weeks to prevent imbalance.
Wash Hair Before Applying the Mask
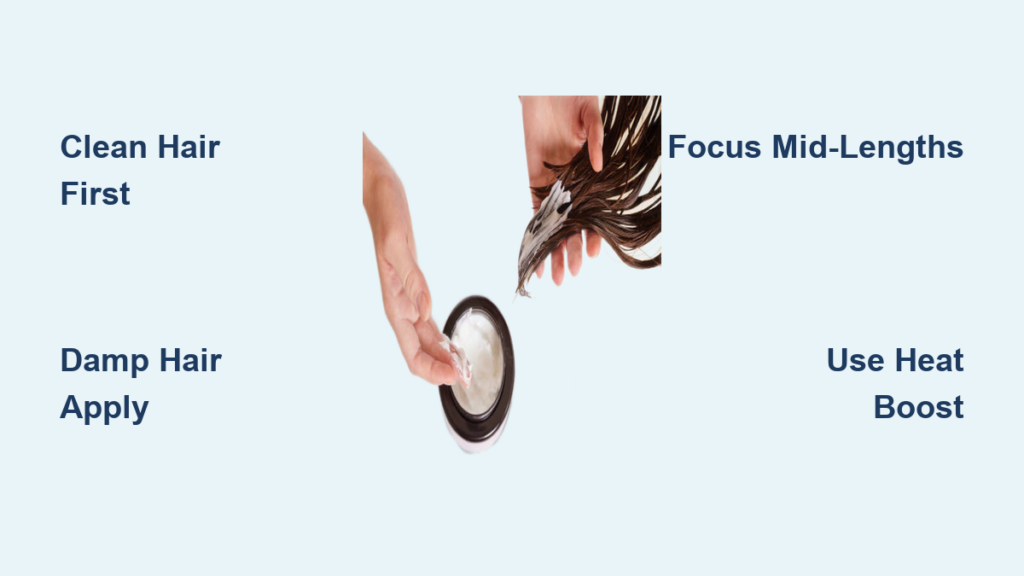
Clean hair absorbs treatment better. Always start with a fresh base.
Shampoo First for Maximum Penetration
Use a gentle, sulfate-free shampoo to remove buildup without stripping essential lipids. Dirty hair creates a barrier that blocks active ingredients from entering the shaft.
For heavily processed or product-laden hair, use a clarifying shampoo once a week before masking.
Exception: Oil-Based Pre-Wash Treatments
If using an oil-based mask, apply it to dry hair before washing. Water and oil repel each other, so applying oil to wet hair reduces absorption.
Massage the oil-based mask into your ends 30 to 60 minutes pre-shampoo to seal in moisture and protect during cleansing. This method is especially effective for afro, coily, or kinky textures needing intense hydration.
Apply to Damp, Not Soaking Wet Hair

Water level matters. Damp hair opens the cuticle slightly, allowing deeper penetration of mask ingredients.
Get the Right Moisture Level
After shampooing, follow these steps:
- Gently squeeze out excess water from your hair
- Use a microfiber towel or cotton t-shirt to blot, never rub
- Ensure hair feels damp, not dripping wet
Wet hair dilutes thick masks, reducing their potency. Dry hair will not allow even distribution.
Focus on Mid-Lengths and Ends
Damage accumulates where hair is oldest and most exposed.
Target the Most Vulnerable Zones
Apply your mask primarily to the mid-lengths and ends. This is where breakage, split ends, and dryness occur most frequently.
Avoid applying heavy masks to the scalp unless using a scalp-specific formula. Heavy products on the roots can clog follicles, increase oiliness, and weigh hair down.
Use the Right Amount
Start with a coin-sized amount of product. Add more for long or thick hair. Use less for fine or oily hair types.
Distribute Evenly
Use your fingers or a wide-tooth comb to spread the mask from mid-shaft to tips. For scalp treatments, use a scalp brush to gently massage and stimulate circulation.
Boost Results with Heat
Heat opens the hair cuticle, letting reparative ingredients penetrate deeper.
Try These Heat Methods
You can use several methods to add heat during your masking session.
Wrap a shower cap around your hair and cover it with a warm towel for 15 to 20 minutes.
Use a microwavable heat cap designed for deep conditioning treatments.
Try a hair steamer for professional-grade steam penetration.
Hold a blow dryer on low heat at a safe distance over a shower cap.
Even five to ten minutes of added warmth can significantly improve absorption.
Leave It On for 15–20 Minutes
Timing is critical. Too short and the mask will not work. Too long and it may cause buildup.
Minimum vs. Ideal Time
The minimum effective time is three to five minutes for quick treatments.
The ideal time for full repair is 15 to 20 minutes.
Overnight masking is safe only with hydrating or moisturizing masks.
Avoid leaving protein or clay-based masks on overnight. These can dry out or over-stiffen hair.
Overnight Masking Tips
If overnight masking, use only lightweight, non-greasy formulas. Cover hair with a shower cap or silk scarf to protect bedding. Rinse thoroughly in the morning.
Rinse Thoroughly with Cool Water
The final rinse locks in results and seals the cuticle.
Why Cool Water Matters
Cool water closes the cuticle for smoother, shinier hair. It locks in moisture and prevents frizz. It also removes residue that can cause greasiness.
Rinse until water runs completely clear. Any leftover product leads to buildup.
Do You Need to Shampoo After
Most masks do not require a second shampoo. However, you may need one after using very rich or oil-based formulas. Some products like New Wash Rich cleanse while conditioning, eliminating post-mask washing.
Follow With Conditioner (Optional)
Some routines benefit from a mask then conditioner sequence.
Why Condition After Masking
The mask deeply nourishes the hair shaft. The conditioner smooths and seals the outer layer. The final rinse removes any lingering residue.
This three-step sequence works well for extremely dry or coarse hair. It also benefits curly or textured types needing extra definition.
Use 2–3 Times Per Week for Best Results

Frequency depends on damage level and hair type.
Damaged Hair Routine
For dry, bleached, heat-damaged, or chemically treated hair, use a mask two to three times per week.
For maintenance after improvement, reduce to once per week.
For fine or oily hair, use once weekly and avoid the scalp.
Overuse can lead to buildup, limpness, and blocked follicles.
Avoid Common Application Mistakes
Even great products fail when used incorrectly.
Top Mistakes and Fixes
Applying to dirty hair leads to poor absorption. Always wash first.
Using too much product creates greasy, weighed-down hair. Start with a coin-sized amount.
Skipping the rinse causes dullness and buildup. Rinse thoroughly with cool water.
Overusing protein masks leads to brittle, stiff hair. Limit protein masks to once every two to three weeks.
Leaving on too long causes dryness and breakage for protein or clay masks. Follow label instructions.
Balance is key. More is not always better.
Try Advanced Techniques for Faster Repair
Go beyond basics with pro-level strategies.
Multi-Masking: Scalp and Ends
Treat different zones differently. Use a lightweight, balancing mask on the scalp. Use a rich, reparative formula on the ends. Apply both simultaneously for targeted care.
Rotate Mask Types
Alternate between different mask types weekly. Use a moisturizing mask one week. Use a protein mask the next week. This prevents moisture-protein imbalance.
DIY Masks With Caution
Homemade options can work but require research. Popular options include avocado and honey for deep moisture, banana and yogurt for protein boost, or coconut oil and aloe vera for soothing hydration.
DIY versions take huge amounts of research. Make sure every ingredient has been scientifically proven beneficial. Always patch-test first.
Watch for Signs of Improvement

Results take time, but they are measurable.
What to Expect in 2–4 Weeks
With consistent use, you should notice improved shine and gloss. Frizz and flyaways will reduce. Your hair will feel softer and silkier. Detangling and manageability will improve. Breakage during brushing will decrease. Elasticity will strengthen, with hair stretching slightly and returning without snapping.
Track your progress with photos and touch tests.
Maintain Results with Smart Habits
A mask is not a one-time fix. It is part of a long-term repair plan.
Prevent Future Damage
Limit heat styling and always use a heat protectant. Trim split ends every six to eight weeks. Protect hair from UV and chlorine exposure. Use sulfate-free, color-safe shampoos.
Store Masks Properly
Keep masks in a cool, dry place. Avoid contamination by not dipping fingers into jars repeatedly.
Frequently Asked Questions About Using Hair Mask for Damaged Hair
How long should I leave a hair mask on damaged hair?
Leave a hair mask on for 15 to 20 minutes for optimal results. For quick treatments, a minimum of three to five minutes works. You can leave hydrating masks on overnight, but avoid overnight use with protein or clay masks.
Can I use a hair mask every day?
No, you should not use a hair mask every day. For damaged hair, two to three times per week is ideal. Overuse causes buildup, weighs hair down, and can increase scalp sebum production. Once hair improves, reduce to once weekly for maintenance.
Do I need to shampoo after rinsing a hair mask?
Most masks do not require shampooing after rinsing. However, very rich or oil-based formulas may need a follow-up shampoo. Products that double as cleansers, like New Wash Rich, eliminate the need for post-mask washing.
Can a hair mask fix split ends?
No, a hair mask cannot fix split ends. Split ends require trimming to remove damaged portions. However, a good mask can temporarily seal split ends and prevent further splitting by improving overall hair health and moisture balance.
Should I apply a hair mask to wet or dry hair?
Apply a hair mask to damp, not soaking wet or dry, hair. Damp hair opens the cuticle slightly, allowing deeper penetration of active ingredients. The exception is oil-based masks, which should be applied to dry hair for better absorption.
Key Takeaways for Using Hair Mask on Damaged Hair
A hair mask will not reverse existing physical damage like split ends, but it can transform damaged hair from weak and dull to strong, shiny, and resilient. Choose the right formula based on your specific damage type, whether heat damage, chemical processing, or general dryness.
Apply your mask to clean, damp hair, focusing on mid-lengths and ends. Use heat to boost penetration, leave it on for 15 to 20 minutes, and rinse thoroughly with cool water. Stick to a consistent routine of two to three times per week, and rotate between moisturizing and protein masks to prevent imbalance.
Avoid common mistakes like overusing product, applying to dirty hair, or skipping the rinse. With patience and proper care, your hair can recover and thrive.



