

If your hair dryer stops working, makes strange noises, or emits a burning smell, disassembling it can help you identify and fix the problem without paying for a replacement. Knowing how to disassemble a hair dryer safely and correctly is essential for diagnosing issues like motor failure, broken wiring, or clogged airflow. This guide walks you through every step, from removing screws to inspecting internal components, using only common tools and proven techniques.
Safety First: Power Off and Prepare
Before touching a single screw, ensure your safety and the device’s stability. Always unplug the hair dryer before starting. Never assume it is safe just because it is turned off because some circuits remain live. Let the unit cool completely if it was recently used because a hot heating element can cause burns or damage tools during disassembly.
Unplug and Cool Down
Check for residual power before proceeding. Look for no indicator light, no motor hum when gently shaken, and use a multimeter to test for voltage across the plug pins. The reading should show zero. Working on a powered or partially charged unit risks electric shock, especially near the circuit board and motor terminals.
Work Environment Setup
Choose a dry, well-lit workspace with insulated tools and a non-conductive surface like a wooden table. Use a magnetic screw tray or labeled containers to keep small parts organized. Disassembling may void the warranty, so proceed only if repair is worth the risk.
Gather the Right Tools
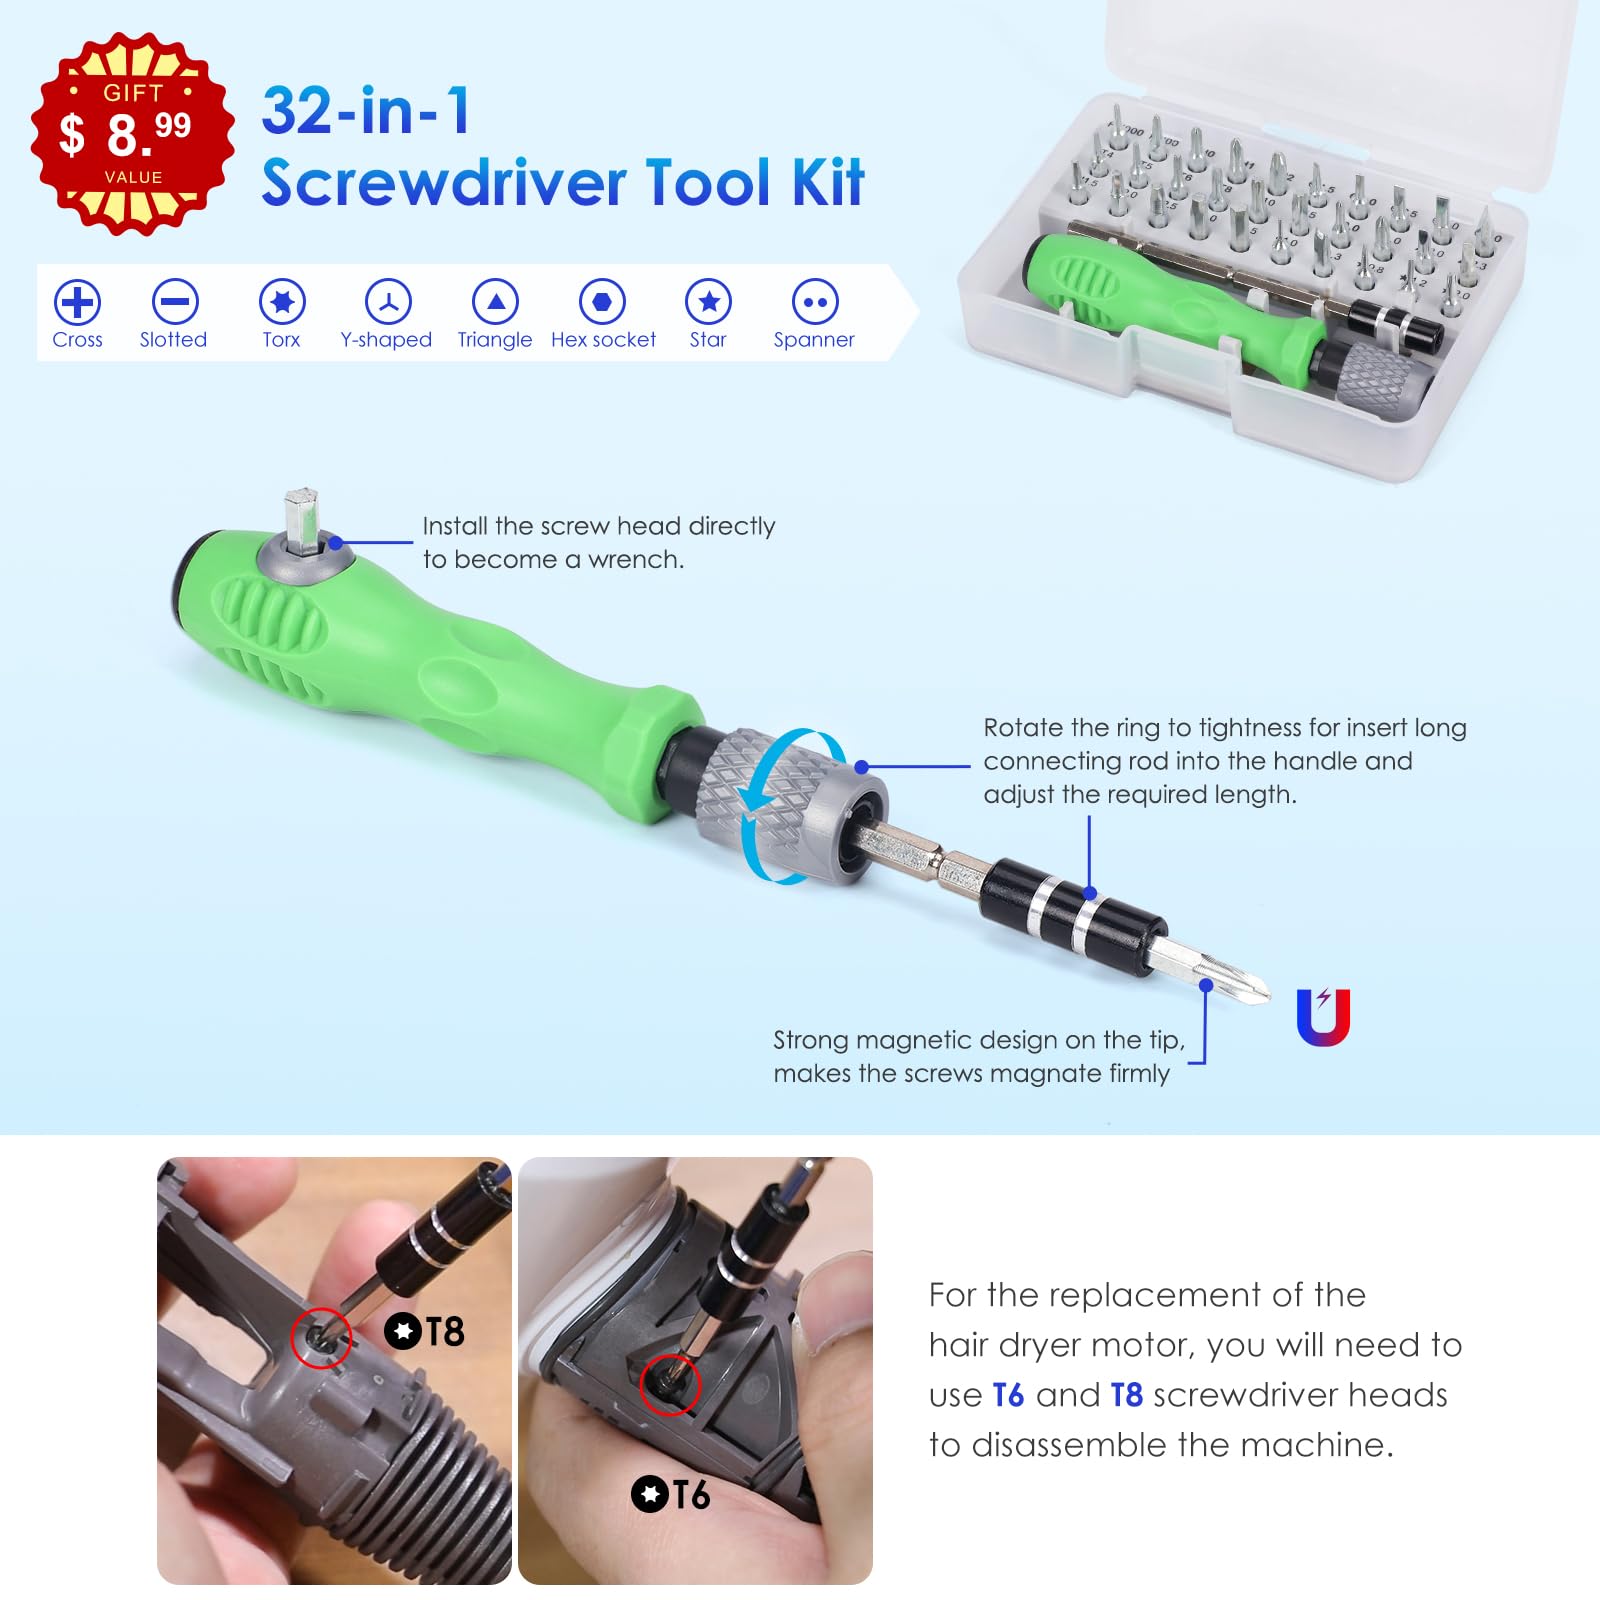
Having the correct tools prevents damage and speeds up the process. Take photos at each step because they will be invaluable when reassembling.
Essential Disassembly Tools
You will need a Phillips #1 or #2 screwdriver for most housing screws. A small flat-head screwdriver works for prying clips and lifting rubber grommets. A case opener or plastic pry tool prevents scratching plastic housings. Needle-nose pliers grip small parts and wires. A multimeter tests continuity, shorts, and resistance. A soldering iron and solder sucker fix broken connections. Soft brush and compressed air clean dust and hair from internals.
Remove External Parts
Start with detachable components to access hidden fasteners. This step applies to most models including generic dryers, Elchim 2001 HP, and Dyson HD01 clones.
Detach Nozzle and Diffuser
Gently pull off the front nozzle or diffuser. Some models require a slight twist. Set these parts aside safely.
Remove Air Intake Filter
Locate the rear filter, usually a circular mesh cover. Pop it out by hand or remove associated screws if present. Check for side-mounted filters or covers that snap into place because these often hide screws underneath.
Find and Remove All Screws
Missing a single screw can make disassembly impossible. Use a flashlight to inspect seams and crevices because some models use star-shaped Torx or proprietary screws.
Common Screw Locations
Most hair dryers have screws in the handle base, under rubber feet or grommets, near the power cord entry, and inside the nozzle base on older models. On many modern dryers like Dyson HD01 clones, all screws are hidden in the handle. Check under rubber grips or labels.
Store Screws Properly
Use a labeled container or magnetic mat. Group screws by location such as handle, switch, or body to avoid confusion during reassembly.
Open the Housing
Now that all screws are removed, separate the two plastic halves. Work slowly and methodically to avoid breaking clips.
Use a Pry Tool Safely
Insert a plastic case opener or flat-head screwdriver at the seam between the handle and body. Gently twist to release plastic clips or tabs. Work your way around the perimeter applying even pressure. Wiggle slightly if stuck. Never force it because if the shell will not open, you have likely missed a screw or clip.
Handle Glued Models with Care
Some imitation or premium models like Dyson knock-offs use adhesive to secure the housing. Separate slowly to avoid cracking. You may need to reapply glue during reassembly.
Access Internal Components

With the housing open, you will see the motor, heating element, and circuit board. Handle each part carefully to avoid damaging wires or connectors.
Remove the Switch Assembly
Two screws near the power cord secure the switch panel. Remove them and lift the assembly upward. Do not pull hard because wires connect to the motor and PCB. Lay it aside gently. Inspect switches for looseness or misalignment and re-seat them in notches if shifted.
Extract the Motor and Fan
The motor is typically held by two screws where it meets the housing. Remove them and slide out the unit. In models like the Elchim 2001 HP, the entire blower assembly can be pulled from the rear after releasing clips. Before removing the fan, loosen the 5/16-inch nut securing it to allow full removal for cleaning.
Inspect the Heating Element
Look for coiled metal springs around a ceramic core. Check for broken or unhooked coils, burn marks or melting, and loose connections at terminals. If coils have come loose, re-wrap them around anchor screws and tighten.
Inspect and Troubleshoot Key Components
Now that everything is exposed, test each part systematically to identify the root cause of the problem.
Test Motor and Fan
Spin the shaft manually because it should rotate freely. Binding suggests debris or motor failure. Check fan blades for hair, dust, or warping. Clean with a soft brush and compressed air. Use tweezers for tangled hair. Ensure the fan does not touch the housing and adjust position if rubbing occurs.
Check the Heating Element
Use a multimeter to test for continuity. Set to ohms and touch probes to both ends of the coil. It should show resistance, not infinite. If there is no continuity, look for visible breaks or burns and trace wiring back to the circuit board.
Examine Wiring and Connections
Focus on high-stress areas like the plug end, handle bend, and switch housing. Look for frayed insulation, burn marks, and discoloration or melting. The blue wire is a known failure point in many models. If damaged, cut out the bad section, strip ends, solder, and insulate with heat-shrink tubing.
Diagnose Circuit Board and Switches
Switches can become loose or misaligned. Re-seat them and tighten screws. PCB solder joints crack due to heat and vibration. Use a solder sucker to remove old solder and re-solder cracked or cold joints. For twist-type terminals, thread wire through the hole, twist with pliers, and solder for secure connection.
Clean Internal Components
Dirt and hair reduce performance and cause overheating. Regular cleaning extends the life of your hair dryer.
Clear Airflow Path
Clean the intake filter and internal ducts using compressed air and a soft brush. Remove debris with tweezers. Clogging leads to reduced airflow, overheating, and a burning smell.
Clean the Heating Element
Gently brush coil surfaces without bending. Ensure no metal particles remain near terminals because they can cause short circuits.
Reassemble with Precision
Follow the reverse order of disassembly but pay attention to these critical details to ensure proper function.
Step-by-Step Reassembly
Clean all parts before reinstalling. Reinstall the fan by aligning ridges with housing slots and hold it in place while tightening the 5/16-inch nut. Route wires carefully through strain-relief channels and away from hot surfaces. Avoid pinching wires between shells. Position the motor by aligning pins with housing slots and distribute wires evenly. Trim excess wire if it interferes with fan rotation. Check mechanical clearance by spinning the fan manually with no rubbing. Close the housing by aligning edges and pressing until clips engage. Confirm no wires are trapped. Reattach front cover and diffuser by snapping into place and twisting slightly to lock. Replace all screws including rubber grommets but do not over-tighten because plastic strips easily.
Final Testing Before Use
Never power on without testing because failure at this stage can cause damage or safety hazards.
Unpowered Safety Checks
Use a multimeter to confirm continuity across power terminals and check for short circuits with infinite resistance between live and ground. Ensure GFCI is reset.
Power-On Test
Plug in and test fan speed 1, then speed 2, followed by heat setting 1 and setting 2. Observe for smooth motor startup, consistent airflow, and gradual heat increase. Resistance should drop as elements engage.
Success Indicators
The repair is complete if there are no grinding or scraping noises, no burning smell, even heat distribution, and full speed on all settings.
Model-Specific Tips
Different hair dryer models require different approaches. Understanding these variations helps you disassemble safely and efficiently.
Generic Models
These typically have 2 to 3 screws in the handle with snap-fit housing and easy clip release. Standard Phillips screws make disassembly straightforward.
Elchim 2001 HP
This Italian-made model has hidden screws under rubber grommets and a multi-layer PCB. You must use a 5/16-inch fan nut for removal. Wires to the motor can break during disassembly so inspect carefully.
Dyson HD01 and Clones
All screws are hidden in the handle with significant internal adhesive. Requires careful prying with high risk of housing damage. Thomas Ong notes that if original, changing the fuse is worth the effort, but if fake, buying a new one is better.
Prevent Future Issues
Extend your hair dryer life with simple habits that minimize wear and prevent common failures.
Regular Maintenance
Clean the filter after every 3 to 5 uses. Blow out dust monthly with compressed air. Inspect the cord for fraying.
Avoid Overheating
Do not block airflow during use. Let the unit cool before storing. Use lower heat settings when possible.
Store Properly
Hang by the cord or lay flat. Avoid tight coiling that stresses wires and causes internal damage.
Frequently Asked Questions About Disassembling a Hair Dryer
Can I disassemble any hair dryer model?
Most hair dryers follow a similar internal design with a motor, heating element, and circuit board. However, some models like Dyson units use proprietary screws, significant adhesive, and hidden fasteners. Check your specific model for any unique requirements before proceeding.
What tools do I need to open a hair dryer?
You need a Phillips screwdriver, small flat-head screwdriver or pry tool, needle-nose pliers, multimeter, and optionally a soldering iron for electrical repairs. A case opener prevents scratching plastic housings during disassembly.
How do I know if the motor is faulty?
Spin the motor shaft manually. It should rotate freely. Binding indicates debris or motor failure. Use a multimeter to test continuity across motor terminals. No continuity suggests a broken motor winding.
Is it worth repairing a cheap hair dryer?
If the motor or circuit board is damaged, repair costs can approach the price of a new unit. However, cleaning clogged filters, re-soldering loose connections, or replacing a damaged cord can extend the life of any hair dryer significantly.
How do I fix a broken blue wire in my hair dryer?
Cut out the damaged section of wire. Strip the insulation from both ends. Solder the connection and insulate with heat-shrink tubing. This is a common repair that often restores full functionality.
Key Takeaways for Disassembling Your Hair Dryer
Disassembling a hair dryer is a straightforward process when you follow the right steps and prioritize safety. Always unplug the device and confirm no residual power before starting. Photograph each step to make reassembly easier. Check for hidden screws under rubber feet and labels. Use a multimeter to test continuity and identify faulty components before replacing them. Clean airflow paths regularly to prevent overheating and extend the life of your device.
Re-solder cracked joints on the circuit board because these are common failure points even when the motor appears functional. Route wires carefully during reassembly to avoid pinching or contact with hot components. Test thoroughly before final use by checking all speed and heat settings.
With the right tools, patience, and this guide, you can diagnose and fix common hair dryer problems yourself. Whether you are troubleshooting a silent motor, cold airflow, or strange noises, you now know exactly how to disassemble a hair dryer safely and successfully.



